Automating FTP II: Windows
15th April 2008Having thought about automating command line FTP on UNIX/Linux, the same idea came to me for Windows too and you can achieve much the same results, even if the way of getting there is slightly different. The first route to consider is running a script file with the ftp command at the command prompt (you may need %windir%system32ftp.exe to call the right FTP program in some cases):
ftp -s:script.txt
The contents of script are something like the following:
open ftp.server.host
user
password
lcd destination_directory
cd source_directory
prompt
get filename
bye
It doesn’t take much to turn your script into a batch file that takes the user name as its first input and your password as its second for sake of enhanced security and deletes any record thereof for the same reason:
echo open ftp.server.host > script.txt
echo %1 >> script.txt
echo %2 >> script.txt
echo cd htdocs >> script.txt
echo prompt >> script.txt
echo mget * >> script.txt
echo bye >> script.txt
%windir%system32ftp.exe -s:script.txt
del script.txt
The feel of the Windows command line (in Windows 2000, it feels very primitive but Windows XP is better and there’s PowerShell now too) can leave a lot to be desired by someone accustomed to its UNIX/Linux counterpart but there’s still a lot of tweaking that you can do to the above, given a bit of knowledge of the Windows batch scripting language. Any escape from a total dependence on pointing and clicking can only be an advance.
Automatically enabling your network connection at startup on CentOS 7
15th August 2014The release of CentOS 7 stoked my curiosity so I gave it a go in a VirtualBox virtual machine. It uses GNOME Shell in classic mode so the feel is not too far removed from that of GNOME 2. One thing to watch though is that it needs at least version 4.3.14 of VirtualBox or the Guest Additions kernel drivers will not compile at all. That might sound surprising when you learn that the kernel version is 3.10.x and that for GNOME Shell is 3.8.4. Much like Debian production releases, more established versions are chosen for the sake of stability and that fits in with the enterprise nature of the intended user base. Even with that more conservative approach, the results still please the eye though attempting to change the desktop background picture managed to freeze the machine. Other than that, most things work fine.
Even so, there are unexpected things to be encountered and one that I spotted was that network connectivity needed to switched on every time the VM was started. The default installation gives rise to this state of affairs and it is a known situation with CentOS from at least version 6 of the distribution and is not so hard to fix once you know what to do.
What you need to do is look for the relevant configuration file in /etc/sysconfig/network-scripts/ and update that. Using the ifconfig command, I found that the name of the network interface. Usually, this is something like eth0 but it was enp0s3 in my case so I had to look for a file named ifcfg-enp0s3 and edit that. The text that is sought is ONBOOT=no and that needs to become ONBOOT=yes for network connections to start automatically. To do something similar from the command line, CentOS had suggested the following:
sed -i -e ‘s@^ONBOOT=”no@ONBOOT=”yes@’ ifcfg-enp0s3
The above uses sed to do an inline (and case insensitve) edit of the file to change the offending no to a yes, once you have dropped in the /etc/sysconfig/network-scripts/ directory. My edit was done manually with Gedit so that works too. One thing to add is that any file editing needs superuser privileges so switching to root with the su command and using sudo is in order here.
Automated entry of SSH passwords
17th February 2022One thing that is very handy for shell scripting is to have automated entry of passwords for logging into other servers. This can involve using plain text files, which is not always ideal so it was good to find an alternative. The first step is to use the keygen tool that comes with SSH. The command is given below and the -t switch specifies the type of key to be made, RSA in this case. There is the option to add a passphrase but I decided against this for sake of convenience and you do need to assess your security needs before embarking on such a course of action.
ssh-keygen -t rsa
The next step is to use the ssh-copy-id command to generate the keys for a set of login credentials. For this, it is better to use a user account with restricted access to keep as much server security as you can. Otherwise, the process is as simple as executing a command like the following and entering the password at the prompt for doing so.
ssh-copy-id [user ID]@[server address]
Getting this set up has been useful for running a file upload script to keep a web server synchronised and it is better to have the credentials encrypted rather than kept in a plain text file.
Shared folders not automounting on an Ubuntu 18.04 guest in a VirtualBox virtual machine
1st October 2019Over the weekend, I finally got to fixing a problem that has affected Ubuntu 18.04 virtual machine for quite a while. The usual checks on Guest Additions installation and vboxsf group access assignment were performed but were not causing the issue. Also, no other VM (Windows (7 & 10) and Linux Mint Debian Edition) on the same Linux Mint 19.2 machine was experiencing the same issue. The latter observation made the problem intrinsic to the Ubuntu VM itself.
Because I install the Guest Additions software from the included virtual CD, I executed the following command to open the relevant file for editing:
sudo systemctl edit --full vboxadd-service
If I had installed installed virtualbox-guest-dkms and virtualbox-guest-utils from the Ubuntu repositories instead, then this would have been the command that I needed to execute instead of the above.
sudo systemctl edit --full virtualbox-guest-utils
Whichever configuration gets opened, the line that needs attention is the one beginning with Conflicts (line 6 in the file on my system). The required edit removes systemd-timesync.service from the list following the equals sign. It is worth checking that file paths include the correct version number for the Guest Additions software that is installed in case this was not the case. The only change that was needed on my Ubuntu VM was to the Conflicts line and rebooting it got the Shared Folder automatically mounted under the /media directory as expected.
A display of brand loyalty
12th July 2013Since 2007, my main camera has been a Pentax K10D DSLR and it has gone on many journeys with me. In fact, more than 15,000 images have been captured with it and I have classed it as an unfailing servant. The autofocus may not be the fastest but my subjects tend to be stationary: landscapes, architecture, flora and transport. Even any bus and train photos have included parked vehicles rather than moving ones so there never have been issues. The hint of underexposure in any photos always can be sorted because DNG files are what I create, with all the raw capture information that is possible to retain. In fact, it has been hard to justify buying another SLR because the K10D has done so well for me.
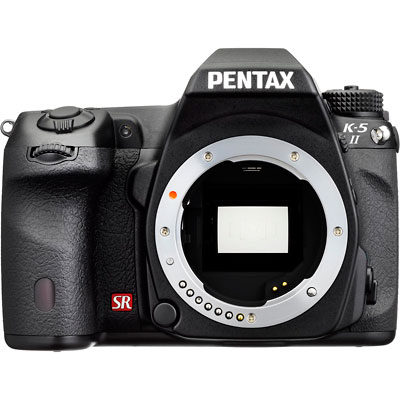
In recent months, I have looking at processed photos and asking myself if time has moved along for what is not far from being a six year old camera. At various times, I have been looking at higher members of the Pentax while wondering if an upgrade would be a good idea. First, there was the K7 and then the K5 before the K5 II got launched. Even though its predecessor is still to be found on sale, it was the newer model that became my choice.
My move to Pentax in 2007 was a case of brand disloyalty since I had been a Canon user from when I acquired my first SLR, an EOS 300. Even now, I still have a Powershot G11 that finds itself slipped into a pocket on many a time. Nevertheless, I find that Canon images feel a little washed out prior to post processing and that hasn’t been the case with the K10D. In fact, I have been hearing good things about Nikon cameras delivering punchy results so one of them would be a contender were it not for how well the Pentax performed.
So, what has my new K5 II body gained me that I didn’t have before? For one thing, the autofocus is a major improvement on that in the K10D. It may not stop me persevering with manual focusing for most of the time but there are occasions the option of solid autofocus is good to have. Other advances include a 16.3 megapixel sensor with a much larger ISO range. The advances in sensor technology since when the K10D appeared may give me better quality photos and noise is something that my eyes may have begun to detect in K10D photos even at my usual ISO of 400.
There have been innovations that I don’t need too. Live View is something that I use heavily with the Powershot G11 because it has such a pitiful optical viewfinder. The K5 II has a very bright and sharp one so that function lays dormant, especially when I witnessed dodgy autofocus performance with it in use; manual focusing should be OK, I reckon. By default too, the screen stays on all the time and that’s a nuisance for an optical viewfinder user like me so I looked through the manual and the menus to switch off the thing. My brief flirtation with the image level display met an end for much the same reason though it’s good that it’s there. There is some horizon auto-correction available as a feature and this is left on to see what it offers since there have been a multitude of times when I needed to sort out crooked horizons caused by my handholding the camera.
The K5 II may have a 3″ screen on its back but it has done nothing to increase the size of the camera. If anything, it is smaller that the K10D and that usefully means that I am not on the lookout for a new camera holster. Not having a bigger body also means there is little change in how the much camera feels in the hand compared with the older one.
In many ways, the K5 II works very like the K10D once I took control over settings that didn’t suit me. Both have Shake Reduction in their camera bodies though the setting has been moved into the settings menu in the new camera when the older one had a separate switch on its body. Since I’d be inclined to leave it on all the time and prefer not to have it knocked off accidentally, this is not an issue. Otherwise, many of the various switches are in the same places so it’s not that hard to find my way around them.
That’s not to say that there aren’t other changes like the addition of a lock to the mode dial but I have used Canon EOS camera bodies with that feature so I do not consider it a step backwards. The exposure compensation button has been moved to the top of the camera where I found it very easily and have been using perhaps more than on the K10D; it’s also something that I use on the G11 so the experimentation is being brought across to the K5 II now as well. Beside it, there’s a new ISO button so further experimentation can be attempted with that to see how it does.
If I have any criticism, it’s about the clutter of the menus on the K5 II. The long lists through you scrolled on the K10D have been replaced with a series of extra tabs so that on-screen scrolling is not needed as before. However, I reckon that this breaks up things too much and makes working through the settings look more foreboding to anyone who is not so technical in mindset. Nevertheless, settings such as the the type of file to capture are there and I continue to use RAW DNG files as is usual for me though JPEG and Pentax’s own RAW format also are there. For a while, I forgot to set the date, soon found out what I did and the situation was remedied. The same sort of thing applied to storing files in different folders according to the capture date. For my own reasons, I turned this off to put everything into a single PENTX directory to suit my own workflow. My latest discovery among the menus was the ability to add photographer and copyright holder information to the EXIF metadata attached to the image files created by the camera. With legislative proposals that dilute the automatic rights of copyright holders going through the U.K. parliament, this seems a very timely inclusion even if most would prefer that there was no change to copyright law.
Of course, the worth of any camera is in the images that it produces and I have been happy with what I have been getting so far. The bigger files mean less images fit on a memory card as before. Thankfully, SDHC card capacities have grown even if I don’t wish to machine gun my photography altogether. While out and about, I was surprised to apertures like F/14 and F/18 when I was more accustomed to a progression like F/11, F/13, F/16, F/19, F/22, etc. Most of those older values still are there though so there hasn’t been a complete break with convention. The same comment applies to shutter speeds where ones like 1/100 and 1/160 made there appearance where I might have expected just ones like 1/90, 1/125, 1/250 and so on. The extra possibilities, and that is what they are, do allow more flexibility I suppose and may even make it easier to make correct exposures though any judgement of correctness has to be in the eye of a photographer and not what a computer algorithm in a camera determines. For much of the time until now, I have stuck with an ISO of 400 apart from a little testing in a woodland area of an evening soon after the camera arrived.
Since the K5 II came my way a few months ago, I have been meaning to collect my thoughts on here and there has been a delay while I brought mu thinking to a sensible close.At one point, it felt like there was so much to say that the piece became larger in my mind that even what you have been reading now. After all, there are other things that I can adjust to see how the resulting images look and white balance is but one of these.The K10D isn’t beyond experimentation either, especially since I discovered that shake reduction was switched off and it has me asking if that lacking in quality that I mentioned earlier has another explanation. Of course, actually making use of my tripod would be another good suggestion so it’s safe to say that yet more photographic explorations await.
Windows Automated Installation Kit
2nd March 2007This may prove useful for those IT professionals who need to customise and deploy Vista; you can download the kit here.
Automating FTP I: UNIX and Linux
11th April 2008Having got tired of repeated typing in everything at the prompt of an interactive command line FTP session and doing similar things via the GUI route, I started to wonder if there was a scripting alternative and, lo and behold, I found it after a spot of googling. There are various opportunities for its extension such as prompting for username and password instead of the risky approach of including them in a script or cycling through a directory structure but here’s the foundation stone for such tinkering anyway:
HOSTNAME='ftp.server.host'
 USER='user'
 PSSWD='password'
 REP_SRC='source_directory'
 REP__DEST='destination_directory'
 FILENAME='*'
rm -rf log_file.tmp
cd "${REP_DEST}"
ftp -i -n -v <<EndFTP >>log_file.tmp 2>>log_file.tmp
 open ${HOSTNAME}
 user ${USER} ${PSSWD}
 prompt
 cd "${REP_SRC}"
 mget "${FILENAME}"
 EndFTP
cd ~
Dealing with the following message issued when using Certbot on Apache: “Unable to find corresponding HTTP vhost; Unable to create one as intended addresses conflict; Current configuration does not support automated redirection”
12th April 2024When doing something with Certbot on another website not so long ago, I encountered the above message when executing the following command (semicolons have been added to separate the lines):
sudo certbot --apache
The solution was to open /etc/apache2/sites-available/000-default.conf using nano and update the ServerName field (or the line containing this keyword) so it matched the address used for setting up Let’s Encrypt SSL certificates. The mention of Apache in the above does make the solution specific to this web server software, so you will need another solution if you meet this kind of problem when using Nginx or another web server.
Taking a camera on a walk…
24th July 2007On Saturday, I happened to be in Jessops and overheard a salesman emphatically state that you don’t buy a camera for its specifications but for the photos that it produces. While his tone of voice was a touch condescending and he seemed to be putting down a DSLR, he was essentially right. Nevertheless, the specifications do help you get the images and they have to be seen in that light. For instance, having on-board sensor cleaning may save you from having either to clean the thing yourself or send the camera away for the professionals to do the needful, a much safer option in my view. And there may be occasions where image stabilisation is very useful, low light wildlife photography for instance. Yes, there are features that I consider surplus to requirements, like live viewing and movie capture and that is very much due to my buying cameras to make photos. The salesman in question would surely have agreed…
Sunday saw me head to the Lakeland Fells for some walking and a spot of testing of my new Pentax K10D. The details of the walk itself are not for here but for my hillwalking blog and that is where you will find them. While making my way from Crewe to Windermere, I perused the manual looking particularly for information pertaining to functions that I actually use, I should really have done this beforehand, but distractions meant that I hadn’t got around to it. I had to wade through something designed for a new SLR user before I got to what I consider the important stuff. Though this may be a bit irritating, I can understand and accept why they do it this way; we were all new users once and they are hardly likely to want to know about things like aperture priority, raw file capture, ISO control and such like straight away.
What do I think of it then? Let’s start with first impressions. It is definitely smaller than the Canon EOS 10D it accompanies in my possession. That said, it is not too small and there is a decent grip hosting the shutter release button and the camera on/off switch. It also feels well-assembled and reassuringly weighty, an important consideration given that it will see the outdoors a lot. A discussion of the features most relevant to me follows.
On the subject of switching on and off, the camera is set to go into a sleep mode after a second of inactivity but it reawakens quickly when needed, the trigger being half-depression of the shutter release button. In fact, the camera does reawaken much faster than my Canon as it happens and where the delay is a constant source of some irritation. It might sound strange but the on/off switch is also used to activate the depth of field preview, something that no SLR should not have. The location may be unusual, but maybe the designers thought that having shutter release and depth of field preview next to each was a logical way to do it. From a camera operation point of view, there is certainly something to that way of thinking. Behind the shutter release, you’ll find a screen that is a reminder of film SLR’s and it conveys information such as battery life, number of exposures remaining on the card and exposure details (aperture & shutter speed).
Staying on the subject of screens, the one on the back of the camera is larger than that on the Canon. As is customary for these, it allows replay of photos taken and access to the various menus required to control the camera’s operation. In comparison to the Canon, which is essentially a one menu affair with a thumb wheel controlling scrolling and an OK button at its centre to perform operations, the Pentax has a more elaborate system of submenus: one each for recording, playback and set-up. The playback menu is where I found the setting that makes the camera highlight areas of underexposure and overexposure during image playback. This is something that I missed with respect to the Canon until I happened upon it. Camera cleaning is located on the set-up menu and the camera is now set to clean the sensor every time that it is turned on. Why this is not enabled by default is a little beyond me, but the designers might have thought that a vibration from the camera on turning it on could have resulted in a load of support calls. The same submenu also hosts memory card formatting. The recording submenu is where I set the camera to deliver RAW DNG files, an Adobe innovation, rather than the default JPEG’s. There are other options like RAW PEF files, Pentax’s own format, or RAW and JPEG simultaneously, but my choice reflects my workflow in Photoshop Elements; I have yet to stop the said software editing the DNG files, however. With all these options, it is fortunate that there is a navigation wheel whose operation uses arrow buttons to get about. While on the subject of the back screen, there are further settings that are accessed with the FN button rather than the Menu one. These include ISO, white balance, shooting mode (single, continuous, timed and so on) and flash. The only setting that I changed out of this lot was to set the ISO to 400; I prefer to feel that I am in control.
Returning to the camera’s top plate, the exposure mode dial is on the left-hand side, which is no hardship to me as this is in the same place as on the Canon. There are no scene modes, but the available exposure modes are more than sufficient: fully automatic, program, sensitivity priority, shutter priority, aperture priority, shutter and aperture priority, manual, bulb and external flash synchronisation. A few of these need a spot of explaining. Sensitivity priority is no one on me but it is a consequence of the ability of DSLR’s to offer a range of ISO settings; the aperture and the shutter speed are varied according to the ISO setting. Shutter and aperture priority is like manual exposure and is the inverse of sensitivity priority: set both aperture and shutter speed, and the camera will vary the ISO setting. Both of the foregoing assume that you let the camera set the ISO but my setting the thing myself may have put paid to these functions. Shutter priority and aperture priority are, as far as I can tell, their usual selves. For all exposure modes, the thumb wheels at the front and back of the shutter release handgrip set apertures and shutter speeds where appropriate and this arrangement works well.
Mounting on the same column as the exposure dial the metering mode selector and here is where I see more options than my Canon, which has only full and partial multi-segment metering. With the Pentax, you get spot and centre-weighted metering in addition to the default multisegmented variety. Spot metering is definitely very useful but capturing the reading is a multitasking affair: half pressing the shutter button and fulling pressing the AE lock one at the same time. In contrast, Canon’s partial metering is a more convenient single button operation meter and retain facility. Pentax would do well to learn from this.
The focussing mode selector is found on the left of the body next to the lens coupling. I am used to having this on the lenses themselves, so this is a new arrangement for me and one to which I can easily become accustomed. In fact, it is easy to find it while composing a picture. The modes themselves are manual focus, one-time autofocus and continuous autofocus; the last of these is for focussing on moving objects.
I could go further, perhaps overboard, with a discussion of the features of this camera but I draw a line at what’s here. Yes, it is useful to set the focussing point and activate image stabilisation but the above are what matter to me and its performance in the photo making department is the most important aspect. That neatly brings me to my appraisal of how it performs. With inspection of the first few images on the review screen, I was a little disappointed to see how dark the foreground was in comparison to the sky. When I brought everything home as I always do, I found that things weren’t necessarily as they appeared in the field. The Pentax more usefully offers histogram review and highlighting of any areas that are either underexposed or overexposed. It is these functions that I will be using in reshooting decisions while out and about with the Pentax and the same can be said for how I currently use the Canon. In fast changing lighting, the AE lock technique was a bit irritating but I am certain that I will get better at it. The autofocus doesn’t always lock onto the subject, especially in tricky lighting, so manual focussing is a definite necessity and is more useful more for landscape photography, in fact. Nevertheless, the autofocus did do well most of the time and my Sigma lenses have done worse things on me. All in all, I am happy with the K10D and will continue to use it. I have got some decent photos from my excursion and that, as that Jessops salesman would agree, is the main point of a camera.
Sometimes, a firmware update is in order
28th February 2011After a recent trip to Oxford, I have started to mull over adding a longer lens (could make more distant architectural detail photos a possibility) to complement my trusty Sigma 18-125mm f/3.8-5.6 DC HSM zoom lens that now is entering approaching its third year in my hands. While I have made no decision about the acquisition of another lens, there are some tempting bargains out there, it seems. However, the real draw on my attention is the lack of autofocus with the aforementioned Sigma and I now find it hard to believe that I was blaming the manufacturer for no keeping up with Pentax when it really was the other way around. A bit of poking around on the web revealed that all that I needed to do was download a firmware update from the Pentax website. While being slowed down by the lack of autofocus cannot have done bad things for my photography, I still wonder at why I didn’t try updating the camera for as long as I have.
In the file for updating my K10D, there was a README file containing the instructions for carrying out the update with the included binary file that was set to take the camera from version 1.00 to 1.30 (hold down the Menu button while starting the camera to see what you have). In summary, both files were copied onto an SD card that was inserted into the camera and it turned off. The next step was to power up the camera with the menu button held down to start the update. To stop erroneous updates, there is an “Are you sure?” style Yes/No menu popped up before anything else happens. Selecting Yes sets things into motion and you have to wait until the word “COMPLETE” appears in the bottom left corner before turning the camera and removing the card. Now that I think of it, I should have checked the battery before doing anything because the consequences of losing power in the middle of what I was doing would have been annoying, especially with my liking the photographic results produced by the camera.
Risk taking aside, the process was worth its while with HSM now working as it should have done all this time. It seems quiet and responsive too from my limited tests to date. Even better, the autofocus doesn’t hunt anywhere near as much as the 18-55 mm Pentax kit lens that came with the camera. The next decision is whether to stick with my manual focussing ways or lapse into trusting autofocus from now on though my better reason is to stick with the slower approach unless the subjects are fast. Now that I think of it, train and bus photos for my transport website have become a whole lot easier as have any wildlife photos that I care to capture. Speaking of the latter brings me back to that telephoto quandary that I mentioned at the beginning. Well, there’s a tempting Sigma 50-200 mm that has caught my eye…