A display of brand loyalty
12th July 2013Since 2007, my main camera has been a Pentax K10D DSLR and it has gone on many journeys with me. In fact, more than 15,000 images have been captured with it and I have classed it as an unfailing servant. The autofocus may not be the fastest but my subjects tend to be stationary: landscapes, architecture, flora and transport. Even any bus and train photos have included parked vehicles rather than moving ones so there never have been issues. The hint of underexposure in any photos always can be sorted because DNG files are what I create, with all the raw capture information that is possible to retain. In fact, it has been hard to justify buying another SLR because the K10D has done so well for me.
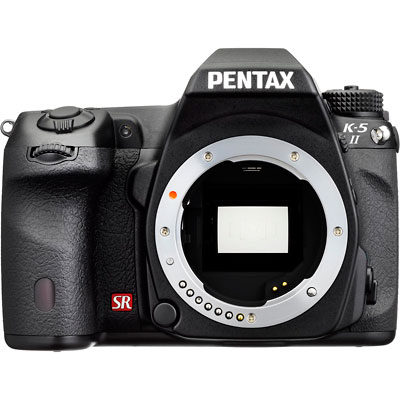
In recent months, I have looking at processed photos and asking myself if time has moved along for what is not far from being a six year old camera. At various times, I have been looking at higher members of the Pentax while wondering if an upgrade would be a good idea. First, there was the K7 and then the K5 before the K5 II got launched. Even though its predecessor is still to be found on sale, it was the newer model that became my choice.
My move to Pentax in 2007 was a case of brand disloyalty since I had been a Canon user from when I acquired my first SLR, an EOS 300. Even now, I still have a Powershot G11 that finds itself slipped into a pocket on many a time. Nevertheless, I find that Canon images feel a little washed out prior to post processing and that hasn’t been the case with the K10D. In fact, I have been hearing good things about Nikon cameras delivering punchy results so one of them would be a contender were it not for how well the Pentax performed.
So, what has my new K5 II body gained me that I didn’t have before? For one thing, the autofocus is a major improvement on that in the K10D. It may not stop me persevering with manual focusing for most of the time but there are occasions the option of solid autofocus is good to have. Other advances include a 16.3 megapixel sensor with a much larger ISO range. The advances in sensor technology since when the K10D appeared may give me better quality photos and noise is something that my eyes may have begun to detect in K10D photos even at my usual ISO of 400.
There have been innovations that I don’t need too. Live View is something that I use heavily with the Powershot G11 because it has such a pitiful optical viewfinder. The K5 II has a very bright and sharp one so that function lays dormant, especially when I witnessed dodgy autofocus performance with it in use; manual focusing should be OK, I reckon. By default too, the screen stays on all the time and that’s a nuisance for an optical viewfinder user like me so I looked through the manual and the menus to switch off the thing. My brief flirtation with the image level display met an end for much the same reason though it’s good that it’s there. There is some horizon auto-correction available as a feature and this is left on to see what it offers since there have been a multitude of times when I needed to sort out crooked horizons caused by my handholding the camera.
The K5 II may have a 3″ screen on its back but it has done nothing to increase the size of the camera. If anything, it is smaller that the K10D and that usefully means that I am not on the lookout for a new camera holster. Not having a bigger body also means there is little change in how the much camera feels in the hand compared with the older one.
In many ways, the K5 II works very like the K10D once I took control over settings that didn’t suit me. Both have Shake Reduction in their camera bodies though the setting has been moved into the settings menu in the new camera when the older one had a separate switch on its body. Since I’d be inclined to leave it on all the time and prefer not to have it knocked off accidentally, this is not an issue. Otherwise, many of the various switches are in the same places so it’s not that hard to find my way around them.
That’s not to say that there aren’t other changes like the addition of a lock to the mode dial but I have used Canon EOS camera bodies with that feature so I do not consider it a step backwards. The exposure compensation button has been moved to the top of the camera where I found it very easily and have been using perhaps more than on the K10D; it’s also something that I use on the G11 so the experimentation is being brought across to the K5 II now as well. Beside it, there’s a new ISO button so further experimentation can be attempted with that to see how it does.
If I have any criticism, it’s about the clutter of the menus on the K5 II. The long lists through you scrolled on the K10D have been replaced with a series of extra tabs so that on-screen scrolling is not needed as before. However, I reckon that this breaks up things too much and makes working through the settings look more foreboding to anyone who is not so technical in mindset. Nevertheless, settings such as the the type of file to capture are there and I continue to use RAW DNG files as is usual for me though JPEG and Pentax’s own RAW format also are there. For a while, I forgot to set the date, soon found out what I did and the situation was remedied. The same sort of thing applied to storing files in different folders according to the capture date. For my own reasons, I turned this off to put everything into a single PENTX directory to suit my own workflow. My latest discovery among the menus was the ability to add photographer and copyright holder information to the EXIF metadata attached to the image files created by the camera. With legislative proposals that dilute the automatic rights of copyright holders going through the U.K. parliament, this seems a very timely inclusion even if most would prefer that there was no change to copyright law.
Of course, the worth of any camera is in the images that it produces and I have been happy with what I have been getting so far. The bigger files mean less images fit on a memory card as before. Thankfully, SDHC card capacities have grown even if I don’t wish to machine gun my photography altogether. While out and about, I was surprised to apertures like F/14 and F/18 when I was more accustomed to a progression like F/11, F/13, F/16, F/19, F/22, etc. Most of those older values still are there though so there hasn’t been a complete break with convention. The same comment applies to shutter speeds where ones like 1/100 and 1/160 made there appearance where I might have expected just ones like 1/90, 1/125, 1/250 and so on. The extra possibilities, and that is what they are, do allow more flexibility I suppose and may even make it easier to make correct exposures though any judgement of correctness has to be in the eye of a photographer and not what a computer algorithm in a camera determines. For much of the time until now, I have stuck with an ISO of 400 apart from a little testing in a woodland area of an evening soon after the camera arrived.
Since the K5 II came my way a few months ago, I have been meaning to collect my thoughts on here and there has been a delay while I brought mu thinking to a sensible close.At one point, it felt like there was so much to say that the piece became larger in my mind that even what you have been reading now. After all, there are other things that I can adjust to see how the resulting images look and white balance is but one of these.The K10D isn’t beyond experimentation either, especially since I discovered that shake reduction was switched off and it has me asking if that lacking in quality that I mentioned earlier has another explanation. Of course, actually making use of my tripod would be another good suggestion so it’s safe to say that yet more photographic explorations await.
A need to update graphics hardware
16th June 2013Not being a gaming enthusiast, having to upgrade graphics cards in PC’s is not something that I do very often or even rate as a priority. However, two PC’s in my possession have had that very piece of hardware upgraded on them and it’s not because anything was broken either. My backup machine has seen quite a few Linux distros on there since I built it nearly four years ago. The motherboard is an ASRock K10N78 that sourced from MicroDirect and it has onboard an NVIDIA graphics chip that has performed well if not spectacularly. One glitch that always existed was a less than optimal text rendering in web browsers but that never was enough to get me to add a graphics card to the machine.
More recently, I ran into trouble with Sabayon 13.04 with only the 2D variant of the Cinnamon desktop environment working on it and things getting totally non-functional when a full re-installation of the GNOME edition was attempted. Everything went fine until I added the latest updates to the system when a reboot revealed that it was impossible to boot into a desktop environment. Some will relish this as a challenge but I need to admit that I am not one of those. In fact, I tried out two Arch-based distros on the same PC and got the same results following a system update on each. So, my explorations of Antergos and Manjaro have to continue in virtual machines instead.
To get a working system, I gave Linux Mint 15 Cinnamon a go and that worked a treat. However, I couldn’t ignore that the cutting edge distros that I tried before it all took exception to the onboard NVIDIA graphics. systemd has been implemented in all of these and it seems reasonable to think that it is coming to Linux Mint at some stage in the future so I went about getting a graphics card to add into the machine. Having had good experiences with ATi’s Radeon in the past, I stuck with it even though it now is in the hands of AMD. Not being that fussed so long there was Linux driver support, I picked up a Radeon HD 6450 card from PC World. Adding it into the PC was a simpler of switching off the machine, slotting in the card, closing it up and powering it on again. Only later on did I set the BIOS to look for PCI Express graphics before anything else and I could have got away without doing that. Then, I made use of the Linux Mint Additional Driver applet in its setting panel to add in the proprietary driver before restarting the machine to see if there were any visual benefits. To sort out the web browser font rendering, I used the Fonts applet in the same settings panel and selected full RGBA hinting. The improvement was unmissable if not still like the appearance of fonts on my main machine. Overall, there had been an improvement and a spot of future proofing too.
That tinkering with the standby machine got me wondering about what I had on my main PC. As well as onboard Radeon graphics, it also gained a Radeon 4650 card for which 3D support wasn’t being made available by Ubuntu GNOME 12.10 or 13.04 to VMware Player and it wasn’t happy about this when a virtual machine was set to have 3D support. Adding the latest fglrx driver only ensured that I got a command line instead of a graphical interface. Issuing one of the following commands and rebooting was the only remedy:
sudo apt-get remove fglrx
sudo apt-get remove fglrx-updates
Looking at the AMD website revealed that they no longer support 2000, 3000 or 4000 series Radeon cards with their latest Catalyst driver the last version that did not install on my machine since it was built for version 3.4.x of the Linux kernel. A new graphics card then was in order if I wanted 3D graphics in VWware VM’s and both GNOME and Cinnamon appear to need this capability. Another ASUS card, a Radeon HD 6670, duly was acquired and installed in a manner similar to the Radeon HD 6450 on the standby PC. Apart from not needing to alter the font rendering (there is a Font tab on Gnome Tweak Tool where this can be set), the only real exception was to add the Jockey software to my main PC for installation of the proprietary Radeon driver. The following command does this:
sudo apt-get install jockey-kde
When that was done I issue the jockey-kde command and selected the first entry on the list. The machine worked as it should on restarting apart from an AMD message at the bottom right hand corner bemoaning unrecognised hardware. There had been two entries on that Jockey list with exactly the same name so it was time to select the second of these and see how it went. On restarting, the incompatibility message had gone and all was well. VMware even started virtual machines with 3D support without any messages so the upgrade did the needful there.
Hearing of someone doing two PC graphics card upgrades in a weekend may make you see them as an enthusiast but my disinterest in computer gaming belies this. Maybe it highlights that Linux operating systems need 3D more than might be expected. The Cinnamon desktop environment now issues messages if it is operating in 2D mode with software 3D rendering and GNOME always had the tendency to fall back to classic mode, as it had been doing when Sabayon was installed on my standby PC. However, there remain cases where Linux can rejuvenate older hardware and I installed Lubuntu onto a machine with 10 year old technology on there (an 1100 MHz Athlon CPU, 1GB of RAM and 60GB of hard drive space in case dating from 1998) and it works surprisingly well too.
It seems that having fancier desktop environments like GNOME Shell and Cinnamon means having the hardware on which it could run. For a while, I have been tempted by the possibility of a new PC since even my main machine is not far from four years old either. However, I also spied a CPU, motherboard and RAM bundle featuring an Intel Core i5-4670 CPU, 8GB of Corsair Vengence Pro Blue memory and a Gigabyte Z87-HD3 ATX motherboard included as part of a pre-built bundle (with a heatsink and fan for the CPU) for around £420. Even for someone who has used AMD CPU’s since 1998, that does look tempting but I’ll hold off before making any such upgrade decisions. Apart from exercising sensible spending restraint, waiting for Linux UEFI support to mature a little more may be no bad idea either.
Update 2013-06-23: The new graphics card in my main machine is working as it should and has reduced the number of system error report messages turning up too; maybe Ubuntu GNOME 13.04 didn’t fancy the old graphics card all that much. A rogue .fonts.conf file was found in my home area on the standby machine and removing it has improved how fonts are displayed on there immeasurably. If you find one on your system, it’s worth doing the same or renaming it to see if it helps. Otherwise, tinkering with the font rendering settings is another beneficial act and it even helps on Debian 6 too and that uses GNOME 2! Seeing what happens on Debian 7.1 could be something that I go testing sometime.
Sorting a kernel upgrade error in Linux Mint 13
30th November 2012Linux Mint 14 may be out now but I’ll be sticking with its predecessor for now. Being a user of GNOME Shell instead of Cinnamon or Mate, I’ll wait for extensions to get updated for 3.6 before making a move away from 3.4 where the ones that I use happily work. Given that Linux Mint 13 is set to get support until 2017, it’s not as if there is any rush either. Adding the back-ported packages repository to my list of software sources means that I will not miss out on the latest versions of MDM, Cinnamon and Mate anyway. With Ubuntu set to stick to GNOME 3.6 until after 13.04 is released, adding the GNOME 3 Team PPA will be needed if 3.8 arrives with interesting goodies; there are interesting noises that suggest the approach taken in Linux Mint 12 may be used to give more of a GNOME 2 desktop experience. Options abound and there are developments in the pipeline that I hope to explore too.
However, there is one issue that I have had to fix which stymies upgrades within the 3.2 kernel branch. A configuration file (/etc/grub.d/10_linux) points to /usr/share/grub/grub-mkconfig_lib instead of /usr/lib/grub/grub-mkconfig_lib so I have been amending it every time I needed to do a kernel update. However, it just reverts to the previous state so I thought of another solution: creating a symbolic link in the incorrect location that points to the correct one so that updates complete without manual intervention every time. The command that does the needful is below:
sudo ln -s /usr/lib/grub/grub-mkconfig_lib /usr/share/grub/grub-mkconfig_lib
Of course, figuring out what causes the reversion would be good too but the symbolic link fix works so well that there’s little point in exploring it further. Of course, if anyone can add how you’d do that, I’d welcome this advice too. New knowledge always is good.
Upgrading from Windows 7 to Windows 8 in a VMWare Virtual Machine
1st November 2012Though my main home PC runs Linux Mint, I do like to have the facility to use Windows software from time to time and virtualisation has allowed me to continue doing that. For a good while, it was a Windows 7 guest within a VirtualBox virtual machine and, before that, one running Windows XP fulfilled the same role. However, it did feel as if things were running slower in VirtualBox than once might have been the case and I jumped ship to VMware Player. It may be proprietary and closed source but it is free of charge and has been doing what was needed. A subsequent recent upgrade of video driver on the host operating system allowed the enabling of a better graphical environment in the Windows 7 guest.
Instability
However, there were issues with stability and I lost the ability to flit from the VM window to the Linux desktop at will with the system freezing on me and needing a reboot. Working in Windows 7 using full screen mode avoided this but it did feel as I was constrained to working in a Windows machine whenever I did so. The graphics performance was imperfect too with screening refreshing being very blocky with some momentary scrambling whenever I opened the Start menu. Others would not have been as patient with that as I was though there was the matter of an expensive Photoshop licence to be guarded too.
In hindsight, a bit of pruning could have helped. An example would have been driver housekeeping in the form of removing VirtualBox Guest Additions because they could have been conflicting with their VMware counterparts. For some reason, those thoughts entered my mind and I was pondering another more expensive option instead.
Considering NAS & Windows/Linux Networking
That would have taken the form of setting aside a PC for running Windows 7 and having a NAS for sharing files between it and my Linux system. In fact, I did get to exploring what a four bay QNAP TS-412 would offer me and realised that you cannot put normal desktop hard drives into devices like that. For a while, it looked as if it would be a matter of getting drives bundled with the device or acquiring enterprise grade disks so as to main the required continuity of operation. The final edition of PC Plus highlighted another one though: the Western Digital Red range. These are part way been desktop and enterprise classifications and have been developed in association with NAS makers too.
Looking at the NAS option certainly became an education but it has exited any sort of wish list that I have. After all, there is the cost of such a setup and it’s enough to get me asking if I really need such a thing. The purchase of a Netgear FS 605 ethernet switch would have helped incorporate it but there has been no trouble sorting alternative uses for it since it bumps up the number of networked devices that I can have, never a bad capability to have. As I was to find, there was a less expensive alternative that became sufficient for my needs.
In-situ Windows 8 Upgrade
Microsoft have been making available evaluation copies of Windows 8 Enterprise that last for 90 days before expiring. One is in my hands has been running faultlessly in a VMware virtual machine for the past few weeks. That made me wonder if upgrading from Windows 7 to Windows 8 help with my main Windows VM problems. Being a curious risk-taking type I decided to answer the question for myself using the £24.99 Windows Pro upgrade offer that Microsoft have been running for those not needing a disk up front; they need to pay £49.99 but you can get one afterwards for an extra £12.99 and £3.49 postage if you wish, a slightly cheaper option. There also was a time cost in that it occupied a lot of a weekend on me but it seems to have done what was needed so it was worth the outlay.
Given the element of risk, Photoshop was deactivated to be on the safe side. That wasn’t the only pre-upgrade action that was needed because the Windows 8 Pro 32-bit upgrade needs at least 16 GB before it will proceed. Of course, there was the matter of downloading the installer from the Microsoft website too. This took care of system evaluation and paying for the software as well as the actual upgrade itself.
The installation took a few hours with virtual machine reboots along the way. Naturally, the licence key was needed too as well as the selection of a few options though there weren’t many of these. Being able to carry over settings from the pre-exisiting Windows 7 instance certainly helped with this and with making the process smoother too. No software needed reinstatement and it doesn’t feel as if the system has forgotten very much at all, a successful outcome.
Post-upgrade Actions
Just because I had a working Windows 8 instance didn’t mean that there wasn’t more to be done. In fact, it was the post-upgrade sorting that took up more time than the actual installation. For one thing, my digital mapping software wouldn’t work without .Net Framework 3.5 and turning on the operating system feature form the Control Panel fell over at the point where it was being downloaded from the Microsoft Update website. Even removing Avira Internet Security after updating it to the latest version had no effect and it was a finding during the Windows 8 system evaluation process. The solution was to mount the Windows 8 Enterprise ISO installation image that I had and issue the following command from a command prompt running with administrative privileges (it’s all one line though that’s wrapped here):
dism.exe /online /enable-feature /featurename:NetFX3 /Source:d:\sources\sxs /LimitAccess
For sake of assurance regarding compatibility, Avira has been replaced with Trend Micro Titanium Internet Security. The Avira licence won’t go to waste since I have another another home in mind for it. Removing Avira without crashing Windows 8 proved impossible though and necessitating booting Windows 8 into Safe Mode. Because of much faster startup times, that cannot be achieved with a key press at the appropriate moment because the time window is too short now. One solution is to set the Safe Boot tickbox in the Boot tab of Msconfig (or System Configuration as it otherwise calls itself) before the machine is restarted. There may be others but this was the one that I used. With Avira removed, clearing the same setting and rebooting restored normal service.
Dealing with a Dual Personality
One observer has stated that Windows 8 gives you two operating systems for the price of one: the one in the Start screen and the one on the desktop. Having got to wanting to work with one at a time, I decided to make some adjustments. Adding Classic Shell got me back a Start menu and I left out the Windows Explorer (or File Explorer as it is known in Windows 8) and Internet Explorer components. Though Classic Shell will present a desktop like what we have been getting from Windows 7 by sweeping the Start screen out of the way for you, I found that this wasn’t quick enough for my liking so I added Skip Metro Suite to do this and it seemed to do that a little faster. The tool does more than sweeping the Start screen out of the way but I have switched off these functions. Classic Shell also has been configured so the Start screen can be accessed with a press of Windows key but you can have it as you wish. It has updated too so that boot into the desktop should be faster now. As for me, I’ll leave things as they are for now. Even the possibility of using Windows’ own functionality to go directly to the traditional desktop will be left untested while things are left to settle. Tinkering can need a break.
Outcome
After all that effort, I now have a seemingly more stable Windows virtual machine running Windows 8. Flitting between it and other Linux desktop applications has not caused a system freeze so far and that was the result that I wanted. There now is no need to consider having separate Windows and Linux PC’s with a NAS for sharing files between them so that option is well off my wish-list. There are better uses for my money.
Not everyone has had my experience though because I saw a report that one user failed to update a physical machine to Windows 8 and installed Ubuntu instead; they were a Linux user anyway even if they used Fedora more than Ubuntu. It is possible to roll back from Windows 8 to the previous version of Windows because there is a windows.old directory left primarily for that purpose. However, that may not help you if you have a partially operating system that doesn’t allow you to do just that. In time, I’ll remove it using the Disk Clean-up utility by asking it to remove previous Windows installations or running File Explorer with administrator privileges. Somehow, the former approach sounds the safer.
What About Installing Afresh?
While there was a time when I went solely for upgrades when moving from one version of Windows to the next, the annoyance of the process got to me. If I had known that installing the upgrade twice onto a computer with a clean disk would suffice, it would have saved me a lot. Staring from Windows 95 (from the days when you got a full installation disk with a PC and not the rescue media that we get now) and moving through a sequence of successors not only was time consuming but it also revealed the limitations of the first in the series when it came to supporting more recent hardware. It was enough to have me buying the full retailed editions of Windows XP and Windows 7 when they were released; the latter got downloaded directly from Microsoft. These were retail versions that you could move from one computer to another but Windows 8 will not be like that. In fact, you will need to get its System Builder edition from a reseller and that can only be used on one machine. It is the merging of the former retail and OEM product offerings.
What I have been reading is that the market for full retail versions of Windows was not a big one anyway. However, it was how I used to work as you have read above and it does give you a fresh system. Most probably get Windows with a new PC and don’t go building them from scratch like I have done for more than a decade. Maybe the System Builder version would apply to me anyway and it appears to be intended for virtual machine use as well as on physical ones. More care will be needed with those licences by the looks of things and I wonder what needs not to be changed so as not to invalidate a licence. After all, making a mistake might cost between £75 and £120 depending on the edition.
Final Thoughts
So far Windows 8 is treating me well and I have managed to bend to my will too, always a good thing to be able to say. In time, it might be that a System Builder copy could need buying yet but I’ll leave well alone for now. Though I needed new security software, the upgrade still saved me money over a hardware solution to my home computing needs and I have a backup disk on order from Microsoft too. That I have had to spend some time settling things was a means of learning new things for me but others may not be so patient and, with Windows 7 working well enough for most, you have to ask if it’s only curious folk like me who are taking the plunge. Still, the dramatic change has re-energised the PC world in an era when smartphones and tablets have made so much of the running recently. That too is no bad thing because an unchanging technology is one that dies and there are times when big changes are needed, as much as they upset some folk. For Microsoft, this looks like one of them and it’ll be interesting to see where things go from here for PC technology.
Synchronising package selections between Linux Mint and Linux Mint Debian Edition
18th April 2012To generate the package list on the GNOME version of Linux Mint, I used the Backup Tool. It simply was a matter of using the Backup Software Selection button and telling it where to put the file that it generates. Alternatively, dpkg can be used from the command line like this:
sudo dpkg --get-selections > /backup/installed-software.txt
After transferring the file to the machine with Linux Mint Debian Edition, I tried using the Backup Tool on there too. However, using the Restore Software Selection button and loading the required only produced an irrecoverable error. Therefore, I set to looking around the web and found a command line approach that did the job for me.
The first step is to load the software selection using dpkg by issuing this command (it didn’t matter that the file wasn’t made using the dpkg command though I suspect that’s what the Linux Mint Backup Tool was doing that behind the scenes):
sudo dpkg --set-selections < /backup/installed-software.txt
Then, I started dselect and chose the installation option from the menu that appeared. First time around, it fell over but trying again was enough to complete the job. Packages available to the vanilla variant of Linux Mint but not found in the LMDE repositories were overlooked as I had hoped and installation of the extra packages had no impact on system stability either.
sudo dselect
Apparently, there is an alternative to using dselect that is based on the much used apt-get command but I didn’t make use of it so cannot say more:
sudo apt-get dselect-upgrade
All that I can say is that the dpkg/dselect combination did what I wanted so I’ll keep them in mind if ever need to synchronise software selections between two Debian-based distributions in the future again. The standard edition of Linux Mint may be based on Ubuntu rather than Debian but Ubuntu is itself based on Debian so the description holds here.
A new phone
4th February 2012After a few years with a straightforward Nokia 1661 and a PAYG Blackberry 8520, I decided to go and upgrade from the former to an HTC Wildfire S. So far, the new phone has been good to me with only a few drawbacks. Other than working out how to insert a SIM card, the phone has been easy to use with just a few nuances to learn, such as finger pinch zooming and dealing with an onscreen keyboard as opposed to a real one.
The touchscreen interface and the 3G capability are the big changes from my Blackberry and both make web browsing so much faster too, especially with the larger screen. For instance, checking RSS feeds with Google Reader and emails is so much faster on the move with the screen being very responsive most of the time that I am using it; it does get dirty like others so either a screen cover or frequent cleaning with a camera lens cloth would be no bad thing. The onscreen keyboard remains something to which I need to grow accustomed and probably is the one area where the Blackberry continues to hold sway though turning the phone sideways and tapping it on the side to change orientation helps a lot. That makes the keys larger and, while my finger are not the thickest, there are fewer cases of hitting the wrong key. Even then, you need to get used to switching between alphabet and numeric keyboards and that applies also when you need punctuation marks like commas and so on.

Otherwise, the user interface is bright and pleasing to the eye with the typical presentation of both a clock and current weather on there. Handily, the screen is locked easily too with a press of the button at the top right of the phone. That will put a stop to inadvertent phone calls, emailing, web browsing and other things so it is to be commended. To unlock the screen, all that’s needed is to swipe the lock bar to the bottom. Any alerts are viewed in a similar way with holding down your finger on the top bar presenting an extension that can be pulled all of the way down to see what’s there.
With an icon for the Android Marketplace on the main screen, I got to adding a few apps and you can set these to update automatically too but you need to watch your phone contract’s data allowance. The one for WordPress works better than it does on my Blackberry but it seems that retweeting with UberSocial is much less good on the Android platform. For one thing, feeds for all accounts are presented on the one screen and swiping left to right is needed for replying, retweeting and other operations and that’s not working out so smoothly for me yet. Maybe I’ll try an alternative. There are others that I have downloaded too and these include one from CrossCountry Trains and that seems to be a nice offering even if it failed to find trains between Macclesfield and Edale of a Sunday morning. For those omissions, I have an alternative in place and I also have the LinkedIn app too. That seems to work well too. Usefully, it is possible to move these to the phones microSD card to avoid filling up the limited space that’s on offer. However, that isn’t to say that I will be going mad on these things.
Of course, any phone should be good at making and taking phones and the Wildfire seems to be doing well on this score too. Firstly, contacts were read from the SIM but they can be transferred from an old phone using Bluetooth connections too. Sound is good and loud though you need to be on a call to adjust the speaker volume with the rocker button on the side of the phone. Otherwise, that just changes the volume of the ring tone. Without any adjustments, the phone seems to vibrate and ring at the same time though that may be something that I get to changing in time. The pings emitted when new text messages, emails or tweets fall into the same category.
If there’s any downside to this phone, it has to be battery life. Unlike others that I have had, this is a phone that needs charging every night at the very least. Maybe that’s the price of having a nice bright responsive screen but it would be no harm if it lasted longer. Others have found the same thing and reported as much on the web though some have having worse experiences than others. There are some hints regarding how to conserve battery life but they include such things as switching off 3G or data capabilities and neither appeal to me; after all, I might as well use my old Nokia if this is all that can be offered. Instead, I am wondering if acquiring a spare battery might be no bad idea because that’s what I do for my Pentax DSLR (note in passing: I haven’t got to using the phone’s own camera but recent wintry weather had me tempted by the idea, especially with the likes of Twitpic and YFrog out there.). Taking things further, others have mentioned getting a larger capacity replacement but that sounds more risky.
All in all, first impressions of the HTC Wildfire are good ones. Over time, I should find out more about the ins and outs of the gadget. After all, it is a mini-computer with its own operating system and other software. Since I continue to learn more and more about PC’s everyday, the same should be the case here too.
Yet another useful Windows shortcut
11th December 2011During the week, I needed to go to a client to upgrade the laptop that they’d given me for doing work for them. The cause was their migration from Windows XP to Windows 7. Office 2010 also came with the now set up and they replace the machines with new ones too. As part of doing this, they carried out upgrade training and this is when I got to learn a thing or two.
While I may have been using Windows 7 since the beta releases first were made available, I am under no illusions that I know all there is to be known about the operating system. Included among the things of which I wasn’t aware was a shortcut key combination for controlling display output from the HP laptop that I’d been given. This is the Windows key + P. This brings up a dialogue screen from which you can select the combination that you need and that includes extending the display across two different screens, such as that of the laptop and an external monitor. Going into the display properties will fine tune things such as what is the main display and the placement of the desktops; there’s no point in having Windows thinking that the external screen is to your left when in fact it is at the right.
Another interesting shortcut is the Windows key + TAB. This affects the Aero application view and repeating the combination cycles through the open applications or you can use a mouse wheel to achieve the same end. With ALT + TAB and the taskbar still about, this might appear more of a curiosity but some may still find it handy so I’ve shared it here too.
All in all, it’s best never to think that you know enough about something because there’s always something new to be learned and it’s always the smallest of things that proves to be the most helpful. With every release of Windows, that always seems to be the case and Windows 8 should not be any different, even if all the talk is about its Metro interface. A beta release is due in the spring of 2012 so we’ll have a chance to find out then. You never can stop learning about this computing business.
An in situ upgrade to Linux Mint 12
4th December 2011Though it isn’t the recommended approach, I have ended up upgrading to Linux Mint 12 from Linux Mint 11 using an in situ route. Having attempted this before with a VirtualBox hosted installation, I am well aware of the possibility of things going wrong. Then, a full re-installation was needed to remedy the situation. With that in mind, I made a number of backups in the case of an emergency fresh installation of the latest release of Linux Mint. Apache and VirtualBox configuration files together with MySQL backups were put where they could be retrieved should that be required. The same applied to the list of installed packages on my system. So far, I haven’t needed to use these, but there is no point in taking too many chances.
The first step in an in-situ Linux Mint upgrade is to edit /etc/apt/sources.list. In the repository location definitions, any reference to katya (11) was changed to lisa (for 12) and the same applied to any appearance of natty (Ubuntu 11.04) which needed to become oneiric (Ubuntu 11.10). With that done, it was time to issue the following command (all one line even if it is broken here):
sudo apt-get update && sudo apt-get upgrade && sudo apt-get dist-upgrade
Once that had completed, it was time to add the new additions that come with Linux Mint 12 to my system using a combination of apt-get, aptitude and Synaptic; the process took a few cycles. GNOME already was in place from prior experimentation, so there was no need to add this anew. However, I need to instate MGSE to gain the default Linux Mint customisations of GNOME 3. Along with that, I decided to add MATE, the fork of GNOME 2. That necessitated the removal of two old libraries (libgcr0 and libgpp11, if I recall correctly but it will tell you what is causing any conflict) using Synaptic. With MGSE and MATE in place, it was time to install LightDM and its Unity greeter to get the Linux Mint login screen. Using GDM wasn’t giving a very smooth visual experience and Ubuntu, the basis of Linux Mint, uses LightDM anyway. Even using the GTK greeter with LightDM produced a clunky login box in front of a garish screen. Configuration tweaks could have improved on this but it seems that using LightDM and Unity greeter is what gives the intended setup and experience.
With all of this complete, the system seemed to be running fine until the occasional desktop freeze occurred with Banshee running. Blaming that, I changed to Rhythmbox instead, though that helped only marginally. While this might be blamed on how I upgraded my system, things seemed to have steadied themselves in the week since then. As a test, I had the music player going for a few hours and there was no problem. With the call for testing of an update to MATE a few days ago, it now looks as if there may have been bugs in the original release of Linux Mint 12. Daily updates have added new versions of MGSE and MATE so that may have something to do with the increase in stability. Even so, I haven’t discounted the possibility of needing to do a fresh installation of Linux Mint 12 just yet. However, if things continue as they are, then it won’t be needed and that’s an upheaval avoided should things go that way. That’s why in situ upgrades are attractive though rolling distros like Arch Linux (these words are being written on a system running this) and LMDE are more so.
Adding Software to Arch Linux from the AUR
3rd December 2011There are packages absent from the Arch Linux repositories that could come in useful. When you are after one of these, then it’s time to search the Arch User Repository (AUR). In here, I have found the likes of Microsoft Core Fonts, Adobe Reader and Dropbox. There may be others but these examples are what comes to mind as I write this. In time, it may be that packages make if from the AUR into the Arch community repository but you have to use the former if you cannot wait.
Just search the AUR for what you want and download the tarball (tar.gz file) from the webpage where you find it. Then, I recommend extracting it to /tmp where clearance at boot time means that you don’t need to do it yourself. Then, going into the appropriate subfolder in /tmp (acroread for Adobe Reader, for instance) and issue the following command:
makepkg
This will attempt to create a package file where you are working for installation by pacman. If dependencies are absent, you will be told and these may need another AUR search in some cases though most are included in the repositories. Once dependencies, have been sorted, just issue the makepkg command again to create the xz file that pacman needs to perform the installation. To do so, issue the following command from the same directory either as root or by using sudo if your user account has such privileges:
pacman -U *.xz
There usually is but one xz archive in a package folder so I have been taking the easy route of not looking up the name all of the time. Of course, you can do that for safety if you want.
With pacman not looking at the AUR, you have to do more work to get upgrades to happen if you want to avoid without having to repeat the above process all of the time. There is a package in the AUR called yaourt that needs package-query from the same place as well. Before any of these, yajl needs to installed from one of the default repositories. Once yaourt is in place, then the following does the updates for you:
yaourt -Syu --aur
Again, it might be best run this as root or using sudo though that gives messages from makepkg about not running it as a privileged user. However, I reckon that those might need to be ignored. When I tried it, the Citrix update failed though the Dropbox one succeeded. This experience might be worth bearing in mind. Saying that, I have found installing and updating software from the AUR not to be too onerous a process so far. Anything that gives a little more freedom only can be a good thing.
Sorting out MySQL on Arch Linux
5th November 2011Seeing Arch Linux running so solidly in a VirtualBox virtual box has me contemplating whether I should have it installed on a real PC. Saying that, recent announcements regarding the implementation of GNOME 3 in Linux Mint have caught my interest even if the idea of using a rolling distribution as my main home operating system still has a lot of appeal for me. Having an upheaval come my way every six months when a new version of Linux Mint is released is the main cause of that.
While remaining undecided, I continue to evaluate the idea of Arch Linux acting as my main OS for day-to-day home computing. Towards that end, I have set up a working web server instance on there using the usual combination of Apache, Perl, PHP and MySQL. Of these, it was MySQL that went the least smoothly of all because the daemon wouldn’t start for me.
It was then that I started to turn to Google for inspiration and a range of actions resulted that combined to give the result that I wanted. One problem was a lack of disk space caused by months of software upgrades. Since tools like it in other Linux distros allow you to clear some disk space of obsolete installation files, I decided to see if it was possible to do the same with pacman, the Arch Linux command line package manager. The following command, executed as root, cleared about 2 GB of cruft for me:
pacman -Sc
The S in the switch tells pacman to perform package database synchronization while the c instructs it to clear its cache of obsolete packages. In fact, using the following command as root every time an update is performed both updates software and removes redundant or outmoded packages:
pacman -Syuc
So I don’t forget the needful housekeeping, this will be what I use in future with the y being the switch for a refresh and the u triggering a system upgrade. It’s nice to have everything happen together without too much effort.
To do the required debugging that led me to the above along with other things, I issued the following command:
mysqld_safe --datadir=/var/lib/mysql/ &
This starts up the MySQL daemon in safe mode if all is working properly and it wasn’t in my case. Nevertheless, it creates a useful log file called myhost.err in /var/lib/mysql/. This gave me the messages that allowed the debugging of what was happening. It led me to installing net-tools and inettools using pacman; it was the latter of these that put hostname on my system and got the MySQL server startup a little further along. Other actions included unlocking the ibdata1 data file and removing the ib_logfile0 and ib_logfile1 files so as to gain something of a clean sheet. The kill command was used to shut down any lingering mysqld sessions too. To ensure that the ibdata1 file was unlocked, I executed the following commands:
mv ibdata1 ibdata1.bad
 cp -a ibdata1.bad ibdata1
These renamed the original and then crated a new duplicate of it with the -a switch on the cp command forcing copying with greater integrity than normal. Along with the various file operations, I also created a link to my.cnf, the MySQL configuration file on Linux systems, in /etc using the following command executed by root:
ln -s /etc/mysql/ my.cnf /etc/my.cnf
While I am unsure if this made a real difference, uncommenting the lines in the same file that pertained to InnoDB tables. What directed me to these were complaints from mysqld_safe in the myhost.err log file. All I did was to uncomment the lines beginning with “innodb” and these were 116-118, 121-122 and 124-127 in my configuration file but it may be different in yours.
After all the above, the MySQL daemon ran happily and, more importantly, started when I rebooted the virtual machine. Thinking about it now, I believe that was a lack of disk space, the locking of a data file and the lack of InnoDB support that was stopping the MySQL service from running.Running commands like mysqld start weren’t yielding useful messages so a lot of digging was needed to get the result that I needed. In fact, that’s one of the reasons why I am sharing my experiences here.
In the end, creating databases and loading them with data was all that was needed for me to start see functioning websites on my (virtual) Arch Linux system. It turned out to be another step on the way to making it workable as a potential replacement for the Linux distributions that I use most often (Linux Mint, Fedora and Ubuntu).