Fixing Background Image Display in GNOME Shell 3.10
2nd May 2014On upgrading from Ubuntu GNOME 13.10 to Ubuntu GNOME 14.04, a few rough edges were to be noticed. One was the display of my chosen background image: it was garbled. Later, I discovered that there is a maximum width of 2560 px for background images in GNOME Shell these days and that things get messy beyond that.
In my case, the image width was around 6000 px and I was used to its getting resized in GNOME Shell 3.8 and its predecessors. It seems that the functionality got removed after that though so the workaround of manual image resizing in the GIMP needed to be employed. Though having big images open in memory creates an additional overhead, not handling them very well at all looks like a bug caused by setting 2560 px as a maximum screen width for the GNOME Shell panel and the complete removal of Nautilus from desktop rendering duties. Let’s hope that sense is seen with ever larger screen sizes and resolutions coming our way.
It’s the sort of thing that did get me looking at adding on Cinnamon 2.2 for a while before setting background image scaling using the indispensable GNOME Tweak Tool was discovered. LinuxG.net has a useful tutorial on this for anyone with such an adventurous streak in them. For now though, I am OK with my set up but the GNOME project’s focus on minimalism could affect us in other ways so I can see why Clem Lefebvre started the Cinnamon one primarily for Linux Mint and the desktop environment is appearing elsewhere too. After all, Gedit lost its menu bar in GNOME 3.12 so it’s just as well that we have alternative choices.
Update 2014-05-06: It seems that the desktop image bug that afflicts GNOME Shell 3.10 got sorted for GNOME Shell 3.12. At least, that is the impression that an Antergos instance in a VirtualBox virtual machine gives me.
Restoring GNU Parallel Functionality in Ubuntu GNOME 13.04
31st July 2013There is a handy comand line utility called GNU Parallel that allows you to run Linux commands on more than one CPU core at a time to perform parallel processing of the task at hand. Here is a form of the command that is similar to one that I often use:
ls *.* | parallel gm convert -sharpen 1×3 {} sharpened_images/{}
What it does is pipe a list of files in a folder to GraphicsMagick for sharpening and outputting to a sharpened_images directory. The {} in the command is where the filenames go in the sharpening command.
This worked fine in Ubuntu GNOME 12.10 but stopped doing so after I upgraded to the next version. A look on the web set me to running the following command:
parallel --version
That produced output that included the following line:
WARNING: YOU ARE USING --tollef. IF THINGS ARE ACTING WEIRD USE --gnu.
Rerunning the original command with the --gnu option worked but there was a more permanent solution than using something like this:
ls *.* | parallel --gnu gm convert -sharpen 1×3 {} sharpened_images/{}
That was editing /etc/parallel/config with root privileges to delete the --tollef option from there. With that completed, all was as it should again and it makes me wonder why the change was made in the first place. Perhaps because of it, there even is a discussion about the possibility of removing the --tollef option altogether since it is raising more questions than it answers.
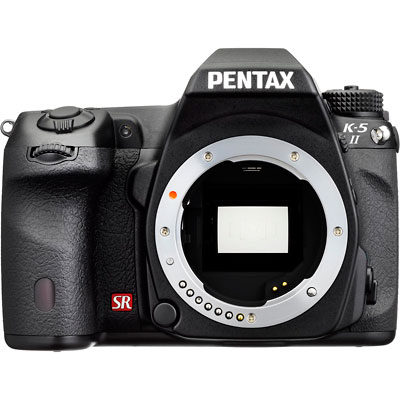
A display of brand loyalty
12th July 2013Since 2007, my main camera has been a Pentax K10D DSLR and it has gone on many journeys with me. In fact, more than 15,000 images have been captured with it and I have classed it as an unfailing servant. The autofocus may not be the fastest but my subjects tend to be stationary: landscapes, architecture, flora and transport. Even any bus and train photos have included parked vehicles rather than moving ones so there never have been issues. The hint of underexposure in any photos always can be sorted because DNG files are what I create, with all the raw capture information that is possible to retain. In fact, it has been hard to justify buying another SLR because the K10D has done so well for me.
In recent months, I have looking at processed photos and asking myself if time has moved along for what is not far from being a six year old camera. At various times, I have been looking at higher members of the Pentax while wondering if an upgrade would be a good idea. First, there was the K7 and then the K5 before the K5 II got launched. Even though its predecessor is still to be found on sale, it was the newer model that became my choice.
My move to Pentax in 2007 was a case of brand disloyalty since I had been a Canon user from when I acquired my first SLR, an EOS 300. Even now, I still have a Powershot G11 that finds itself slipped into a pocket on many a time. Nevertheless, I find that Canon images feel a little washed out prior to post processing and that hasn’t been the case with the K10D. In fact, I have been hearing good things about Nikon cameras delivering punchy results so one of them would be a contender were it not for how well the Pentax performed.
So, what has my new K5 II body gained me that I didn’t have before? For one thing, the autofocus is a major improvement on that in the K10D. It may not stop me persevering with manual focusing for most of the time but there are occasions the option of solid autofocus is good to have. Other advances include a 16.3 megapixel sensor with a much larger ISO range. The advances in sensor technology since when the K10D appeared may give me better quality photos and noise is something that my eyes may have begun to detect in K10D photos even at my usual ISO of 400.
There have been innovations that I don’t need too. Live View is something that I use heavily with the Powershot G11 because it has such a pitiful optical viewfinder. The K5 II has a very bright and sharp one so that function lays dormant, especially when I witnessed dodgy autofocus performance with it in use; manual focusing should be OK, I reckon. By default too, the screen stays on all the time and that’s a nuisance for an optical viewfinder user like me so I looked through the manual and the menus to switch off the thing. My brief flirtation with the image level display met an end for much the same reason though it’s good that it’s there. There is some horizon auto-correction available as a feature and this is left on to see what it offers since there have been a multitude of times when I needed to sort out crooked horizons caused by my handholding the camera.
The K5 II may have a 3″ screen on its back but it has done nothing to increase the size of the camera. If anything, it is smaller that the K10D and that usefully means that I am not on the lookout for a new camera holster. Not having a bigger body also means there is little change in how the much camera feels in the hand compared with the older one.
In many ways, the K5 II works very like the K10D once I took control over settings that didn’t suit me. Both have Shake Reduction in their camera bodies though the setting has been moved into the settings menu in the new camera when the older one had a separate switch on its body. Since I’d be inclined to leave it on all the time and prefer not to have it knocked off accidentally, this is not an issue. Otherwise, many of the various switches are in the same places so it’s not that hard to find my way around them.
That’s not to say that there aren’t other changes like the addition of a lock to the mode dial but I have used Canon EOS camera bodies with that feature so I do not consider it a step backwards. The exposure compensation button has been moved to the top of the camera where I found it very easily and have been using perhaps more than on the K10D; it’s also something that I use on the G11 so the experimentation is being brought across to the K5 II now as well. Beside it, there’s a new ISO button so further experimentation can be attempted with that to see how it does.
If I have any criticism, it’s about the clutter of the menus on the K5 II. The long lists through you scrolled on the K10D have been replaced with a series of extra tabs so that on-screen scrolling is not needed as before. However, I reckon that this breaks up things too much and makes working through the settings look more foreboding to anyone who is not so technical in mindset. Nevertheless, settings such as the the type of file to capture are there and I continue to use RAW DNG files as is usual for me though JPEG and Pentax’s own RAW format also are there. For a while, I forgot to set the date, soon found out what I did and the situation was remedied. The same sort of thing applied to storing files in different folders according to the capture date. For my own reasons, I turned this off to put everything into a single PENTX directory to suit my own workflow. My latest discovery among the menus was the ability to add photographer and copyright holder information to the EXIF metadata attached to the image files created by the camera. With legislative proposals that dilute the automatic rights of copyright holders going through the U.K. parliament, this seems a very timely inclusion even if most would prefer that there was no change to copyright law.
Of course, the worth of any camera is in the images that it produces and I have been happy with what I have been getting so far. The bigger files mean less images fit on a memory card as before. Thankfully, SDHC card capacities have grown even if I don’t wish to machine gun my photography altogether. While out and about, I was surprised to apertures like F/14 and F/18 when I was more accustomed to a progression like F/11, F/13, F/16, F/19, F/22, etc. Most of those older values still are there though so there hasn’t been a complete break with convention. The same comment applies to shutter speeds where ones like 1/100 and 1/160 made there appearance where I might have expected just ones like 1/90, 1/125, 1/250 and so on. The extra possibilities, and that is what they are, do allow more flexibility I suppose and may even make it easier to make correct exposures though any judgement of correctness has to be in the eye of a photographer and not what a computer algorithm in a camera determines. For much of the time until now, I have stuck with an ISO of 400 apart from a little testing in a woodland area of an evening soon after the camera arrived.
Since the K5 II came my way a few months ago, I have been meaning to collect my thoughts on here and there has been a delay while I brought mu thinking to a sensible close.At one point, it felt like there was so much to say that the piece became larger in my mind that even what you have been reading now. After all, there are other things that I can adjust to see how the resulting images look and white balance is but one of these.The K10D isn’t beyond experimentation either, especially since I discovered that shake reduction was switched off and it has me asking if that lacking in quality that I mentioned earlier has another explanation. Of course, actually making use of my tripod would be another good suggestion so it’s safe to say that yet more photographic explorations await.
Command Line Processing of EXIF Image Metadata
8th July 2013There is a bill making its way through the U.K. parliament at the moment that could reduce the power of copyright when it comes to images placed on the web. The current situation is that anyone who creates an image automatically holds the copyright for it. However, the new legislation will remove that if it becomes law as it stands. As it happens, the Royal Photographic Society is doing what it can to avoid any changes to what we have now. There may be the barrier of due diligence but how many of us take steps to mark our own intellectual property? For one, I have been less that attentive to this and now wonder if there is anything more that I should be doing. Others may copyleft their images but I don’t want to find myself unable to share my own photos because another party is claiming rights over them. There’s watermarking them but I also want to add something to the image metadata too.
That got me wondering about adding metadata to any images that I post online that assert my status as the copyright holder. It may not be perfect but any action is better than doing nothing at all. Given that I don’t post photos where EXIF metadata is stripped as part of the uploading process, it should be there to see for anyone who bothers to check and there may not be many who do.
Because I also wanted to batch process images, I looked for a command line tool to do the needful and found ExifTool. Being a Perl library, it is cross-platform so you can use it on Linux, Windows and even OS X. To install it on a Debian or Ubuntu based Linux distro, just use the following command:
sudo apt-get install libimage-exiftool-perl
The form of the command that I found useful for adding the actual copyright information is below:
exiftool -p “-copyright=(c) John …” -ext jpg -overwrite_original
The -p switch preserves the timestamp of the image file while the -overwrite_original one ensures that you don’t end up with unwanted backup files. The copyright message goes within the quotes along with the -copyright option. With a little shell scripting, you can traverse a directory structure and change the metadata for any image files contained in different sub-folders. If you wish to do more than this, there’s always the user documentation to be consulted.
On upgrading from Fedora 13 to Fedora 14
7th November 2010My Fedora box recently got upgraded to the latest version of the distribution (14) and I stuck to a method that I have used successfully before and one that isn’t that common with variants of Linux either. What I did was to go to the Fedora website and download a full DVD image, burn it to a disk and boot from that. Then, I chose the upgrade option from the menus and all went smoothly with only commonplace options needing selection from the menus and no data was lost either. Apparently. this way of going about things is only offered by the DVD option because the equivalent Live CD versions only do full installations.
However, there was another option that I fancied trying but was stymied by messages about a troublesome Dropbox repository. As I later discovered, that would have been easily sorted but I went for a tried and tested method instead. This was a pity because only two commands would have needed to be issued when logged in as root and it would have been good to have had a go with them:
yum update yum
yum --releasever=14 update --skip-broken
These may have done what I habitually do with Ubuntu upgrades but trying them out either will have to await the release of the next version or my getting around to setting up a Fedora virtual machine to see what happens. The latter course of action might be sensible anyway to see if all works without any problem before doing it for a real PC installation.
A tendency for overexposure?
14th July 2010A recent trip to Sweden saw my Canon PowerShot G11 being put to rather more use than was expected. If I had known what might have been coming my way, I may even have eschewed the principle of lightweight packing to bring along my Pentax DSLR. Nevertheless, the little Canon did what ever was asked of it when light was plentiful.
Once thing that I have noticed in comparison with the Pentax is the Canon’s tendency to overexpose a scene. To a point, this can be explained by the former having proper spot-metering and the latter having the less specific partial metering. In fact, that might explain why a Canon EOS 10D SLR in my possession has the same tendency. Maybe it’s time to make more use of the Sekonic light meter that I have but that adds bulk that doesn’t fit in with the idea of carrying a compact camera around with you.
That leaves getting more practice with exposure corrections at processing time (I do capture all my photos in raw format). Going further, I am finding that the same consideration appears to apply to image sharpening too. It’s almost as if you need to develop a feeling for the results produced by a camera before satisfaction with any acquired photos will follow. Having decent lighting at capture time and not having muck on the sensor helps too as I have discovered with the photos made used my Pentax K10D on a recent visit to Arran and Argyll. The state of the sensor needs sorting (even if it has an anti-dust system on board) but I sometimes wonder if my judgement of lighting is what it used to be or whether my aspirations have gone too high. Maybe I need to slow down a little so as to set aside time for working on getting better results and with the right light, a quantity that should come with autumn and winter. In the meantime, I’ll stick with making the best of the British summer.
Easier to print?
20th February 2010One matter that really came to light was how well or not the pages on here and on my hill walking and photography website came out on the printed page. After spotting a WordPress Codex article and with an eye on making things better, I have made a distinction between screen and print stylesheets. The code in the XHTML looks like this:
<link rel=”stylesheet” href=”/style.css” type=”text/css” media=”screen” />
<link rel=”stylesheet” href=”/style_print.css” type=”text/css” media=”print” />
The media attribute seems to be respected by the browsers that I have been using for testing (latest versions of Firefox, MSIE and Opera) so it then was a matter of using CSS to control what was shown and how it was displayed. Extraneous items like sidebars were excluded from the printed page in favour of the real content that visitors would be wanting anyway and everything else was made as monochrome as possible with images being the only things to escape. After all, people don’t want to be wasting paper and ink in this cash strained times and there’s no need to have any more colour than necessary either. Then, there’s the distraction caused by non-functioning hyperlinks that has inspired the sharing of some wisdom on A List Apart. Returning to my implementation, please let me know in the comments what you think of what I have done on here and if there remains any room for improvement.
8?
12th October 2009It now seems that we have a new version of Photoshop Elements from Adobe for every year unless you’re a Mac user. Version 7 convinced me to splash out and that gained me Camera Raw recognition of my Pentax K10D along with subtly enhanced image processing power that I have been putting to good use to get more pleasing results than I ever got before. What can be achieved by using levels, curves and the shadow/highlight adjustment tool for exposure correction has amazed me recently. Quick selection functionality has allowed me to treat skies differently from everything else in landscape photos, a flexible graduated filter if you like. It seems to work on Windows 7 along with Vista and XP so I plan to stick with it for a while yet. As you may have gathered from this, it would take some convincing to make me upgrade and, for me, version 8 doesn’t reach that mark. All in all, it seems that it is a way of giving Mac users a new release with added goodness after having to stay with 6 for so long; yes, there are new features like autotagging in the image organiser but they just don’t grab me. Given that they already have Aperture from Apple and Windows users seem to get more releases, it’s a wonder that any Mac user would toy with Elements anyway. Maybe, that’s Adobe’s suspicion too.
Getting Fedora working in VirtualBox
12th May 2009After a hiatus induced by disk errors seen on start up, I have gone having a go with Fedora again. In the world of real PC’s, its place has been taken by Debian so virtualisation was brought into play for my most recent explorations. I could have gone with 10, the current stable version, but curiosity got the better of me and I downloaded a pre-release version of 11 instead.
On my way to getting that instated, I encountered two issues. The first of these was boot failure with the message like this:
FATAL: INT18: BOOT FAILURE
As it turned out, that was easily sorted. I was performing the installation from a DVD image mounted as if it were a real DVD and laziness or some other similar reason had me rebooting with still mounted. There is an option to load the hard disk variant but it wasn’t happening, resulting in the message that’s above. A complete shut down and replacement of the virtual DVD with a real one set matters to rights.
The next trick was to get Guest Additions added but Fedora’s 2.6.29 was not what VirtualBox was expecting and it demanded the same ransom as Debian: gcc, make and kernel header files. Unfamiliarity had me firing up Fedora’s software installation software only to find that Synaptic seems to beat it hands down in the search department. Turning to Google dredged up the following command to be executed and that got me further:
yum install binutils gcc make patch libgomp glibc-headers glibc-devel kernel-headers kernel-devel
However, the installed kernel headers didn’t match the kernel but a reboot fixed that once the kernel was updated. Then, the Guest Additions installed themselves as intended with necessary compilations to match the installed kernel.
The procedures that I have described here would, it seems, work for Fedora 10 and they certainly have bequeathed me a working system. I have had a little poke and a beta of Firefox 3.5 is included and I saw sign of OpenOffice 3.1 too. So, it looks very cutting edge, easily so in comparison with Ubuntu and Debian. Apart from one or niggles, it seems to run smoothly too. Firstly, don’t use the command shutdown -h now to close the thing down or you’ll cause VirtualBox to choke. Using the usual means ensures that all goes well, though. The other irritation is that it doesn’t connect to the network without a poke from me. Whether SELinux is to blame for this or not, I cannot tell but it might be something for consideration by the powers than be. That these are the sorts of things that I have noticed should itself be telling you that I have no major cause for complaint. I have mulled over a move to Fedora in the past and that option remains as strong as ever but Ubuntu is not forcing me to look at an alternative and the fact that I know how to achieve what I need is resulting in inertia anyway.
Harnessing the power of ImageMagick
26th October 2008Using the command line to process images might sound senseless but the tools offered by ImageMagick certainly prove that it has its place. I have always been wary of using bulk processing for my digital photo files (some digitised from film prints with a scanner) but I do agree that some of it is needed to free up some time for other more necessary things. With this in mind, it is encouraging to see the results from ImageMagick and I can see it making a major difference to how I maintain my online photo gallery.
For instance, making thumbnail images for the gallery certainly seems to be one of those operations where command line bulk processing comes into its own and ImageMagick’s own convert command is heaven sent for this one. For resizing images, all that’s needed is the following:
convert -resize 40% input.jpg output.jpg
Add a spot of further shell scripting and even a dash of Perl and the possibilities for this sort of thing become clearer and this is but the pinnacle of the proverbial iceberg. The -rotate switch will do what the name suggests and there are a whole plethora of other options on tap. So long as you have Ghostscript on your system, conversion of graphics to Postscript (and Encapsulated Postscript too) and PDF files is possible with the -page option controlling the margin around the image itself in the resulting outputs. Unfortunately, portrait is the sole orientation on offer but a bit of judicious post processing will turn things around. Here’s a command that’ll do the trick:
convert -page 792×612+72+72 input.png ps2:output.ps
For retrieving image metadata like its resolution and size, the identify command comes into play. The -verbose option invokes the output of all manner of image metadata so using grep or egrep is perhaps advisable, especially for bulking processing with the likes of Perl. Having the ability to stream image metadata makes loading databases like MySQL less of a chore than the manual data entry that has been my way of doing things until now.