Technology Tales

Adventures & experiences in contemporary technology

Installing FreeBSD in a VirtualBox Virtual Machine

2nd March 2014

With UNIX being the basis of Linux, I have a soft spot for trying out any UNIX that can be installed on a PC. For a while, I had OpenSolaris on the go and even vaguely recall having a look at one of the BSD’s. However, any recent attempt to install one of the latter, and there are quite a few around now, got stymied by some sort of kernel panic caused by using AMD CPU’s. With the return to the Intel fold arising from the upgrade of my main home PC last year, it perhaps was time to try again.

The recent release of FreeBSD 10.0 was the cue and I downloaded a DVD image for a test installation in a VirtualBox virtual machine with 4 GB of memory and a 32 GB virtual hard drive attached (expanding storage was chosen so not all the allocated space has been taken so far). The variant of FreeBSD chosen was the 64-bit x86 one and I set to installing it in there. Though not as pretty in appearance as those in various Linux distros, the installer was not that user unfriendly to me. Mind you, I have experience of installing Arch Linux so that might have acclimatised me somewhat.

Those installation screens ask about the keyboard mapping that you want and I successfully chose one of the UK options. There was limited opportunity for adding extras though there was a short list of few from which I made some selections. User account set up also was on offer and I would have been better off knowing what groups to assign for my personal user account so as to have to avoid needing to log in as root so often following system start up later. Otherwise, all the default options were sufficient.

When the installation process was complete, it was time to boot into the new system and all that was on offer was a command line log in session. After logging in as root, it was time to press pkg into service in order to get a desktop environment in place. The first step was to install X:

pkg install xorg

Then, it was time to install a desktop environment. While using XFCE or KDE were alternatives, I chose GNOME 2 due to familiarity and more extensive instructions on the corresponding FreeBSD handbook page. Issuing the following command added GNOME and all its helper applications:

pkg install gnome2

So that GNOME starts up at the next reboot, some extra steps are needed. The first of these is to add the following line into /etc/fstab:

proc /proc procfs rw 0 0

Then, two lines were needed in /etc/rc.conf:

gdm_enable=”YES”
gnome_enable=”YES”

The first enables the GNOME display manager and the second activates other GNOME programs that are needed for a desktop session to start. With each of these in place, I got a graphical login screen at the next boot time.

With FreeDSB being a VirtualBox Guest, it was time to consult the relevant FreeBSD manual page. Here, there are sections for a number of virtual machine tools so a search was needed to find the one for VirtualBox. VirtualBox support for FreeBSD is incomplete in that there is no installation media for BSD systems though Linux and Solaris are supported along with Windows. Therefore, it is over to the FreeBSD repositories for the required software:

pkg install virtualbox-ose-additions

Aside from the virtual machine session not capturing and releasing the mouse pointer automatically, that did everything that was needed even if it was the open source edition of the drivers and their proprietary equivalents. To resolve the mouse pointer issue, I needed to temporarily disable the GNOME desktop session in /etc/rc.conf to drop down to a console only session where xorg. conf could be generated using the following commands:

Xorg -configure
cp xorg.conf.new /etc/xorg.conf

In the new xorg.conf file, the mouse section needs to be as follows:

Section “InputDevice”
Identifier  “Mouse0”
Driver      “vboxmouse”
EndSection

If it doesn’t look like the above and it wasn’t the case for me then it needs changing. Also, any extra lines from the default set up also need removing or the mouse will not function as it should. The ALT+F1 (for accessing GNOME menus) and ALT+F2 (for running commands) keyboard shortcuts then become crucial when your mouse is not working as it should and could avert a panic too; knowing that adjusting a single configuration file will fix a problem when doing so is less accessible is not a good feeling as I discovered to my own cost. The graphics settings were fine by default but here’s what you should have in case it isn’t for you:

Section “Device”
### Available Driver options are:-
### Values: <i>: integer, <f>: float, <bool>: “True”/”False”,
### <string>: “String”, <freq>: “<f> Hz/kHz/MHz”
### [arg]: arg optional
Identifier  “Card0”
Driver      “vboxvideo”
VendorName  “InnoTek Systemberatung GmbH”
BoardName   “VirtualBox Graphics Adapter”
BusID       “PCI:0:2:0”
EndSection

The next step is to ensure that your HAL settings are as they should. I needed to create a file in /usr/local/etc/hal/fdi/policy called 90-vboxguest.fdi that contains the following:

<?xml version=”1.0″ encoding=”utf-8″?>
<!--
# Sun VirtualBox
# Hal driver description for the vboxmouse driver
# $Id: chapter.xml,v 1.33 2012-03-17 04:53:52 eadler Exp $
Copyright (C) 2008-2009 Sun Microsystems, Inc.
This file is part of VirtualBox Open Source Edition (OSE, as
available from http://www.virtualbox.org. This file is free software;
you can redistribute it and/or modify it under the terms of the GNU
General Public License (GPL) as published by the Free Software
Foundation, in version 2 as it comes in the “COPYING” file of the
VirtualBox OSE distribution. VirtualBox OSE is distributed in the
hope that it will be useful, but WITHOUT ANY WARRANTY of any kind.
Please contact Sun Microsystems, Inc., 4150 Network Circle, Santa
Clara, CA 95054 USA or visit http://www.sun.com if you need
additional information or have any questions.
-->
<deviceinfo version=”0.2″>
<device>
<match key=”info.subsystem” string=”pci”>
<match key=”info.product” string=”VirtualBox guest Service”>
<append key=”info.capabilities” type=”strlist”>input</append>
<append key=”info.capabilities” type=”strlist”>input.mouse</append>
<merge key=”input.x11_driver” type=”string”>vboxmouse</merge>
<merge key=”input.device” type=”string”>/dev/vboxguest</merge>
</match>
</match>
</device>
</deviceinfo>

With all that set, it is time to ensure that the custom user account is added to the wheel and operator groups using this command:

pw user mod [user name] -G wheel operator

Executing the above as root means that the custom account can run the su command so that logging in as root at the start of a desktop session no longer is needed. That is what being in the wheel group allows and the anyone in the operator group can shut down or restart the system. Both are facilities readily available in Linux so I fancied having them in FreeBSD too.

Being able to switch to root in a terminal session meant that I could go on to add software like Firefox, Libreoffice, GIMP, EMACS, Geany, Netbeans, Banshee and so on. There may be a line of opinion that FreeBSD is a server operating system but all of these make it more than passable for serving as a desktop one too. There may be no package management GUI as such and the ones that come with GNOME do not work either but anyone familiar with command line working will get around that.

FreeBSD may be conservative but that has its place too and being able to build up a system one item at a time teaches far more than getting everything already sorted in one hit. So far, there is enough documentation to get me going and I hope to see where else things go too. So far, the OS hasn’t been that intimidating and that’s good to see.

Getting VirtualBox 2.02 working on Ubuntu 8.04

10th October 2008

Seamless VirtualBox VM Application Windows on Ubuntu

Having run VirtualBox OSE (1.5.6) for a while now, I succumbed to the idea of grabbing the latest version from the VirtualBox website and putting it on my main Linux box. The idea of having 64-bit support proved irresistible and I did get OpenSolaris to start, even if its being a VMware VM meant that it stalled along the way.

To accomplish this, I needed to rid my system of all traces of the old version before 2.02 would install, with a system reboot being needed before the process of installation fully completed. Then, I fired up a Windows XP virtual machine only for it to completely freeze. The hint as to the cause came when I opened up the VM’s settings for the following message to greet me:

Could not load the Host USB Proxy Service (VERR_FILE_NOT_FOUND). The service might be not installed on the host computer.

While it didn’t stop things in their tracks when it came to accessing and changing those settings, it was a vital hint for working out what was happening. It now seems that a problem with USB port support was the cause. The fact that issuing the following command got things going for me appeared to confirm the prognosis.

sudo  mount -t usbfs /sys/bus/usb /proc/bus/usb/

Of course, not wanting to have to issue the same command over and over again, I was after a more permanent solution. That involved adding the following lines to /etc/fstab:

#usbfs

none /proc/bus/usb usbfs devgid=46,devmode=664 0 0

A reboot later, that change apparently was enough to settle the matter and I am now able to run VM’s as before. Seamless application mode is going well (the host key -- right Ctrl by default -- + L key combination is sufficient to toggle the setting on and off), even if it has a few quirks. Two that I have spotted include the usual Ubuntu screen furniture disappearing when maximised windows are displayed and the Windows taskbar appearing when two or more applications are running. That last one may be just as well because individual applications don’t get an Ubuntu taskbar icon each, which is perhaps an idea for a future enhancement. Updating Guest Additions in a VM’s doesn’t seem to change the behaviour, but any imperfections are curiosities rather than complaints given how well things run anyway, unless you decide to confound matters by closing and minimising windows, but resolving that is just a toggle away. It’s all looking good so far…

A matter of fonts…

6th November 2007

It’s when you pop from one operating system to another that you realise how operating system specific it is that fonts are. For instance, only one of the names in the following list are understood by Firefox on Ubuntu, the last one: Trebuchet MS, Lucida Grande, Verdana, Arial, Sans-Serif. The reason that San-Serif is understood is that it’s a general font class name in the world of CSS. However, that does not mean that you still are not at the mercy of operating system fonts. In fact, font sizes vary and 16px in one font isn’t the same as 16px in another; that can mean broken layouts if you are sufficiently clumsy.

As it happens, the main menu bar on my hillwalking blog should all fit on one line but it took up two lines when viewed on Linux. If it did that neatly, there wouldn’t be much of a problem but it didn’t. Some CSS hacking could have repaired the situation but I went for a simpler solution for now: picking a Linux sans serif font that fitted the bill better. So popping in mentions of "Nimbus Sans L" in appropriate places in my stylesheet was the way that I went. I don’t know how this appears in other Linux distributions but the wonders of virtualisation should allow to find out.

If I was really concerned about the fonts that were being used, I could have gone with a server-side approach: embedded fonts. I haven’t tried this for a while but differing browser support was a major issue when I did: you had to create a set of files for IE and for Netscape when I was investigating such things, hardly convenient even in those days when Opera was merely a speck on the horizon and Mozilla was nascent. It’s a valid approach for those exclusive fonts but so is questioning why you are using them in the first place. Adobe’s Flash is another option for those who obsess with fonts though how users take to this remains an open question, as does the accessibility of the approach.

I will be sticking with testing how things look in different operating systems and virtualisation is an excellent enabler of this, as are Live CD’s. The latter is particularly useful for Linux distributions which the former has application with more scenarios: names OpenSolaris and, with a spot of tinkering, OS X come to mind. It sounds like an intriguing proposition and Firefox is virtually a de facto cross-platform standard these days anyway. Mind you, seeing how websites are rendered by Safari running on OS X might be of interest to some.

Looking at from the user’s point of view rather than the web developer’s, there remains a question regarding the visiting of websites that break because of the font conundrum. If you find this happening to you a lot, it may be an idea to bring in some TrueType or OpenType fonts. With Ubuntu, this is straight forward: fire up Synaptic, search for msttcorefonts and install that package along with any of its dependencies. Logging off from and on to the system will make the new fonts available. There was a time when more work was needed than that…

Got OpenSolaris back

3rd February 2007

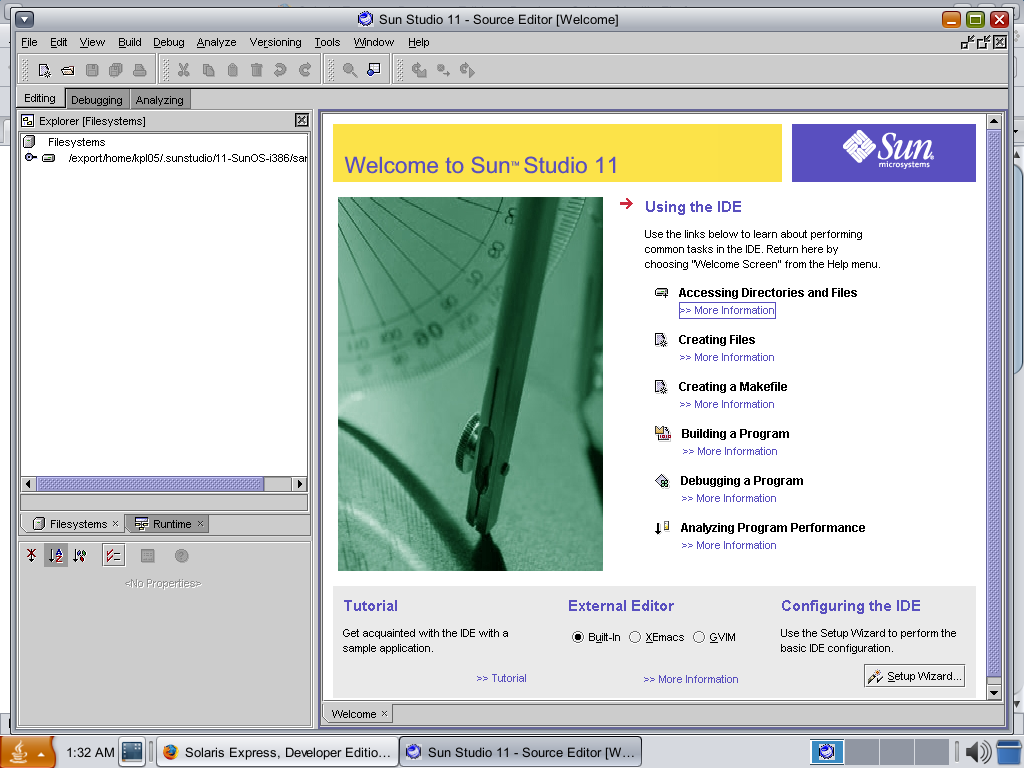
Having done a reinstallation, I have now got OpenSolaris going again in VMware and clone the VM in case I go on a wrecking spree again. I am going to leave VMware tools uninstalled for now so that I don’t encounter the display problems I previously experienced. Speaking of how it looks, I uploaded a screenshot here; the difference between how looks what its ancestor did are enormous. Having sorted the VMware/ZoneAlarm clash, networking not works as it should and I can access the web through Firefox. Now that everything is all set, the real explorations can begin.

Trying out OpenSolaris

2nd February 2007

Having been programming (mostly in SAS as it happens) on Sun’s venerable Solaris operating system platform at work since the start of this year, the chance to try OpenSolaris x86 edition in a VMware virtual machine seemed a good opportunity for advancing my skills.

Prior to this, my exposure to Solaris was when I was at university and things have moved on a bit since then, not least on the technology side but also in terms of my own skills. In those days, my mindset was fixed by exposure to macOS and Windows with their point-and-click functionality; the fact that the terminals that we were using were ancient didn’t make for a positive impression. You can see below what I mean. And the concept of tackling a command line, even one as powerful as that in UNIX, armed with a good book was somehow foreign to me.

View of old Solaris desktop

Mind you, in those pre-Safari days, getting your hands on books not in the university library was an expensive outing for the student finances. Armed with years of programming and web development experience, the UNIX command line now looks like a powerful tool to be used to the greatest advantage. Years of exposure to Perl and Linux have made the tool a less daunting one for me. Also, the availability of shell scripting makes the Windows batch file language look positively archaic. The default ksh shell (I believe that it is ksh88) in Solaris is not as friendly as it could be, but bash is available on demand, so life isn’t that uncomfortable on the command line.

To date, my experience of OpenSolaris has been brief because I wrecked the installation while trying to sort out an annoying graphics issue that appeared after installing VMware Tools (drivers for various pseudo-devices) on OpenSolaris; I have yet to put things back. The installation procedure is pretty painless for what is a technical operating system. The Community: Tools section of the OpenSolaris website has articles on installation and installation under VMware is discussed on Developer’s Quarterdeck Log.

As regards a desktop environment, you have a choice between the ubiquitous Gnome and Sun’s own CDE, of which I have seen plenty at work. As it happened, I installed the developer edition, but there are the usual Linux mainstays on the desktop: StarOffice (in place of OpenOffice), GIMP, Mozilla Firefox, etc. One thing that I wasn’t able to sort out was the internet connection, and that may be because ZoneAlarm was blacklisting VMware at the time of installation. All in all, it looked like a far friendlier environment for users than that which I encountered during my early years on UNIX. I must get it back in action and take things on from here…

VMware and ZoneAlarm

30th January 2007

Contrary to appearances given by this blog, I am not exclusively a Windows user. In fact, I have sampled Linux on a number of occasions in the past and I use VMware to host a number of different distributions – my Ubuntu installation is updating itself as I write this – as I like to keep tabs on what is out there. I also retain a Windows 2000 installation for testing and have had virtual machine hosting a test release of Vista not so long ago. I also have my finger in the UNIX world with an instance of OpenSolaris, though it is currently off my system thanks to my wrecking its graphics set up. However, ZoneAlarm has been known to get ahead of itself and start blocking VMware. If you go taking a look on the web, there is no solution to this beyond a complete system refresh (format the boot drive and reinstall everything again) and I must admit that this sounds like throwing out bath, baby and bathwater together. I did find another approach though: removing ZoneAlarm and reinstalling it. This wipes all its remembered settings, including the nefarious one that conflicted with VMware in the first place. It’s amazing that no one else has considered this but it has worked for me and having to have the security software relearn everything again is much less painless than rebuilding your system.

  • All the views that you find expressed on here in postings and articles are mine alone and not those of any organisation with which I have any association, through work or otherwise. As regards editorial policy, whatever appears here is entirely of my own choice and not that of any other person or organisation.

  • Please note that everything you find here is copyrighted material. The content may be available to read without charge and without advertising but it is not to be reproduced without attribution. As it happens, a number of the images are sourced from stock libraries like iStockPhoto so they certainly are not for abstraction.

  • With regards to any comments left on the site, I expect them to be civil in tone of voice and reserve the right to reject any that are either inappropriate or irrelevant. Comment review is subject to automated processing as well as manual inspection but whatever is said is the sole responsibility of the individual contributor.