TOPIC: RAW IMAGE FORMAT
 9th October 2021
Having had a mishap that lost me some photos in the early days of my dalliance with digital photography, I have been far more careful since then and that now applies to other files as well. Doing regular backups is a must that you find reiterated by many different authors, and the current computing climate makes doing that more vital than it ever was.
So, as well as having various local backups, I also have remote ones in the form of OneDrive, Dropbox and Google Drive. While these more correctly are file synchronisation services, disciplined use can make them useful as additional storage facilities in the interests of maintaining added resilience. There also are dedicated backup services that I have seen reviewed in the likes of PC Pro magazine, but I have to make use of those.
Insync
Part of my process for dealing with new digital photo files is to back them up to Google Drive, and I did that with a Windows client in the early days but then moved to Insync running on Linux Mint. One drawback to the approach is that this hogs the upload bandwidth of an internet connection that has yet to move to fibre from copper cabling. While having fibre connections to a local cabinet helps, a 100 KiB/s upload speed is easily overwhelmed and digital photo file sizes keep increasing. It does not help that I insist on using more flexible raw formats like DNG, CR2 or CR3 either.
While making fewer images could help to cut the load, I still come away from an excursion with many files because I get so besotted with my surroundings. This means that upload sessions take numerous hours and can extend across calendar days. Ultimately, this makes my internet connection far less usable; hence I want to throttle upload speed, much like what is possible in the Transmission BitTorrent client or in the Dropbox client. Since this is not available in Insync, I have tried using the trickle command instead, and an example is below:
trickle -d 2000 -u 50 insync
Here, the upload speed is limited to 50 KiB/s while the download speed is limited to 2000 KiB/s. In my case, the latter of these hardly matters, while the former leaves me with acceptable internet usability. Insync does not work smoothly with this, though, so occasional restarts are needed to keep file uploads progressing and CPU load also is higher. As rough as the user experience feels, uploads can continue in parallel with other work.
gdrive
One other option that I am exploring is the use of the command-line tool gdrive and this appears to work well with trickle. After downloading and installing the tool, getting going is a matter of issuing the following command and following the instructions:
gdrive about
On web servers, I even have the tool backing up things to Google Drive on a scheduled basis. Because of a Google Drive limitation that I have encountered not only with gdrive but also with Insync and Google's own Windows Google Drive client, synchronisation only happens with two new folders, one local and the other remote. Handily, gdrive supports the usual bash style commands for working with remote directories, so something like the following will create a directory on Google Drive:
gdrive mkdir ttdc [ID for parent folder]
Here, the ID for the parent folder may be omitted, though it can be obtained by going to Google Drive online and getting a link location by right-clicking on a folder and choosing the appropriate context menu item. This gets you something like the following and the required identifier is found between the last slash and the first question mark in the address string (so as not to share any real links, I made the address more general below):
https://drive.google.com/drive/folders/[remote folder ID]?usp=sharing
Then, synchronisation uses a command like the following:
gdrive sync upload [local folder or file path] [remote folder ID]
There also is the option to do a one-way upload, and this is the form of the command used:
gdrive upload [local folder or file path] -p [remote folder ID]
Because every file or folder object has its own ID on Google Drive, it is possible to create two objects on there that appear to have the same name, though that is sure to cause confusion even if you know what is happening. It is possible in each of the above to throttle them using trickle as well:
trickle -d 2000 -u 50 gdrive sync upload [local folder or file path] [remote folder ID]

trickle -d 2000 -u 50 gdrive upload [local folder or file path] -p [remote folder ID]
Handily, this works without the added drama seen with Insync and lends itself to scripting as well, so it could be something that I will incorporate into my current workflow. One thing that needs to be watched is file upload failures, but there may be ways to catch those and retry them, which would be another thing that needs doing. This is built into Insync, and it would be a learning opportunity if I were to stick with gdrive instead.
17th April 2018
Photo editing has been something that I have been doing since my first-ever photo scan in 1998 (I believe it was in June of that year but cannot be completely sure nearly twenty years later). Since then, I have been using various tools for the job and wondered how other photos can look better than my own. What cannot be excluded is my preference for being active in the middle of the day when light is at its bluest, as well as a penchant for using a higher ISO of 400. In other words, what I do when making photos affects how they look afterwards as much as the weather that I had encountered.
My reason for mentioning the above aspects of photographic craft is that they affect what you can do in photo editing afterwards, even with the benefits of technological advancement. My tastes have changed over time, so the appeal of re-editing old photos fades when you realise that you only are going around in circles and there always are new ones to share, so that may be a better way to improve.
When I started, I was a user of Paint Shop Pro but have gone over to Adobe since then. First, it was Photoshop Elements, but an offer in 2011 lured me into having Lightroom and the full version of Photoshop. Nowadays, I am a Creative Cloud photography plan subscriber, so I get to see new developments much sooner than once was the case.
Even though I have had Lightroom for all that time, I never really made full use of it and preferred a Photoshop-based workflow. Lightroom was used to select photos for Photoshop editing, mainly using adjustments for such things as tones, exposure, levels, hue and saturation. Removal of dust spots, resizing and sharpening were other parts of a still minimalist approach.
What changed all this was a day spent pottering about the 2018 Photography Show at the Birmingham NEC during a cold snap in March. That was followed by my checking out the Adobe YouTube Channel afterwards, where there were videos of the talks featured every day of the four-day event. Here are some shortcuts if you want to do some catching up yourself: Day 1, Day 2, Day 3, and Day 4. Be warned though that these videos are long in that they feature the whole day and there are enough gaps that you may wish to fast-forward through them. Even so, there is quite a bit of variety of things to see.
Of particular interest were the talks given by the landscape photographer David Noton who sensibly has a philosophy of doing as little to his images as possible. It helps that his starting points are so good that adjusting black and white points with a little tonal adjustment does most of what he needs. Vibrancy, clarity and sharpening adjustments are kept to a minimum, while some work with graduated filters evens out exposure differences between skies and landscapes. It helps that all this can be done in Lightroom, so that set me thinking about trying it out for size, and the trick of using the backslash () key to switch between raw and processed views is a bonus granted by non-destructive editing. Others may have demonstrated the creation of composite imagery, but simplicity is more like my way of working.
It is confusing that we now have cloud-based Lightroom CC, while the previous desktop version is called Lightroom Classic CC. Although the former offers easy dust spot removal and other features, I prefer the latter because I do not want to upload my entire image library, and I already use Google Drive and Dropbox for off-site backup. The mobile app is interesting since it allows capturing images on mobile devices in Adobe's raw DNG format. My workflow is now more Lightroom-based than before, and I appreciate the new technology, especially as Adobe develops its Sensai artificial intelligence engine. Because Adobe has access to numerous images through Lightroom CC and Adobe Stock (formerly Fotolia), it has abundant data to train this AI system.
8th June 2016
At the time of writing, Google Drive is unable to accept DNG files, the Adobe file type for RAW images from digital cameras. While the uploads themselves work fine, the additional processing at the end that, I believe, is needed for Google Photos appears to be failing. Because of this, I thought of other possibilities like uploading them to Dropbox or enclosing them in ZIP archives instead; of these, it is the first that I have been doing and with nothing but success so far. Another idea is to convert the files into an image format that Google Drive can handle, and TIFF came to mind because it keeps all the detail from the original image. In contrast, JPEG files lose some information because of the nature of the compression.
Handily, a one line command does the conversion for all files in a directory once you have all the required software installed:
find -type f | grep -i "DNG" | parallel mogrify -format tiff {}
The find and grep commands are standard, with the first getting you a list of all the files in the current directory and sending (piping) these to the grep command, so the list only retains the names of all DNG files. The last part uses two commands for which I found installation was needed on my Linux Mint machine. The parallel package is the first of these and distributes the heavy workload across all the cores in your processor, and this command will add it to your system:
sudo apt-get install parallel
The mogrify command is part of the ImageMagick suite along with others like convert and this is how you add that to your system:
sudo apt-get install imagemagick
In the command at the top, the parallel command works through all the files in the list provided to it and feeds them to mogrify for conversion. Without the use of parallel, the basic command is like this:
mogrify -format tiff *.DNG
In both cases, the -format switch specifies the output file type, with the tiff portion triggering the creation of TIFF files. The *.DNG portion itself captures all DNG files in a directory, but {} does this in the main command at the top of this post. If you wanted JPEG ones, you would replace tiff with jpg. Should you ever need them, a full list of what file types are supported is produced using the identify command (also part of ImageMagick) as follows:
identify -list format
12th July 2013
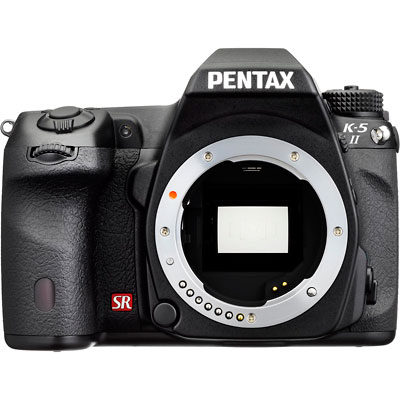
Since 2007, I've used a Pentax K10D DSLR as my main camera. It has travelled with me extensively, capturing over 15,000 images and serving reliably. Though its autofocus isn't the fastest, this doesn't matter for my typical subjects: landscapes, architecture, flora and transport (stationary buses and trains, for instance). Any slight underexposure in photos can be easily fixed since I shoot in DNG format, which preserves all raw image data. The camera has performed so well that I've found it difficult to justify buying a new SLR.
Lately, I have been looking at processed photos and asking myself if time has moved along for what is not far from being a six-year-old camera. At various times, I have been looking at higher members of the Pentax while wondering if an upgrade would be a good idea. First, there was the K7 and then the K5 before the K5 II got launched. Even though its predecessor is still to be found on sale, it was the newer model that became my choice.
My move to Pentax in 2007 was a case of brand disloyalty, since I had been a Canon user from when I acquired my first SLR, an EOS 300. Even now, I still have a PowerShot G11 that finds itself slipped into a pocket on many a time. Nevertheless, I find that Canon images feel a little washed out before post-processing, and that hasn't been the case with the K10D. In fact, I have been hearing good things about Nikon cameras delivering punchy results, so one of them would be a contender were it not for how well the Pentax performed.
So, what has my new K5 II body gained me that I didn't have before? For one thing, the autofocus is a major improvement on that in the K10D. It may not stop me persevering with manual focusing for most of the time, but there are occasions the option of solid autofocus is good to have. Other advances include a 16.3 megapixel sensor with a much larger ISO range. The advances in sensor technology since when the K10D appeared may give me better quality photos, and noise is something that my eyes may have begun to detect in K10D photos even at my usual ISO of 400.
Some features will not get used, though. While I rely on Live View with my PowerShot G11 due to its poor optical viewfinder, I rarely use it on the K5 II with its bright, sharp viewfinder, especially after noticing unreliable autofocus when using it (though manual focusing should work fine). By default, the screen stays on constantly, which irritated me as an optical viewfinder user, so I consulted the manual to turn it off. Similarly, I quickly abandoned the image level display. However, I've kept the horizon autocorrection feature enabled, as it helps fix the crooked horizons that often result from handheld shooting.
The K5 II may have a 3" screen on its back, but it has done nothing to increase the size of the camera. If anything, it is smaller than the K10D, and that usefully means that I am not on the lookout for a new camera holster. Not having a bigger body also means there is little change in how the much camera feels in the hand compared with the older one.
In many ways, the K5 II works very like the K10D once I took control over settings that didn't suit me. Both have Shake Reduction in their camera bodies, though the setting has been moved into the settings menu in the new camera, when the older one had a separate switch on its body. Since I'd be inclined to leave it on all the time and prefer not to have it knocked off accidentally, this is not an issue. Otherwise, many of the various switches are in the same places, so it's not that difficult to find my way around them.
The K5 II includes other changes, like a mode dial lock, but I'm familiar with this feature from Canon EOS cameras, so it doesn't feel like a downgrade. The exposure compensation button has been relocated to the top of the camera, making it easier to find and use; I'm using it more than I did on the K10D. Since I also use this feature on my G11, I'm applying similar experimentation to the K5 II. Next to it is a new ISO button, which I plan to test to see how it performs.
My main criticism of the K5 II is its cluttered menu system. The K10D's long scrollable lists have been replaced with multiple tabs that eliminate on-screen scrolling. However, I think this fragments the interface too much and makes navigating settings more intimidating for less technical users. Essential settings remain accessible; I continue using RAW DNG files as usual, though JPEG and Pentax's proprietary RAW format are also available. After initially forgetting to set the date, I quickly fixed this. Similarly, I disabled the default setting that stores files in date-based folders, instead directing everything to a single PENTX directory to match my workflow. Recently, I discovered the option to add photographer and copyright information to image file metadata. This seems particularly useful given proposed U.K. legislation that would weaken automatic copyright protections, even though most photographers oppose these legal changes.
A camera's true value lies in the quality of its images, and I'm pleased with what the K5 II produces. The larger file sizes mean fewer images fit on a memory card, though increased SDHC capacities help offset this, even as I avoid excessive shooting. While using the camera, I was surprised to find apertures like F/14 and F/18, as I was used to values like F/11, F/13, F/16, F/19, and F/22. Most traditional values remain available, so there's not a complete departure from convention. Similarly with shutter speeds, I noticed 1/100 and 1/160 where I expected only 1/90, 1/125, and 1/250. These additional options provide more flexibility and potentially make achieving correct exposures easier, though what constitutes "correct" should be determined by the photographer, not the camera's algorithms. So far, I've mostly used ISO 400, except for some evening woodland testing shortly after getting the camera.
While I've been meaning to share my thoughts on the K5 II since acquiring it a few months ago, I needed time to organize my ideas. Initially, I felt overwhelmed by how much there was to say, even more than what you've read here. There are still features to explore, like white balance adjustments and their effect on image quality. After discovering its shake reduction was switched off, I'm also reconsidering my K10D, especially since this might explain the quality issues I mentioned earlier. Using my tripod more consistently would be another improvement. Clearly, I have many more photographic explorations ahead.
18th January 2010
One of the consequences of buying a new camera is that your current photo processing software may not be fully equipped for the job of handling the images that it creates. This especially manifests itself with raw image files; Adobe Photoshop Elements 5 was unable to completely handle DNG files made with my Pentax K10D until I upgraded to version 7.
As things stood, Elements 7 was unable to import CR2 files from my Canon PowerShot G11 into the Organiser, so it was off to the appropriate page on the Adobe website for a Camera Raw updater. Thus, I picked up the latest release of Camera Raw (5.6 at the time of writing) even though it was found in the Elements 8 category (don't be put by this because release notes address the version compatibility question more extensively).
Strangely, the updater doesn't complete everything because you still need to copy Camera Raw.8bi from the zip archive and backup the original. Quite why this couldn't have been more automated, even with user prompts for file names and locations, is beyond me, yet that is how it is. However, once all was in place, CR2 files were handled by Elements without missing a beat.
2nd November 2009
A little while, I encountered a problem with ImageMagick processing DNG files in Ubuntu 9.04. Not realising that I could solve me own problem by editing a file named delegates.xml, I took to getting a Debian VM to do the legwork for me. That's where you'll find all the commands used when helper software is used by ImageMagick to help it on its way. On its own, ImageMagick cannot deal with DNG files, so the command line variant of UFRaw (itself a front end for DCRaw) is used to create a PNM file that ImageMagick can handle. The problem a few months back was that the command in delegates.xml wasn't appropriate for a newer version of UFRaw and I got it into my head that things like this were hard-wired into ImageMagick. Now, I know better and admit my error.
With 9.10, it appears that the command in delegates.xml has been corrected, only for another issue to raise its head. UFRaw 0.15, it seems, isn't the speediest when it comes to creating PNM files and, while my raw file processing script works after a spot of modification to deal with changes in output from the identify command used, it takes far too long to run. Since GIMP also uses UFRaw, I wonder if the same problem has surfaced there too. However, it has been noticed by the Debian team, with the outcome being that they have a package for version 0.16 of the software in their unstable branch that looks as if it has sorted the speed issue. However, I am seeing that 0.15 is in the testing branch, which tempts me to stick with Lenny (5.x) if any successor turns out to have slower DNG file handling with ImageMagick and UFRaw. In my estimation, 0.13 does what I need, so why go for a newer release if it turns out to be slower?
12th October 2009
It now seems that we have a new version of Photoshop Elements from Adobe for every year, unless you're a Mac user. Version 7 convinced me to splash out and that gained me Camera Raw recognition of my Pentax K10D along with subtly enhanced image processing power that I have been putting to good use to get more pleasing results than I ever got before.
What can be achieved by using levels, curves and the shadow/highlight adjustment tool for exposure correction has amazed me recently. Quick selection functionality has allowed me to treat skies differently from everything else in landscape photos, a flexible graduated filter if you like. It seems to work on Windows 7 along with Vista and XP, so I plan to stick with it for a while yet.
As you may have gathered from this, it would take some convincing to make me upgrade and, for me, version 8 doesn't reach that mark. All in all, it appears that it is a way of giving Mac users a new release with added goodness after having to stay with 6 for so long; yes, there are new features like automatic tagging in the image organiser, but they just don't grab me. Given that they already have Aperture from Apple and Windows users seem to get more releases, it's a wonder that any Mac user would toy with Elements anyway. Maybe, that's Adobe's suspicion, too.
9th January 2008
Since Google's Picasa is now available for Linux, I decided to give it a spin. The availability of downloadable DEB packages made installation a piece of cake. It has been ported using WINE, which means that the look and feel is very much of the Windows world. The functionality is similar too, which means that it can seek out image files on your PC. However, it didn't find any DNG files for me, a surprise when DNG could become the standard raw camera format for digital imaging. In contrast, the lack of support for proprietary formats like Canon's CRW might be understandable. Because I like to review the raw image files before committing to editing them, Picasa will not suffice for this purpose, leading me to stick with what I already use.
14th March 2007
If you ever go into a bricks and mortar newsagent and peruse its shelves with an eye out for references to data imaging software, you might find Adobe’s Photoshop as predominant there as it is in the digital imaging world. And the same trend seems to continue in to the bricks and mortar bookshops as well. Online, especially within the vaults of Amazon, it is not as much a matter of what gets stocked as what gets published, and my impression is that the bias, if that’s the right word, continues there. That said, I didn’t realise until recently that Elsevier’s Focal Press has been covering Paint Shop Pro, once branded the poor man’s Photoshop, from at least version 7. That discovery, if it had come earlier, may have made a big difference to how I have been using PSP. Saying that, I have seen some opinions that PSP is easy to use and that may explain the lack of attention from publishers. While Future Publishing did put out a monthly guide to PSP, that seems to have disappeared from the shelves, which it does lend weight to that argument. Or it could have been Corel’s purchase of JASC that changed things…
Of course, without books and magazines, it is not as easy to see the possibilities, and it is here where Photoshop really scores. The digital photography revolution has ensured the software’s escape from the world of computing and the digital arts into photography magazines and beyond. These days, even conventional photography titles feature Photoshop how-to articles. In fact, such is the level of digital content in titles such as Photography Monthly, Practical Photography and Outdoor Photography that you hardly need to pursue the specialist digital photography titles at all.
Speaking of photography, this is and has been my main use of digital imaging technology, be it the scanner that I use for digitising the output of my efforts in film photography or processing RAW files from my digital SLR. I have been using scanners since 1998 and am on my second, a CanoScan 5000F. The colour rendition in the output from its predecessor, a UMAX 1212U, deteriorated to the point where a replacement needed to be sought. As it happened, the Canon turned out to be light years ahead of the UMAX, even with the latter operating properly. Incidentally, my first scanning outing was in the then current version of Photoshop (I booked some time on a scanner at the graphics centre of the university I was attending at the time and sneaked in the scanning of a photo with the journal graphic that I needed to do) - a limited affair, it has to be said - but I then reverted to things like Corel PhotoPaint and Paint Shop Pro. And PSP was what I was using in the main, even after encountering the copy of Photoshop Elements 2 bundled with my EOS 10D. Though Elements’ cloning capabilities did tempt me though, and I did acquire a Focal Press volume on the application, I somehow never took it further.
At the end of last year, Corel and Adobe launch new versions of PSP and Elements, respectively. That got me tempted by the idea of giving the whole business another look, this time in detail. My look at PSP XI regrettably suffered from the lack of time that I could devote to it and seeing what a book on it might have to say. I had more of a chance with Photoshop Elements and came away impressed with the way that it worked. Since then, I have been making my way through Scott Kelby’s latest Elements book and the ideas are building up. At the same time, I have been making good use of a Photoshop CS2 try-out, and I am on the horns of a dilemma: do I splash out on CS2, do I get Elements 5 or do I await the now imminent CS3? You’ll notice that PSP doesn’t feature here; the amount of literature pertaining to Photoshop simply is too much to ignore, and I have loads more to learn.
8th March 2007

Currently, I am in the process of adding new photos to my online photo gallery, and the exercise is giving my Photoshop CS2 trial version a good amount of use. And the experience also adding a few strings to my bow in graphics editing terms, something that is being helped along by the useful volume that is The Focal Easy Guide to Photoshop CS2.
The most significant change that has happened is that to my workflow. Previously, it took the following form:
- Acquire image from scanner/camera
- For a camera image, do some exposure compensation
- Create copy of image in software’s own native file format (PSPIMAGE/PSP for Paint Shop Pro and PSD/PSB for Photoshop)
- Clean up image with clone stamp tool: removes scanner artefacts or sensor dust from camera images; I really must get my EOS 10D cleaned (the forecast for the coming weekend is hardly brilliant, so I might try sending it away).
- Save a new version of the image following clean-up.
- Reduce the size of the digital camera image to 600×400 and create a new file.
- Boost colours of original image with hue/saturation/lightness control; save new version of file.
- Sharpen the image and save another version.
- For web images, save a new file with a descriptive name
- Create JPEG version
- Copy JPEG to Apache web server folders
- Create thumbnail from original JPEG
The new workflow is based upon this:
- Acquire image from scanner/camera
- For a camera image, do some exposure compensation; there is a lot of pre-processing that you can do in Camera Raw
- Create a copy of image in software’s own native file format
- Clean up the image with the clone stamp tool and create a new file with _cleaned as its filename suffix. I tried the spot healing brush but didn’t seem to have that much success with it. Maybe I need to try again…
- Add adjustment layer for level correction and save file with _level suffix in its name.
- Add adjustment layer for curves correction
- Add adjustment layer for boosting colours with hue/saturation/lightness control
- Flatten layers and save new image with _flatten suffix in its name
- Sharpen flattened image and create a new version with _sharpened suffix in its name
- For web images, save a new file with a descriptive name
- Create JPEG versions in Apache web server folders; carry out any resizing using bi-cubic sharpening at this point.
Some improvements remain. For instance, separation of raw, intermediate and final photos by storing them in different directories is perhaps one possibility that I should consider. But there are other editing tricks that I have yet to use as well: merged and blended layers. Bi-cubic smoothing for expanding images is another possibility, but it is one that requires a certain amount of caution. And I am certain that I will encounter others as I make my way through my reading.