TOPIC: POWERSHELL
How to persist R packages across remote Windows server sessions
Recently, I was using R to automate some code changes that needed implementation when porting code from a vendor to client systems. While I was doing so, I noticed that packages needed to be reinstalled every time that I logged into their system. This was because they were going into a temporary area by default. The solution was to define another location where the packages could be persisted.
That meant creating a .Renviron file, with Windows Explorer making that manoeuvre an awkward one that could not be completed. Using PowerShell was the solution for this. There, I could use the following command to do what I needed:
New-Item -ItemType File "$env:USERPROFILE\Documents\.Renviron" -Force
That gave me an empty .Renviron file, to which I could add the following text for where the packages should be kept (the path may differ on your system):
R_LIBS_USER=C:/R/packages
Here, the paths are only examples and do not always represent what the real ones were, and that is by design for reasons of client confidentiality. Restarting RStudio to give me a fresh R session meant that I now could install packages using commands like this one:
install.packages("tidyverse")
Version constraints meant for compilation from source in my case, making for a long wait time for completion. Once that was done, though, there was no need for a repeat operation.
One final remark is that file creation and population could be done in the same command in PowerShell:
'R_LIBS_USER=C:/R/packages' | Out-File -Encoding ascii "$env:USERPROFILE\Documents\.Renviron"It places the text into a new file or completely overwrites an existing, meaning that you really want to do this once should you decide to add any more setting details to .Renviron later on.
Not so fast: When tasks using AI may take more time and attention than you expect
If you believed all the hype that surrounds AI, you might believe that all of us would out of work before we knew it. The truth is that the new technology is not that miraculous, especially when based on some experiences that I have been having. Firstly, there are deficiencies and then there will be new things that need doing as well as becoming possible for the first time.
PowerShell Scripting
One pertained to spinning up PowerShell scripts for doing code reviews of SAS programs submitted by a vendor to a client of mine. While all worked well for simple cases, I found that more complex tasks like finding the datasets using in code and comparing them against what is listed in the program headers became too complicated and probably needed a week of my time to get things in order, which was the amount of time that I did not have.
Picking out macro calls from code and comparing them against lists in the headers was more successful because the code situations were less variable. Other tasks were really handy, though, even if I would benefit from AI teaching me how to write PowerShell scripts by myself. That would give me more scope to critique the code that was being produced. Starting simple and progressing one step at a time would ensure sounder embedding of PowerShell commands in my memory.
Article Writing
It is all too tempting to get AI to write articles on subjects of your choosing for website content production. That which sounds like a labour-saving way to go can command a higher amount of attention than some realise. Sometimes, writing it all by yourself might be a better approach, one that I am using for this piece.
My workflow often involves these steps when AI is involved: assembly of the source material, conversion of source material into an article by one AI, fact checking of the same text by another AI and restructuring by that second AI with added links for those wanting to find out more. While human content production is reduced, the need for human oversight, along with fact and link checking, means that time is used in other ways.
In short, it is best not to rush this, as I found when assembling two articles on Canadian rail travel. You also need to watch how much content is being processed because that can both overwhelm human bandwidth and undermine human engagement. This is more than proofreading of what is produced; you need to know something about a given subject yourself too.
Image Production
While AI can do well with producing some images, there are ones where it will struggle because of lack of training. An example is when I asked for an image with cyclists placing bicycles on a bus before boarding it. None of the generated images worked, meaning that a trip to a stock library was in order.
While some can specify everything in a prompt at one sitting, I work more iteratively, which probably adds to any task, especially with image generation. It proves that still is a place for stock libraries and having your own personal library as well. We need to remain as orchestrators in all of this, and lack of personal talent can remain a limitation.
System Administration
While this may not be something that I do professionally, my keeping an eye on the worlds of DevOps and DevSecOps means that I am seeing that the presence of AI is adding work of its own. This has no sign of lessening, proving that work is changing dramatically instead of reducing, especially you bring Agentic AI into the equation.
It feels much like the advent of personal computing and that produced a similar seismic shift in the workplace in more innocent times. This time around, nefarious actors are misusing AI, a not unexpected if ominous trend, adding to the security woes that have beset computing for a few decades now.
A Human in the Loop?
At a recent conference, much was being made of keeping humanity in the loop when it came to using AI. There is a catch, though: how do we have engaged humans in the loop? After all, creating computer code allows one to get into flow and remain engaged, possibly overriding any feelings of fatigue. This is what needs replicating, hardly an experience reported with automation in other professions.
The use of AI is a developing field, bringing new challenges as well as solving old problems. That also means upskilling on a grand scale, something happened over time with personal and business computing. While it looks as if the process could be faster this time around, it is too early to know enough about where this revolution is going to take us. That may be enough to keep us engaged.
Installing PowerShell on Linux Mint for some cross-platform testing
Given how well shell scripting works on Linux and my familiarity with it, the need to install PowerShell on a Linux system may seem surprising. However, this was part of some testing that I wanted to do on a machine that I controlled before moving the code to a client's system. The first step was to ensure that any prerequisites were in place:
sudo apt update

sudo apt install -y wget apt-transport-https software-properties-common
After that, the next moves were to download and install the required package for instating Microsoft repository details:
wget -q https://packages.microsoft.com/config/ubuntu/24.04/packages-microsoft-prod.deb

sudo dpkg -i packages-microsoft-prod.deb
Then, I could install PowerShell itself:
sudo apt update

sudo apt install -y powershell
When it was in place, issuing the following command started up the extra shell for what I needed to do:
pwsh
During my investigations, I found that my local version of PowerShell was not the same as on the client's system, meaning that any code was not as portable as I might have expected, Nevertheless, it is good to have this for future reference and proves how interoperable Microsoft has needed to become.
Some PowerShell fundamentals for practical automation
In the last few months, I have taken to using PowerShell for automating tasks while working on a new contract. There has been an element of vibe programming some of the scripts, which is why I wished to collate a reference guide that anyone can have to hand. While working with PowerShell every day does help to reinforce the learning, it also helps to look up granular concepts on a more bite-sized level. This especially matters given PowerShell's object-oriented approach. After all, many of us build things up iteratively from little steps, which also allows for more flexibility. Using an AI is all very well, yet the fastest recall is always from your on head.
1. Variables and Basic Data Types
Variables start with a dollar sign and hold values you intend to reuse, so names like $date, $outDir and $finalDir become anchors for later operations. Dates are a frequent companion in filenames and logs, and PowerShell's Get-Date makes this straightforward. A format string such as Get-Date -Format "yyyy-MM-dd" yields values like 2025-10-27, while Get-Date -Format "yyyy-MM-dd HH:mm:ss" adds a precise timestamp that helps when tracing the order of events. Because these commands return text when a format is specified, you can stitch the results into other strings without fuss.
2. File System Operations
As soon as you start handling files, you will meet a cluster of commands that make navigation robust rather than fragile. Join-Path assembles folder segments without worrying about stray slashes, Test-Path checks for the existence of a target, and New-Item creates folders when needed. Moving items with Move-Item keeps the momentum going once the structure exists.
Environment variables give cross-machine resilience; reading $env:TEMP finds the system's temporary area, and [Environment]::GetFolderPath("MyDocuments") retrieves a well-known Windows location without hard-coding. Setting context helps too, so Set-Location acts much like cd to make a directory the default focus for subsequent file operations. You can combine these approaches, as in cd ([Environment]::GetFolderPath("MyDocuments")), which navigates directly to the My Documents folder without hard-coded paths.
Scripts are often paired with nearby files, and Split-Path $ScriptPath -Parent extracts a parent folder from a full path so you can create companions in the same place. Network locations behave like local ones, with Universal Naming Convention paths beginning \ supported throughout, and Windows paths do not require careful case matching because the file systems are generally case-insensitive, which differs from many Unix-based systems. Even simple details matter, so constructing strings such as "$Folder*" is enough for wildcard searches, with backslashes treated correctly and whitespace handled sensibly.
3. Arrays and Collections
Arrays are created with @() and make it easy to keep related items together, whether those are folders in a $locs array or filenames gathered into $progs1, $progs2 and others. Indexing retrieves specific positions with square brackets, so $locs[0] returns the first entry, and a variable index like $outFiles[$i] supports loop counters.
A single value can still sit in an array using syntax such as @("bm_rc_report.sas"), which keeps your code consistent when functions always expect sequences. Any collection advertises how many items it holds using the Count property, so checking $files.Count equals zero tells you whether there is anything to process.
4. Hash Tables
When you need fast lookups, a hash table works as a dictionary that associates keys and values. Creating one with @{$locs[0] = $progs1} ties the first location to its corresponding programme list and then $locsProgs[$loc] retrieves the associated filenames for whichever folder you are considering. This is a neat stepping stone to loops and conditionals because it organises data around meaningful relationships rather than leaving you to juggle parallel arrays.
5. Control Flow
Control flow is where scripts begin to feel purposeful. A foreach loop steps through the items in a collection and is comfortable with nested passes, so you might iterate through folders, then the files inside each folder, and then a set of search patterns for those files. A for loop offers a counting pattern with initialisation, a condition and an increment written as for ($i = 0; $i -lt 5; $i++). It differs from foreach by focusing on the numeric progression rather than the items themselves.
Counters are introduced with $i = 0 and advanced with $i++, which in turn blends well with array indexing. Conditions gate work to what needs doing. Patterns such as if (-not (Test-Path ...)) reduce needless operations by creating folders only when they do not exist, and an else branch can note alternative outcomes, such as a message that a search pattern was not found.
Sometimes there is nothing to gain from proceeding, and break exits the current loop immediately, which is an efficient way to stop retrying once a log write succeeds. At other times it is better to skip just the current iteration, and continue moves directly to the next pass, which proves useful when a file list turns out to be empty for a given pattern.
6. String Operations
Strings support much of this work, so several operations are worth learning well. String interpolation allows variables to be embedded inside text using "$variable" or by wrapping expressions as "$($expression)", which becomes handy when constructing paths like "psoutput$($date)".
Splitting text is as simple as -split, and a statement such as $stub, $type = $File -split "." divides a filename around its dot, assigning the parts to two variables in one step. This demonstrates multiple variable assignment, where the first part goes to $stub and the second to $type, allowing you to decompose strings efficiently.
When transforming text, the -Replace operator substitutes all occurrences of one pattern with another, and you can chain replacements, as in -replace $Match, $Replace -replace $Match2, $Replace2, so each change applies to the modified output of the previous one.
Building new names clearly is easier with braces, as in "${stub}_${date}.txt", which prevents ambiguity when variable names abut other characters. Escaping characters is sometimes needed, so using "." treats a dot as a literal in a split operation. The backtick character ` serves as PowerShell's escape character and introduces special sequences like a newline written as `n, a tab as `t and a carriage return as `r. When you need to preserve formatting across lines without worrying about escapes, here-strings created with @" ... "@ keep indentation and line breaks intact.
7. Pipeline Operations
PowerShell's pipeline threads operations together so that the output of one command flows to the next. The pipe character | links each stage, and commands such as ForEach-Object (which processes each item), Where-Object (which filters items based on conditions) and Sort-Object -Unique (which removes duplicates) become building blocks that shape data progressively.
Within these blocks, the current item appears as $_, and properties exposed by commands can be read with syntax like $_.InputObject or $_.SideIndicator, the latter being especially relevant when handling comparison results. With pipeline formatting, you can emit compact summaries, as in ForEach-Object { "$($_.SideIndicator) $($_.InputObject)" }, which brings together multiple properties into a single line of output.
A multi-stage pipeline filtering approach often follows three stages: Select-String finds matches, ForEach-Object extracts only the values you need, and Where-Object discards anything that fails your criteria. This progressive refinement lets you start broad and narrow results step by step. There is no compulsion to over-engineer, though; a simplified pipeline might omit filtering stages if the initial search is already precise enough to return only what you need.
8. Comparison and Matching
Behind many of these steps sit comparison and matching operators that extend beyond simple equality. Pattern matching appears through -notmatch, which uses regular expressions to decide whether a value does not fit a given pattern, and it sits alongside -eq, -ne and -lt for equality, inequality and numeric comparison.
Complex conditions chain with -and, so an expression such as $_ -notmatch '^%macro$' -and $_ -notmatch '^%mend$' ensures both constraints are satisfied before an item passes through. Negative matching in particular helps exclude unwanted lines while leaving the rest untouched.
9. Regular Expressions
Regular expressions define patterns that match or search for text, often surfacing through operators such as -match and -replace. Simple patterns like .log$ identify strings ending with .log, while more elaborate ones capture groups using parentheses, as in (sdtm.|adam.), which finds two alternative prefixes.
Anchors matter, so ^ pins a match to the start of a line and $ pins it to the end, which is why ^%macro$ means an entire line consists of nothing but %macro. Character classes provide shortcuts such as w for word characters (letters, digits or underscores) and s for whitespace. The pattern "GRCw*" matches "GRC" followed by zero or more word characters, demonstrating how * controls repetition. Other quantifiers like + (one or more) and ? (zero or one) offer further control.
Escaping special characters with a backslash turns them into literals, so . matches a dot rather than any character. More complex patterns like '%(m|v).*?(?=[,(;s])' combine alternation with non-greedy matching and lookaheads to define precise search criteria.
When working with matches in pipelines, $_.Matches.Value extracts the actual text that matched the pattern, rather than returning the entire line where the match was found. This proves essential when you need just the matching portion for further processing. The syntax can appear dense at first, but PowerShell's integration means you can test patterns quickly within a pipeline or conditional, refining as you go.
10. File Content Operations
Searching file content with Select-String applies regular expressions to lines and returns match objects, while Out-File writes text to files with options such as -Append and -Encoding UTF8 to control how content is persisted.
11. File and Directory Searching
Commands for locating files typically combine path operations with filters. Get-ChildItem retrieves items from a folder, and parameters like -Filter or -Include narrow results by pattern. Wildcards such as * are often enough, but regular expressions provide finer control when integrated with pipeline operations. Recursion through subdirectories is available with -Recurse, and combining these techniques allows you to find specific files scattered across a directory tree. Once items are located, properties like FullName, Name and LastWriteTime let you decide what to do next.
12. Object Properties
Objects exposed by commands carry properties that you can access directly. $File.FullName retrieves an absolute path from a file object, while names, sizes and modification timestamps are all available as well. Subexpressions introduced with $() evaluate an inner expression within a larger string or command, which is why $($File.FullName) is often seen when embedding property values in strings. However, subexpressions are not always required; direct property access works cleanly in many contexts. For instance, $File.FullName -Replace ... reads naturally and works as you would expect because the property access is unambiguous when used as a command argument rather than embedded within a string.
13. Output and Logging
Producing output that can be read later is easier if you apply a few conventions. Write-Output sends structured lines to the console or pipeline, while Write-Warning signals notable conditions without halting execution, a helpful way to flag missing files. There are times when command output is unnecessary, and piping to Out-Null discards it quietly, for example when creating directories. Larger scripts benefit from consistency and a short custom function such as Write-Log establishes a uniform format for messages, optionally pairing console output with a line written to a file.
14. Functions
Functions tie these pieces together as reusable blocks with a clear interface. Defining one with function Get-UniquePatternMatches { } sets the structure, and a param() block declares the inputs. Strongly typed parameters like [string[]] make it clear that a function accepts an array of strings, and naming parameters $Folder and $Pattern describes their roles without additional comments.
Functions are called using named parameters in the format Get-UniquePatternMatches -Folder $loc -Pattern '(sdtm.|adam.)', which makes the intent explicit. It is common to pass several arrays into similar functions, so a function might have many parameters of the same type. Using clear, descriptive names such as $Match, $Replace, $Match2 and $Replace2 leaves little doubt about intent, even if an array of replacement rules would sometimes reduce repetition.
Positional parameters are also available; when calling Do-Compare you can omit parameter names and rely on the order defined in param(). PowerShell follows verb-noun naming conventions for functions, with common verbs including Get, Set, New, Remove, Copy, Move and Test. Following this pattern, as in Multiply-Files, places your code in the mainstream of PowerShell conventions.
It is worth avoiding a common pitfall where a function declares param([string[]]$Files) but inadvertently reads a variable like $progs from outside the function. PowerShell allows this via scope inheritance, where functions can access variables from parent scopes, but it makes maintenance harder and disguises the function's true dependencies. Being explicit about parameters creates more maintainable code.
Simple functions can still do useful work without complexity. A minimal function implementation with basic looping and conditional logic can accomplish useful tasks, and a recurring structure can be reused with minor revisions, swapping one regular expression for another while leaving the looping and logging intact. Replacement chains are flexible; add as many -replace steps as are needed, and no more.
Parameters can be reused meaningfully too, demonstrating parameter reuse where a $Match variable serves double duty: first as a filename filter in -Include, then as a text pattern for -replace. Nested function calls tie output and input together, as when piping a here-string to Out-File (Join-Path ...) to construct a file path at the moment of writing.
15. Comments
Comments play a quiet but essential role. A line starting with # explains why something is the way it is or temporarily disables a line without deleting it, which is invaluable when testing and refining.
16. File Comparison
Comparison across datasets rounds out common tasks, and Compare-Object identifies differences between two sets, telling you which items are unique to each side or shared by both. Side indicators in the output are compact: <= shows the first set, => the second, and == indicates an item present in both.
17. Common Parameters
Across many commands, common parameters behave consistently. -Force allows operations that would otherwise be blocked and overwrites existing items without prompting in contexts that support it, -LiteralPath treats a path exactly as written without interpreting wildcards, and -Append adds content to existing files rather than overwriting them. These options smooth edges when you know what you want a command to do and prefer to avoid interactive questions or unintended pattern expansion.
18. Advanced Scripting Features
A number of advanced features make scripts sturdier. Automatic variables such as $MyInvocation.MyCommand.Path provide information about the running script, including its full path, which is practical for locating resources relative to the script file. Set-StrictMode -Version Latest enforces stricter rules that turn common mistakes into immediate errors, such as using an uninitialised variable or referencing a property that does not exist. Clearing the console at the outset with Clear-Host gives a clean slate for output when a script begins.
19. .NET Framework Integration
Integration with the .NET Framework extends PowerShell's reach, and here are some examples. For instance, calling [System.IO.Path]::GetFileNameWithoutExtension() extracts a base filename using a tested library method. To gain more control over file I/O, [System.IO.File]::Open() and System.IO.StreamWriter expose low-level handles that specify sharing and access modes, which can help when you need to coordinate writing without blocking other readers. File sharing options like [System.IO.FileShare]::Read allow other processes to read a log file while the script writes to it, reducing contention and surprises.
20. Error Handling
Error handling deserves a clear pattern. Wrapping risky operations in try { } catch { } blocks captures exceptions, so a script can respond gracefully, perhaps by writing a warning and moving on. A finally block can be added for clean-up operations that must run regardless of success or failure.
When transient conditions are expected, a retry logic pattern is often enough, pairing a counter with Start-Sleep to attempt an operation several times before giving up. Waiting for a brief period such as Start-Sleep -Milliseconds 200 gives other processes time to release locks or for temporary conditions to clear.
Alongside this, checking for null values keeps assumptions in check, so conditions like if ($null -ne $process) ensure that you only read properties when an object was created successfully. This defensive approach prevents cascading errors when operations fail to return expected objects.
21. External Process Management
Managing external programmes is a common requirement, and PowerShell's Start-Process offers a controlled route. Several parameters control its behaviour precisely:
The -Wait parameter makes PowerShell pause until the external process completes, essential for sequential processing where later steps depend on earlier ones. The -PassThru parameter returns a process object, allowing you to inspect properties like exit codes after execution completes. The -NoNewWindow parameter runs the external process in the current console rather than opening a new window, keeping output consolidated. If a command expects the Command Prompt environment, calling it via cmd.exe /c $cmd integrates cleanly, ensuring compatibility with programmes designed for the CMD shell.
Exit codes reported with $process.ExitCode indicate success with zero and errors with non-zero values in most tools, so checking these numbers preserves confidence in the sequence of steps. The script demonstrates synchronous execution, processing files one at a time rather than in parallel, which can be an advantage when dependencies exist between stages or when you need to ensure ordered completion.
22. Script Termination
Scripts need to finish in a way that other tools understand. Exiting with Exit 0 signals success to schedulers and orchestrators that depend on numeric codes, while non-zero values indicate error conditions that trigger alerts or retries.
Bringing It All Together
Because this is a granular selection, it leaves it to us to piece everything together to accomplish the tasks that we have to complete. In that way, we can embed the knowledge so that we are vibe coding all the time, ensuring that a more deterministic path is followed.
File comparison using PowerShell
In the past, I have compared files on the Linux/UNIX command line as well as the legacy Windows command line. Recently, I decided to try it using PowerShell. Here is the command structure:
Compare-Object (Get-Content ".\[name of one text file]") (Get-Content ".\[name of another text file]") > [path and name of output file]
Admittedly, this is more verbose than the others that I have mentioned above. Nevertheless, it does the job and sends everything to a text file for review. The Compare-Object piece does the comparison once the Get-Content portions have read in the content.
Executing PowerShell scripts in Windows 11
Recently, I have added the capability to update a Hugo-driven website from a laptop running Windows 11. Compared to what you get with Linux, I do feel a little like a fish out of water when it comes to using Windows for tasks that I accomplish more often on the former. That includes running PowerShell scripts instead of their BASH counterparts. While Linux Subsystem for Windows could be an option, my machine runs Windows 11 Home, where it is unavailable. Learning the ways of the Windows Terminal cannot do any harm in any case.
The default action of not executing PowerShell scripts is not a bad approach when it comes to keeping machines secure for less technical users. For the rest, you need to learn how to use the Set-ExecutionPolicy commandlet. Doing this in a safe means doing it in a restrictive manner. Thus, I chose the following command and executed it in a terminal running with admin privileges:
Set-ExecutionPolicy -ExecutionPolicy Unrestricted -Scope CurrentUser
The scope here is for the currently logged-in user, instead of allowing every user the same capability. Some undoubtedly might suggest an execution policy of AllSigned and that adds effort that I was unwilling to expend, hence the choice that I made. This is not that critical a machine, so that is why I made the choice that I did. There was nothing too complicated about the script logic anyway.
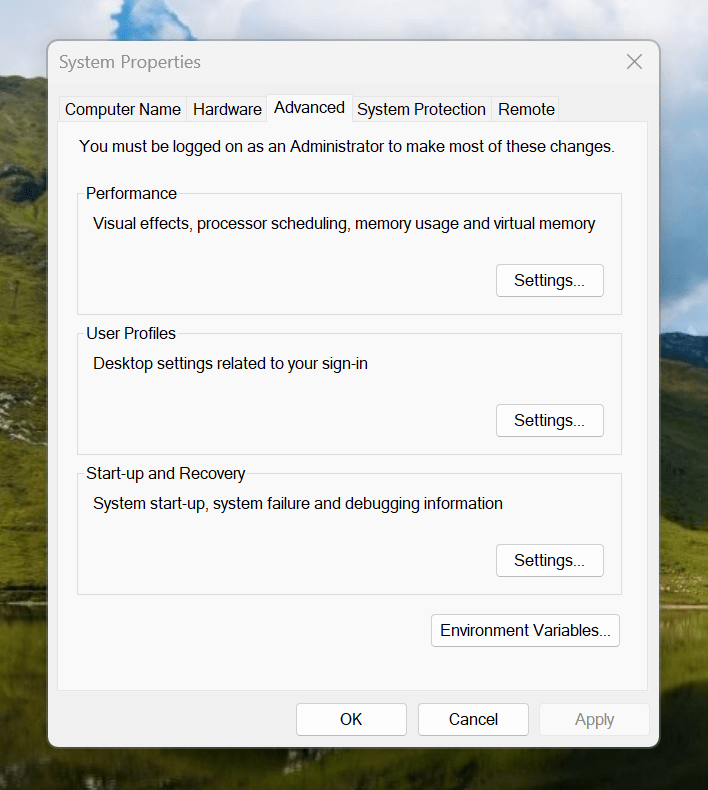
Making the script available without needing to specify the path to it was my next step. In my case, I added a new location to the Path environment variable. To accomplish that, you need to find the Control Panel, open it and go to System and Security. Then, move to System (Control Panel\System and Security\System) and click on Advanced System Settings. In the new dialogue box that appears, click on the Environment Variables... button. Next, select the Path entry and click on the Edit button. That spawns another dialogue box where I added the new path. Clicking the OK button in each dialogue box closes them all, one at a time, to get back to the Control Panel window again. That too can be closed, and any open terminals shut down and a new one opened. The process is clunky, yet it works once you know what to do.
At the end of all this, I had a scripted process for updating a Hugo-driven website. It was not as sleek as what I have on my Linux system, yet it works well enough to allow more flexibility. In time, I may refine things further.
One way to fix slow CyberGhost VPN connections on Windows 10
Due to a need to access websites with country blocking, I have decided to give CyberGhost a go, and it also will come in handy when connecting devices to other Wi-Fi connections. What I have got is the three-year subscription package and all went well on the first day of use. However, things became unusable on the second and a reboot did not sort it.
Since the problem seemed to affect a phone running Android too, I even got to suspect my router and broadband provider. Even terminating the subscription came to mind, but it did not come to that. Instead, I did a bit more research and tried changing the maximum transition unit (MTU) for the connection to 1300 as suggested in a CyberGhost help article. Because using the Control Panel meant that it was resetting to 1500 on my Windows 10 machine, I then turned to a command line-based solution.
To accomplish that, I started PowerShell in administrator mode from the context menu produced by right-clicking on the Start Menu icon on the taskbar. Then, I entered the following command to see what connections I had and what the MTU settings were:
netsh interface ipv4 show subinterfaces
From looking through the Settings and Control Panel applications, I already had worked out what network interface belonged to the CyberGhost connection. Seeing that the MTU setting was 1500, I then issued a command like the following to change that to 1300.
netsh interface ipv4 set subinterface "<name of ethernet interface>" mtu=1300 store=persistent
Here, <name of ethernet interface> gets replaced by the name of your connection and the string is quoted to avoid spaces in the name causing problems with executing the command. Once that second command had been run, the first one was issued again and the output checked to ensure that the MTU setting was as expected.
While this was done when the VPN connection was inactive, it may work also with an active connection. After making the change, I again reconnected to the VPN and all has been as expected since then, and I found a better connection for my Android phone too.
Searching file contents using PowerShell
Having made plenty of use of grep on the Linux/UNIX command and findstr on the legacy Windows command line, I wondered if PowerShell could be used to search the contents of files for a text string. Usefully, this turns out to be the case, but I found that the native functionality does not use what I have used before. The form of the command is given below:
Select-String -Path <filename search expression> -Pattern "<search expression>" > <output file>
While you can have the output appear on the screen, it always seems easier to send it to a file for subsequent use, and that is what I am doing above. The input to the -Path switch can be a filename or a wildcard expression, while that to the -Pattern can be a text string enclosed in quotes or a regular expression. Given that it works well once you know what to do, here is an example:
Select-String -Path *.sas -Pattern "proc report" > c:\temp\search.txt
The search.txt file then includes both the file information and the text that has been found for the sake of checking that you have what you want. What you do next is up to you.
Using PowerShell to reinstall Windows Apps
Recently, I managed to use 10AppsManager to remove most of the in-built apps from a Windows 10 virtual machine that I have for testing development versions in case anything ugly were to appear in a production update. Curiosity is my excuse for letting the tool do what it did and some could do with restoration. Out of the lot, Windows Store is the main one that I have sorted so far.
The first step of the process was to start up PowerShell in administrator mode. On my system, this is as simple as clicking on the relevant item in the menu popped up by right-clicking on the Start Menu button and clicking on the Yes button in the dialogue box that appears afterwards. In your case, it might be a case of right-clicking on the appropriate Start Menu programs entry, selecting the administrator option and going from there.
With this PowerShell session open, the first command to issue is the following:
Get-Appxpackage -Allusers > c:\temp\appxpackage.txt
This creates a listing of Windows app information and pops it into a text file in your choice of directory. Opening the text file in Notepad allows you to search it more easily, and there is an entry for Windows Store:
Name                   : Microsoft.WindowsStore
Publisher              : CN=Microsoft Corporation, O=Microsoft Corporation, L=Redmond, S=Washington, C=US
Architecture           : X64
ResourceId             :
Version                : 11607.1001.32.0
PackageFullName        : Microsoft.WindowsStore_11607.1001.32.0_x64__8wekyb3d8bbwe
InstallLocation        : C:\Program Files\WindowsApps\Microsoft.WindowsStore_11607.1001.32.0_x64__8wekyb3d8bbwe
IsFramework            : False
PackageFamilyName      : Microsoft.WindowsStore_8wekyb3d8bbwe
PublisherId            : 8wekyb3d8bbwe
PackageUserInformation : {S-1-5-21-3224249330-198124288-2558179248-1001
IsResourcePackage      : False
IsBundle               : False
IsDevelopmentMode      : False
Dependencies           : {Microsoft.VCLibs.140.00_14.0.24123.0_x64__8wekyb3d8bbwe,
Microsoft.NET.Native.Framework.1.3_1.3.24201.0_x64__8wekyb3d8bbwe,
Microsoft.NET.Native.Runtime.1.3_1.3.23901.0_x64__8wekyb3d8bbwe,
Microsoft.WindowsStore_11607.1001.32.0_neutral_split.scale-100_8wekyb3d8bbwe}
Using the information from the InstallLocation field, the following command can be built and executed (here, it has gone over several lines, so you need to get your version onto a single one):
Add-AppxPackage -register "C:\Program Files\WindowsApps\Microsoft.WindowsStore_11607.1001.32.0_x64__8wekyb3d8bbwe\AppxManifest.xml" -DisableDevelopmentMode
Once the above has completed, the app was installed and ready to use again. As the mood took me, I installed other apps from the Windows Store as I saw fit.
Compressing a VirtualBox VDI file for a Windows guest running on a Linux Host
Recently, I had a situation where my the VDI files for my Windows 10 virtual machine expanded in size all of a sudden and I needed to reduce them. My downloading maps for use with RouteBuddy may have been the cause, so I moved the ISO installation files onto the underlying Linux Mint drives. With that space, I then set to uncovering how to compact the virtual disk file, and the Sysinternals sdelete tool was recommended for clearing unused space. After downloading, I set it to work in a PowerShell session running on the guest operating system from its directory using the following command:
.\sdelete -z [drive letter designation; E: is an example]
From the command prompt, the following should do:
sdelete -z [drive letter designation; E: is an example]
Once, that had completed, I shut down the VM and executed a command like the following from a bash terminal session:
VBoxManage modifyhd [file location/file name].vdi --compact
Where there was space to release, VDI files were reduced in size to return more disk space. More could be done, so I will look into the Windows 10 drives to see what else needs to be moved out of them.