TOPIC: GRAPHICS SOFTWARE
Possibly a retrograde way to keep an old scanner going on Linux Mint 22?
5th March 2025For making a copy of a document for official purposes, I needed to get my scanner going with the new workstation. The device is an Epson Perfection 4490 Photo that I acquired in 2007 after its Canon predecessor, a CanoScan 5000F, began to malfunction. It has served me well since then, though digital photography has meant that scanning images is not something that I do frequently these days, the last time being in early 2022 to get larger images into my online photo gallery.
The age means that software support is an issue, more particularly for Windows 11. However, Linux can leave old devices behind it too. It does not help that there is little incentive for Epson to update its drivers either. Thus, Linux Mint's move from LIBSANE to LIBSANE1 makes things less straightforward when the Epson software needs the former.
While you can take apart a DEB file, re-edit its components before creating a new version, that sounds tricky to me. Nevertheless, it may be the way to go for others. Instead, I downloaded a DEB file for LIBSANE from Ubuntu and installed that instead. With that installed, the Epson software installed fully, allowing VueScan to work as I needed. Thus, the document got copied as I needed, and the rest then could happen as required.
When I went looking up solutions to my conundrum on Perplexity, it kept telling me that it was not the best way to go. However, I still took the chance, knowing that I could roll things back if needed. Computers never know you that well without a multitude of data, so the safety first approach has its merits, even if it can be overly cautious in some cases.
If I ever do need to replace the scanner, I probably would replace the printer with a multi-function device at the same time. The move would save some desk space, and I have had a good experience with such a device elsewhere. For now, though, such a move is on the long finger; securing a new freelance contract is higher up any to-do list.
Slower ImageMagick DNG processing in Ubuntu 9.10
2nd November 2009A little while, I encountered a problem with ImageMagick processing DNG files in Ubuntu 9.04. Not realising that I could solve me own problem by editing a file named delegates.xml, I took to getting a Debian VM to do the legwork for me. That's where you'll find all the commands used when helper software is used by ImageMagick to help it on its way. On its own, ImageMagick cannot deal with DNG files, so the command line variant of UFRaw (itself a front end for DCRaw) is used to create a PNM file that ImageMagick can handle. The problem a few months back was that the command in delegates.xml wasn't appropriate for a newer version of UFRaw and I got it into my head that things like this were hard-wired into ImageMagick. Now, I know better and admit my error.
With 9.10, it appears that the command in delegates.xml has been corrected, only for another issue to raise its head. UFRaw 0.15, it seems, isn't the speediest when it comes to creating PNM files and, while my raw file processing script works after a spot of modification to deal with changes in output from the identify command used, it takes far too long to run. Since GIMP also uses UFRaw, I wonder if the same problem has surfaced there too. However, it has been noticed by the Debian team, with the outcome being that they have a package for version 0.16 of the software in their unstable branch that looks as if it has sorted the speed issue. However, I am seeing that 0.15 is in the testing branch, which tempts me to stick with Lenny (5.x) if any successor turns out to have slower DNG file handling with ImageMagick and UFRaw. In my estimation, 0.13 does what I need, so why go for a newer release if it turns out to be slower?
Fixing Alt-Click problems in Ubuntu-hosted VirtualBox Windows guests
24th October 2008
The Alt-Click keyboard-mouse combination is a very common way of working with various flavours of Adobe Photoshop. So, it was with some frustration that I couldn't use it while working in Photoshop Elements (still on version 5, by the way; the temptation of newer versions has not struck) on a Windows XP guest in VirtualBox on my main Ubuntu system.
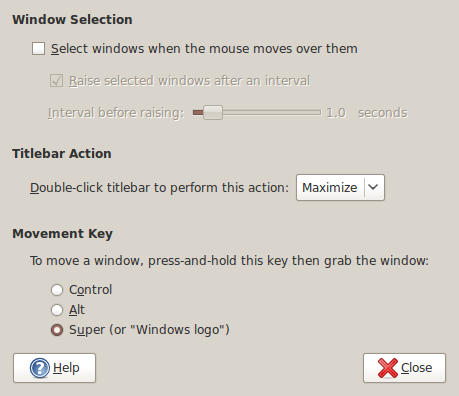
A quick google later and a proposed solution was for me a surprising one: going to System -> Preferences -> Windows on the host OS and changing the setting of the Movement Key from Alt to Super (Windows key on many keyboards). That was enough to set all in order. It appears that a setting on the host operating system was preventing a piece of software running on the guest from behaving as expected. That's all in the past now that I have got my clone brush functionality back and can work as normal again.
Is Apple ditching Windows 2000?
11th October 2007Having had a brainwave of using my Windows 2000 VM to play music without impacting the rest of my PC's working, I made the discovery that a bit of digging was required to find a version of iTunes and QuickTime that work with Win2K. Google delivered the goods, so here are the links:
It all reminds me of a post that I wrote a few months back, but iTunes is now working and, thanks to VMware's Shared Folders functionality, using the host PC's digital music collection. I'll be seeing how the ring-fencing goes...
Putting Photoshop CS2 through its paces with some real photo editing work
8th March 2007
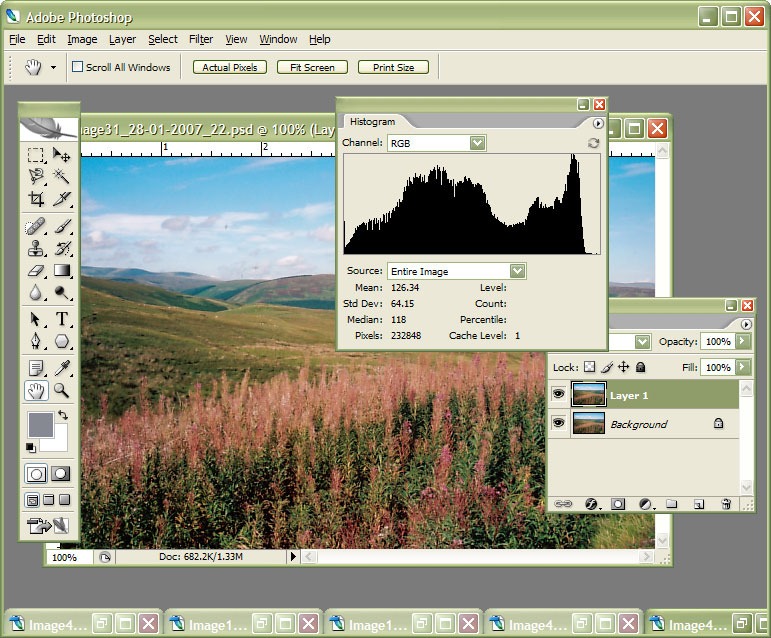
Currently, I am in the process of adding new photos to my online photo gallery, and the exercise is giving my Photoshop CS2 trial version a good amount of use. And the experience also adding a few strings to my bow in graphics editing terms, something that is being helped along by the useful volume that is The Focal Easy Guide to Photoshop CS2.
The most significant change that has happened is that to my workflow. Previously, it took the following form:
- Acquire image from scanner/camera
- For a camera image, do some exposure compensation
- Create copy of image in software’s own native file format (PSPIMAGE/PSP for Paint Shop Pro and PSD/PSB for Photoshop)
- Clean up image with clone stamp tool: removes scanner artefacts or sensor dust from camera images; I really must get my EOS 10D cleaned (the forecast for the coming weekend is hardly brilliant, so I might try sending it away).
- Save a new version of the image following clean-up.
- Reduce the size of the digital camera image to 600×400 and create a new file.
- Boost colours of original image with hue/saturation/lightness control; save new version of file.
- Sharpen the image and save another version.
- For web images, save a new file with a descriptive name
- Create JPEG version
- Copy JPEG to Apache web server folders
- Create thumbnail from original JPEG
The new workflow is based upon this:
- Acquire image from scanner/camera
- For a camera image, do some exposure compensation; there is a lot of pre-processing that you can do in Camera Raw
- Create a copy of image in software’s own native file format
- Clean up the image with the clone stamp tool and create a new file with _cleaned as its filename suffix. I tried the spot healing brush but didn’t seem to have that much success with it. Maybe I need to try again…
- Add adjustment layer for level correction and save file with _level suffix in its name.
- Add adjustment layer for curves correction
- Add adjustment layer for boosting colours with hue/saturation/lightness control
- Flatten layers and save new image with _flatten suffix in its name
- Sharpen flattened image and create a new version with _sharpened suffix in its name
- For web images, save a new file with a descriptive name
- Create JPEG versions in Apache web server folders; carry out any resizing using bi-cubic sharpening at this point.
Some improvements remain. For instance, separation of raw, intermediate and final photos by storing them in different directories is perhaps one possibility that I should consider. But there are other editing tricks that I have yet to use as well: merged and blended layers. Bi-cubic smoothing for expanding images is another possibility, but it is one that requires a certain amount of caution. And I am certain that I will encounter others as I make my way through my reading.