TOPIC: WINDOWS SHELL
Some things that I'd miss on moving from Linux to Windows
17th January 2009The latest buzz surrounding Windows 7 has caused one observer to suggest that it's about to blast Linux from the desktop. While my experiences might be positive, there are still things that I like about Linux that make me reluctant to consider switching back. Here are a few in no particular order:
Virtual Desktops (or Workspaces)
I find these very handy for keeping things organised when I have a few applications open at the same time. While I think that someone has come with a way of adding the same functionality to Windows, I'd need to go looking for that. Having everything cluttering up a single taskbar would feel a bit limiting.
Symbolic Links
If you have not come across these before, they are a little difficult to explain, but it's great to have the ability to make the contents of a folder appear in more than one place at a time without filling up your hard drive. While it's true to say that Windows 7 gets Libraries, I have a soft spot for the way that Linux does it so simply.
Lack of (intrusive) fidgeting
One of Windows' biggest problems is that it's such a massive target for attacks by the less desirable elements of the web community. The result is a multitude of security software vendors wanting to get their wares onto your PC; it's when they get there that all the fidgeting starts. The cause is the constant need for system monitoring that eats up resources that could be used for other things. Though I know some packages are less intrusive than others, I do like the idea of feeling as if I am in full control of my PC rather someone else taking decisions for me (unavoidable in the world of work, I know). An example of this is Norton's not allowing me to shut it down when it goes rogue, even when acting as Administrator. While I can see the reason for this in that it's trying to hamper the attentions of nefarious malware, it ends up making me feel less than empowered and I also like to feel trusted too. Another thing that I like is the idea of something awaiting my input rather than going away and trying to guess what I need and getting it wrong, an experience that seems typical of Microsoft software.
Command Line
Though this is less of a miss than it used to be, there is now a learning curve with PowerShell's inclusion with Windows 7, and it's not something that I want to foist on myself without my having the time to learn its ins and outs. Though it's not a bad skill to have listed on the proverbial CV, I now know my way around bash and its ilk while knowing where to look when I intend to take things further.
After these, there are other personal reasons for my sticking with Linux, like memories of bad experiences with Windows XP and the way that Linux just seems to get on with the job. Its being free of charge is another bonus, and the freedom to have things as you want makes you feel that you have a safer haven in this ever-changing digital world. While I am not sure if I'd acquire the final version of Windows 7, I am certain that it will not be replacing Linux as my main home computing platform, something that should come as no surprise given what I have said above.
Running Windows 7 within VirtualBox
12th January 2009With all the fanfare that surrounded the public beta release of Windows 7, I suppose that the opportunity to give it a whirl was too good to miss. Admittedly, Microsoft bodged the roll-out by underestimating the level of interest and corralling everyone into a 24-hour time slot, with one exacerbating the other. In the event, they did eventually get their act together and even removed the 2.5 million licence limit. Thus, I suppose that they really needed to get 7 right after the unloved offering that was Vista, so they probably worked out that the more testers that they get, the better. After, it might be observed that the cynical view that the era of making people pay to "test" your products might be behind us and that users just want things to work well if not entirely faultlessly these days.
After several abortive raids, I eventually managed to snag myself a licence and started downloading the behemoth using the supplied download manager. I foresaw it taking a long time and so stuck with the 32-bit variant so as not to leave open the possibility of that part of the process using up any more of my time. As it happened, the download did take quite a few hours to complete, but this part of the process was without any incident or fuss.
Once the DVD image was downloaded, it was onto the familiar process of building myself a VirtualBox VM as a sandbox to explore the forthcoming incarnation of Windows. After setting up the ISO file as a virtual DVD, installation itself was an uneventful process, yet subsequent activities weren't without their blemishes. The biggest hurdle to be overcome was to get the virtual network adapter set up and recognised by Windows 7. The trick is to update the driver using the VirtualBox virtual CD as the source because Windows 7 will not recognise it using its own driver repository. Installing the other VirtualBox tools is a matter of going to Compatibility page in the Properties for the relevant executable, the one with x86 in the file name in my case, and setting XP as the Windows version (though Vista apparently works just as well, I played safe and depended on my own experience). While I was at it, I allowed the file to run under the administrator account, too. Right-clicking on executable files will bring you to the compatibility troubleshooter that achieves much the same ends but by a different route. With the Tools installed, all was workable rather than completely satisfactory. Shared folders have not worked for, but that might need a new version of the VirtualBox software or getting to know any changes to networking that come with Windows 7. I plan to stick with using USB drives for file transfer for the moment. Though stretching the screen to fit the VirtualBox window was another thing that would not happen, that's a much more minor irritation.
With those matters out of the way, I added security software from the list offered by Windows with AVG, Norton and Kaspersky being the options on offer. I initially chose the last of these but changed my mind after seeing the screen becoming so corrupted as to make it unusable. That set me to rebuilding the VM and choosing Norton 360 after the second Windows installation had finished. That is working much better, and I plan to continue my tinkering beyond this. I have noticed the inclusion of PowerShell and an IDE for the same, so that could be something that beckons. All in all, there is a certain solidity about Windows 7, though I am not so convinced of the claim of speedy startups at this stage. Time will tell and, being a beta release, it's bound to be full of debugging code that will not make it into the final version that is unleashed on the wider public.
Setting up a new hard drive in Windows
21st January 2007
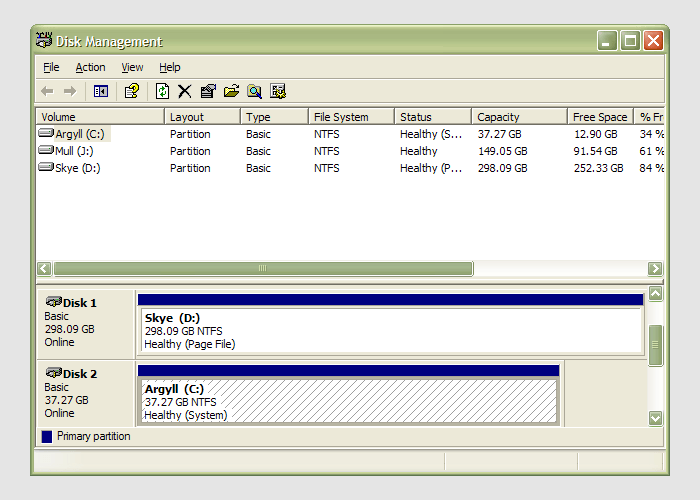
 Having during the week obtained a new 320 GB hard drive, today I am adding it to my system after yesterdays scare with a PSU. As with any such item, you need to format and configure it to work with your operating system, be it Windows, Linux or whatever. Good old Partition Magic can help with this (I have version 7 from the Powerquest days) but Windows XP (Professional, anyway) does offer its own tool for the job: the Disk Management console. Unfortunately, it's a bit difficult to find. The easiest way to get to it is to type
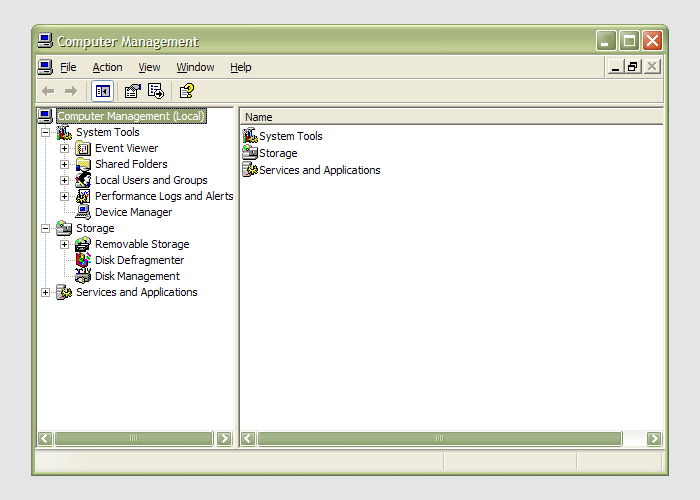
 diskmgmt.msc into the Run command box. Otherwise, it is a matter of setting your Start Menu to show the Administrative Tools group (Taskbar and Start Menu properties> Start Menu tab > Customise > Advanced tab) and accessing through the computer Management console, for which there is a shortcut in this group. Of course, you need to have administrator access to your PC to do any of this.