TOPIC: WINDOWS SHELL
Building an email summariser for Apple Mail using both OpenAI and Shortcuts
One thing that I am finding useful in Outlook is the ability to summarise emails using Copilot, especially for those that I do not need to read in full. While Apple Mail does have something similar, I find it to be very terse in comparison. Thus, I started to wonder about just that by using the OpenAI API and the Apple Shortcuts app. All that follows applies to macOS Sequoia, though the Tahoe version is with us too.
Prerequisite
While you can have the required OpenAI API key declared within the Shortcut, that is a poor practice from a security point of view. Thus, you will need this to be stored in the macOS keychain, which can be accomplished within a Terminal session and issuing a command like the following:
security add-generic-password -a openai -s openai_api_key -w [API Key]
In the command above, you need to add the actual API key before executing it to ensure that it is available to the steps that follow. To check that all is in order, issue the following command to see the API key again:
security find-generic-password -a openai -s openai_api_key -w
This process also allows you to rotate credentials without editing the workflow, allowing for a change of API keys should that ever be needed.
Building the Shortcut
With the API safely stored, we can move onto the actual steps involved in setting up the Email Summarisation Shortcut that we need.
Step 1: Collect Selected Email Messages
First, open the Shortcuts app and create a new Shortcut. Then, add a Run AppleScript action and that contains the following code:
tell application "Mail"
    set selectedMessages to selection
    set collectedText to ""
    repeat with msg in selectedMessages
        set msgSubject to subject of msg
        set msgBody to content of msg
        set collectedText to collectedText & "Subject: " & msgSubject & return & msgBody & return & return
    end repeat
end tell
return collectedText
This script loops through the selected Mail messages and combines their subjects and bodies into a single text block.
Step 2: Retrieve the API Key
Next, add a Run Shell Script action and paste this command:
security find-generic-password -a openai -s openai_api_key -w | tr -d 'n'This reads the API key from the keychain and strips any trailing newline characters that could break the authentication header, the first of several gotchas that took me a while to sort.
Step 3: Send the Request to GPT-5
The, add a Get Contents of URL action and configure it as follows:
URL: https://api.openai.com/v1/chat/completions
Method: POST
Headers:
- Authorization:
Bearer [Shell Script result] - Content-Type:
application/json
Request Body (JSON):
{
  "model": "gpt-5",
  "temperature": 1,
  "messages": [
    {
      "role": "system",
      "content": "Summarise the following email(s) clearly and concisely."
    },
    {
      "role": "user",
      "content": "[AppleScript result]"
    }
  ]
}
When this step is executed, it replaces [Shell Script result] with the output from Step 2, and [AppleScript result] with the output from Step 1. Here, GPT-5 only accepts a temperature value of 1 (a lower value would limit the variability in the output if it could be used), unlike other OpenAI models and what you may see documented elsewhere.
Step 4: Extract the Summary from the Response
The API returns a JSON response that you need to parse, an operation that differs according to the API; Anthropic Claude has a different structure, for example. To accomplish this for OpenAI's gateway, add these actions in sequence to replicate what is achieved using in Python by loading completion.choices[0].message.content:
- Get Dictionary from Input (converts the response to a dictionary)
- Get Dictionary Value for key "choices"
- Get Item from List (select item 1)
- Get Dictionary Value for key "message"
- Get Dictionary Value for key "content"
One all is done (and it took me a while to get that to happen because of the dictionary → list → dictionary → dictionary flow; figuring out that not everything in the nesting was a dictionary took some time), click the information button on this final action and rename it to Summary Text. This makes it easier to reference in later steps.
Step 5: Display the Summary
Add a Show action and select the Summary Text variable. This shows the generated summary in a window with Close and Share buttons. The latter allows you to send to output to applications like Notes or OneNote, but not to Pages or Word. In macOS Sequoia, the list is rather locked down, which means that you cannot extend it beyond the available options. In use or during setup testing, beware of losing the open summary window behind others if you move to another app because it is tricky to get back to without using the CTRL + UP keyboard shortcut to display all open windows at once.
Step 6: Copy to Clipboard
Given the aforementioned restrictions, there is a lot to be said for adding a Copy to Clipboard action with the Summary Text variable as input. This allows you to paste the summary immediately into other apps beyond those available using the Share facility.
Step 7: Return Focus to Mail
After all these, add another Run AppleScript action with this single line:
tell application "Mail" to activateThis brings the Mail app back to the front, which is particularly useful when you trigger the Shortcut via a keyboard shortcut or if you move to another app window.
Step 8: Make the New Shortcut Available for Use
Lastly, click the information button at the top of your Shortcut screen. One useful option that can be activated is the Pin in Menu Bar one, which adds a menu to the top bar with an entry for the new Email Summary Shortcut in there. Ticking the box for the Use as Quick Action option allows you to set a keyboard shortcut. Until, the menu bar option appealed to me, that did have its uses. You just have to ensure that what you select does not override any combination that is in use already. Handily, I also found icons for my Shortcuts in Launchpad as well, which means that they also could be added to the Dock, something that I also briefly did.
Using the Shortcut
After expending the effort needed to set it up, using the new email summariser is straightforward. In Apple Mail, select one or more messages that you want to summarise; there is no need to select and copy the contained textual content because the Shortcut does that for you. Using the previously assigned keyboard combination, menu or Launchpad icon then triggers the summarisation processing. Thus, a window appears moments later displaying the generated summary while the same text is copied to your clipboard, ready to paste anywhere you need it to go. When you dismiss the pop-up window, the Mail app then automatically comes back into focus again.
Using third-party tools to make an Evoluent mouse work as needed on macOS
Now having a new location from which I can work, I acquired an all-in-one desktop computer for use while there. While tempted by an HP option that runs Windows, I ended up choosing an iMac instead. That gained me extra disk space and more memory at a cost. Having UNIX-style command line capability was another attraction. After living with the Windows terminal for a while, its limitations were all too apparent to me.
While I started off desktop computing on a Macintosh Classic and having owned a MacBook Pro in the more recent past, there still was a learning curve. One of these related to the configuration of the mouse supplied with the system. Whatever about only having one button and needing to learn gestures, it was the speed at which the pointer goes that really got me reaching for my more usual Evoluent. Even so, the subsequent discovery of LinearMouse makes things much more bearable once all the requisite permissions were assigned.
Getting the Evoluent configured to my liking needed another third-party application: USB Overdrive. If Evoluent's own software fitted the bill, that would have done. However, they have done some finger pointing at Apple instead of updating it to work with the latest Mac technology. There may be truth in the accusations, but it is striking that another piece of software works when theirs does not. Nevertheless, the other option worked once it got the permissions to detect the hardware. Then, it was a matter of working out which button was which on the mouse, so I could have them assigned as I wished.
After that, I could settle into the new system and get used to its idiosyncrasies. Adding Parallels got me a Windows 11 virtual machine for business compatibility, while I got going with setting up some automation using the macOS terminal. All is becoming more settled than working out of a laptop.
Needing third-party software does have a catch, though: underlying changes to macOS could scupper things. It was the sort of thing that made me move away from GNOME Shell as my Linux desktop. The extensions on which I was depending kept getting obsoleted by every new release. It is something to watch, even if macOS evolves less dramatic than GNOME 3 in its various forms.
Opening up Kindle for PC in a maximised window on Windows 11
One irritation with the Windows app for Amazon Kindle is that it does not open in a maximised window, and it scarcely remembers your size settings from session to session. Finding a solution to this sizing issue is no easy task, so I happened on one of my own that I previously used with File Explorer folder shortcuts.
The first step is to find the actual location of the Start Menu shortcut. Trying C:\Users\[User Name]\AppData\Roaming\Microsoft\Windows\Start Menu\Programs\Amazon\Amazon Kindle should do that.
Next, right-click on the Kindle icon and choose Properties from the context menu that appears. In the dialogue box that causes to appear on the screen, look for the "Run:" setting. By default, this appears as "Normal Window" but you can change this to "Maximised", which is what I did before clicking on Apply before doing the same for the OK button to dismiss the dialogue box.
If you have pinned the shortcut to the taskbar or elsewhere, you may need to unpin it and pin it again to carry over the change. After that, I found that the Kindle app opened up in a maximised window as I wanted.
Executing PowerShell scripts in Windows 11
Recently, I have added the capability to update a Hugo-driven website from a laptop running Windows 11. Compared to what you get with Linux, I do feel a little like a fish out of water when it comes to using Windows for tasks that I accomplish more often on the former. That includes running PowerShell scripts instead of their BASH counterparts. While Linux Subsystem for Windows could be an option, my machine runs Windows 11 Home, where it is unavailable. Learning the ways of the Windows Terminal cannot do any harm in any case.
The default action of not executing PowerShell scripts is not a bad approach when it comes to keeping machines secure for less technical users. For the rest, you need to learn how to use the Set-ExecutionPolicy commandlet. Doing this in a safe means doing it in a restrictive manner. Thus, I chose the following command and executed it in a terminal running with admin privileges:
Set-ExecutionPolicy -ExecutionPolicy Unrestricted -Scope CurrentUser
The scope here is for the currently logged-in user, instead of allowing every user the same capability. Some undoubtedly might suggest an execution policy of AllSigned and that adds effort that I was unwilling to expend, hence the choice that I made. This is not that critical a machine, so that is why I made the choice that I did. There was nothing too complicated about the script logic anyway.
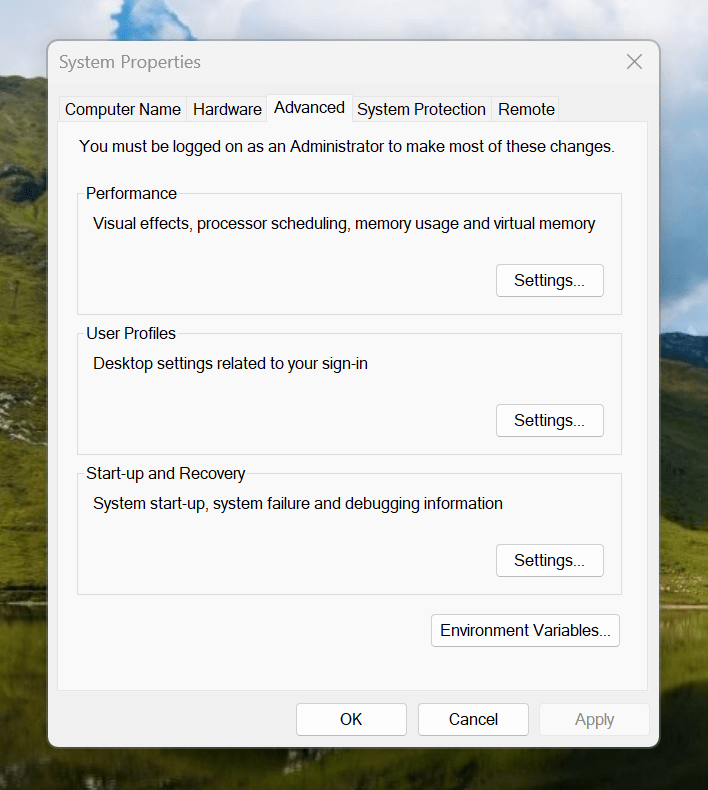
Making the script available without needing to specify the path to it was my next step. In my case, I added a new location to the Path environment variable. To accomplish that, you need to find the Control Panel, open it and go to System and Security. Then, move to System (Control Panel\System and Security\System) and click on Advanced System Settings. In the new dialogue box that appears, click on the Environment Variables... button. Next, select the Path entry and click on the Edit button. That spawns another dialogue box where I added the new path. Clicking the OK button in each dialogue box closes them all, one at a time, to get back to the Control Panel window again. That too can be closed, and any open terminals shut down and a new one opened. The process is clunky, yet it works once you know what to do.
At the end of all this, I had a scripted process for updating a Hugo-driven website. It was not as sleek as what I have on my Linux system, yet it works well enough to allow more flexibility. In time, I may refine things further.
Restoring the menu bar on GNOME Terminal in a GNOME Shell session
By default, a GNOME Terminal instance does not display a menu bar and that applies not only in GNOME Shell but also on the Cinnamon Desktop environment. In the latter, it is easy enough to display the menu bar using the context menu produced by right-clicking in the window before going to Edit > Preferences and ticking the box for Show menubar by default in new terminals in the General section. After closing the Preferences dialogue, every new GNOME Terminal session will show the menu bar.
Unfortunately, it is not so easy in GNOME Shell, though the context menu route does allow you to unhide the menu bar on a temporary basis. That is because the requisite tick box is missing from the Preferences dialogue box displayed after navigating to Edit > Preferences in the menus. To address, you need to execute the following command in a terminal session:
gsettings set org.gnome.Terminal.Legacy.Settings headerbar false
This change permanently adds the menu bar and includes the previously missing tick box, which is selected when necessary. Although GNOME Shell has a minimalist design in some aspects, making this function difficult to access seems excessive.
One way to fix slow CyberGhost VPN connections on Windows 10
Due to a need to access websites with country blocking, I have decided to give CyberGhost a go, and it also will come in handy when connecting devices to other Wi-Fi connections. What I have got is the three-year subscription package and all went well on the first day of use. However, things became unusable on the second and a reboot did not sort it.
Since the problem seemed to affect a phone running Android too, I even got to suspect my router and broadband provider. Even terminating the subscription came to mind, but it did not come to that. Instead, I did a bit more research and tried changing the maximum transition unit (MTU) for the connection to 1300 as suggested in a CyberGhost help article. Because using the Control Panel meant that it was resetting to 1500 on my Windows 10 machine, I then turned to a command line-based solution.
To accomplish that, I started PowerShell in administrator mode from the context menu produced by right-clicking on the Start Menu icon on the taskbar. Then, I entered the following command to see what connections I had and what the MTU settings were:
netsh interface ipv4 show subinterfaces
From looking through the Settings and Control Panel applications, I already had worked out what network interface belonged to the CyberGhost connection. Seeing that the MTU setting was 1500, I then issued a command like the following to change that to 1300.
netsh interface ipv4 set subinterface "<name of ethernet interface>" mtu=1300 store=persistent
Here, <name of ethernet interface> gets replaced by the name of your connection and the string is quoted to avoid spaces in the name causing problems with executing the command. Once that second command had been run, the first one was issued again and the output checked to ensure that the MTU setting was as expected.
While this was done when the VPN connection was inactive, it may work also with an active connection. After making the change, I again reconnected to the VPN and all has been as expected since then, and I found a better connection for my Android phone too.
Lessons learned on managing Windows Taskbar and Start Menu colouring in VirtualBox virtual machines
In the last few weeks, I have had a few occasions when the colouration of the Windows 10 taskbar and its Star Menu has departed from my expectations. At times, this happened in VirtualBox virtual machine installations and both the legacy 5.2.x versions and the current 6.x ones have thrown up issues.
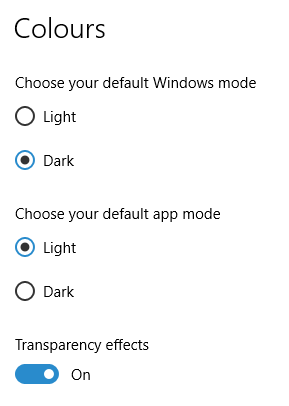

The first one actually happened with a Windows 10 installation in VirtualBox 5.2.x when the taskbar changed colour to light grey and there was no way to get it to pick up the colour of the desktop image to become blue instead. The solution was to change the Windows from Light to Dark in order for the desired colouration to be applied, and the settings above are taken from the screen that appears on going to Settings > Personalisation > Colours.
The second issue appeared in Windows 10 Professional installation in VirtualBox 6.0.x when the taskbar and Start Menu turned transparent after an updated. This virtual machine is used to see what is coming in the slow ring of Windows Insider, so some rough edges could be expected. The solution here was to turn off 3D acceleration in the Display pane of the VM settings after shutting it down. Starting it again showed that all was back as expected.
Both resolutions took a share of time to find and there was a deal of experimentation needed too. Once identified, they addressed the issues as desired. Hence, I am recording them here for use by others as much as future reference for myself.
Quickly changing between virtual desktops in Windows 10
One of the benefits of running Linux is the availability of virtual desktops, and installing VirtuaWin was the only way to get the same functionality on Windows before the launch of Windows 10. For reasons known to Microsoft, they decided against the same sort of implementation as seen in Linux or UNIX. Instead, they put the virtual desktop functionality a click away and rather hides it from most users unless they know what clicking on the Task View button allows. The approach also made switching between desktops slower with a mouse. However, there are keyboard shortcuts that address this once multiple virtual desktops exist.
Using WIN + CTRL + LEFT or WIN + CTRL + RIGHT does this easily once you have mastered the action. Depending on your keyboard setup, WIN is the Windows, Super or Command key while CTRL is the Control key. Then, LEFT is the left arrow key and RIGHT is the right arrow key. For machines with smaller screens where multitasking causes clutter, virtual desktops are a godsend for organising how you work, and having quick key combinations for switching between them adds to their utility.
Using PowerShell to reinstall Windows Apps
Recently, I managed to use 10AppsManager to remove most of the in-built apps from a Windows 10 virtual machine that I have for testing development versions in case anything ugly were to appear in a production update. Curiosity is my excuse for letting the tool do what it did and some could do with restoration. Out of the lot, Windows Store is the main one that I have sorted so far.
The first step of the process was to start up PowerShell in administrator mode. On my system, this is as simple as clicking on the relevant item in the menu popped up by right-clicking on the Start Menu button and clicking on the Yes button in the dialogue box that appears afterwards. In your case, it might be a case of right-clicking on the appropriate Start Menu programs entry, selecting the administrator option and going from there.
With this PowerShell session open, the first command to issue is the following:
Get-Appxpackage -Allusers > c:\temp\appxpackage.txt
This creates a listing of Windows app information and pops it into a text file in your choice of directory. Opening the text file in Notepad allows you to search it more easily, and there is an entry for Windows Store:
Name                   : Microsoft.WindowsStore
Publisher              : CN=Microsoft Corporation, O=Microsoft Corporation, L=Redmond, S=Washington, C=US
Architecture           : X64
ResourceId             :
Version                : 11607.1001.32.0
PackageFullName        : Microsoft.WindowsStore_11607.1001.32.0_x64__8wekyb3d8bbwe
InstallLocation        : C:\Program Files\WindowsApps\Microsoft.WindowsStore_11607.1001.32.0_x64__8wekyb3d8bbwe
IsFramework            : False
PackageFamilyName      : Microsoft.WindowsStore_8wekyb3d8bbwe
PublisherId            : 8wekyb3d8bbwe
PackageUserInformation : {S-1-5-21-3224249330-198124288-2558179248-1001
IsResourcePackage      : False
IsBundle               : False
IsDevelopmentMode      : False
Dependencies           : {Microsoft.VCLibs.140.00_14.0.24123.0_x64__8wekyb3d8bbwe,
Microsoft.NET.Native.Framework.1.3_1.3.24201.0_x64__8wekyb3d8bbwe,
Microsoft.NET.Native.Runtime.1.3_1.3.23901.0_x64__8wekyb3d8bbwe,
Microsoft.WindowsStore_11607.1001.32.0_neutral_split.scale-100_8wekyb3d8bbwe}
Using the information from the InstallLocation field, the following command can be built and executed (here, it has gone over several lines, so you need to get your version onto a single one):
Add-AppxPackage -register "C:\Program Files\WindowsApps\Microsoft.WindowsStore_11607.1001.32.0_x64__8wekyb3d8bbwe\AppxManifest.xml" -DisableDevelopmentMode
Once the above has completed, the app was installed and ready to use again. As the mood took me, I installed other apps from the Windows Store as I saw fit.
Resolving Windows Update Error 0x80244019 on Windows 10
In Windows 10, the preferred place to look if you fancy prompting an update of the system is in the Update & Security section of the Settings application. At the top is the Windows Update, and the process usually is as simple as pressing the Check for updates button. For most of the time, that has been my experience, but it stopped working on my main Windows 10 virtual machine, so I needed to resolve the problem.
Initially, going into the Advanced Options section and deselecting the tick box for Give me updates for other Microsoft products when I update Windows helped. However, it seemed a non-ideal solution, so I looked further. When it was then that I found that manually resetting a system's Windows Updates components helped others, I tried that and restarted the system.
The first part of the process was to right-click on the Start Menu button and select the Windows PowerShell (Admin) entry from the menu that appeared. This may be replaced by Command Prompt (Admin) on your system on your machine, but the next steps in the process are the same. In fact, you could include any commands you see below in a script file and execute that if you prefer. Here, I will run through each group in succession.
From either PowerShell or the Command Prompt, you need to stop the Windows Update, Cryptographic, BITS (or Background Intelligent Transfer Service) and MSI Installer services. To accomplish this, execute the following commands at a command prompt:
net stop wuauserv

net stop cryptSvc

net stop bits

net stop msiserver
With the services stopped, it is then possible to rename the SoftwareDistribution and Catroot2 folders so you can refresh everything to remove them. To accomplish this, execute the following pair of commands using either PowerShell or the Command Prompt:
ren C:\Windows\SoftwareDistribution SoftwareDistribution.old

ren C:\Windows\System32\catroot2 Catroot2.old
Once you have the folders renamed, then you can start the Windows Update, Cryptographic, BITS and MSI Installer services by executing the following commands in either PowerShell or the Command Prompt:
net start wuauserv

net start cryptSvc

net start bits

net start msiserver
Once these have completed, you may close the PowerShell or Command Prompt window that you were using and restart the machine. Going into the Update & Security section of the Settings tool afterwards and pressing the Check for updates button now builds new versions of the folders that you renamed, and this takes a little while longer than the usual update process. Otherwise, you could let your system rebuild things in its own time. As it happens, I opted for manual intervention and all has worked well since then.