TOPIC: PASSWORD
Practical Excel skills for dates, locked files and text splitting
Excel has a reputation for simplicity that does not always survive contact with real working life. Project schedules need to respect weekends and public holidays, files arrive locked at precisely the moment edits are most urgent, and data lands in cells formatted in ways that resist immediate analysis. Three everyday tasks illustrate this gap well: calculating future or past dates that exclude non-working days, removing or working around read-only restrictions when genuine edits are required, and splitting text strings cleanly at the first or Nth delimiter. The guidance below draws on established Excel features, keeping the emphasis firmly on what works in practice.
Working with Business Calendars
The WORKDAY Function
Working with dates that observe a business calendar is a frequent requirement in scheduling, logistics and reporting. Excel's WORKDAY function is designed for this purpose and returns a date that is a given number of working days from a start date, excluding Saturdays and Sundays by default. At its simplest, a formula such as =WORKDAY(A1,5) moves forward five working days from the date in A1. The function can also respect a list of holidays so that results avoid specific non-working dates as well as weekends, as in =WORKDAY(A1,5,C1:C3), which skips any matching dates in C1:C3 when calculating the result.
A concrete example shows how this behaves with a real date. Using named ranges for readability, with start referring to cell B5, days to B8, and holidays to B11:B13, the formula =WORKDAY(start,days) returns the next working day five days after 23rd December 2024. With weekends excluded, but no holidays provided, the result is Monday 30th December 2024. When holidays are supplied with =WORKDAY(start,days,holidays), the function also avoids the listed dates in B11:B13 and produces Thursday 2nd January 2025. In all cases, the weekend definition is Saturday and Sunday, and the holidays must be stored as valid Excel dates to be recognised correctly.
Visualising the Path to the Result
It often helps to see the individual dates that WORKDAY steps through when reaching its answer. A compact way to achieve this is to generate a short run of consecutive dates from the start date and display them alongside abbreviated day names. Using =SEQUENCE(13,1,start) in cell D5 creates thirteen dates beginning with the date held in the named range start because Excel dates are serial numbers that increment by one per day. Formatting these cells with the custom number format ddd, dd-mmm-yy shows an abbreviated weekday alongside the date, making it straightforward to spot weekends at a glance.
Conditional formatting can then shade non-working days directly within this generated block. Because WORKDAY does not evaluate a date when zero is supplied for the argument called days, a small workaround helps determine whether a given date is itself a working day. In column D, a rule based on the formula =WORKDAY(D5-1,1)<>D5 asks WORKDAY for the next working day after the previous day; if the answer does not equal the date in D5, then D5 is not a working day and can be shaded grey. A similar rule for column E, =WORKDAY(E5-1,1,holidays)<>E5, incorporates the named holiday range and produces additional shading where dates overlap with the supplied holiday list as well as weekends.
Highlighting calculated end dates ties the visualisation together. If the main results appear in G5 and G6, cells in column D can be highlighted when equal to $G$5 using a rule such as =D5=$G$5, and cells in column E can be highlighted when equal to $G$6 using =E5=$G$6. If preferred, the formatting rules can be defined without relying on G5 and G6 by embedding the WORKDAY calls directly in the comparisons, as in =D5=WORKDAY(start,days) and =E5=WORKDAY(start,days,holidays). In either arrangement, there are four conditional formatting rules in play across the grid: two to shade non-working days and two to pick out the final dates.
Handling Non-Standard Working Weeks
Work patterns do not always match the standard five-day week. Where a schedule follows a different rhythm, such as a four-day or six-day working week, switching to the WORKDAY.INTL function is the appropriate step. It follows the same principle as WORKDAY, returning a date a set number of business days from a start date while optionally excluding holidays, but it accepts a custom definition of which weekdays count as working days. This flexibility allows organisations that operate alternative rosters to generate accurate due dates without resorting to manual adjustments or complex helper columns.
Managing Read-Only Excel Files
There are several reasons why a workbook might be set to read-only: preventing accidental erasure of data, or ensuring a file remains unchanged as it passes between parties. Each form of protection serves a different purpose and has a distinct method for disabling it. ExcelRibbon.Tips.Net is a useful ongoing reference for these and many other workbook and security scenarios across Excel 2007 and later versions.
Read-Only Recommended
The lightest touch is the Read-Only Recommended setting. When a workbook carries this flag, Excel prompts on opening with a dialogue asking whether to open it as read-only. This method applies across all versions of Microsoft Excel from 2003 through to current releases. To remove the recommendation, open the workbook, use File > Save As and choose Browse to open the Save As window, then select Tools in the lower right of the dialogue, pick General Options, clear the Read-Only Recommended checkbox and click OK before saving. The next time the file opens, the prompt does not appear.
Marked as Final
A firmer signal is applied when a workbook is Marked as Final. In this state, commands, typing and proofing marks are all disabled, and Excel displays a Marked as Final notification bar at the top of the worksheet. To turn this off when editing is required, click Edit Anyway on the notification bar. This removes the read-only state for the current copy and allows modifications to proceed. The flag is more about signalling completion than enforcing security, so the application provides a clear override directly within the interface.
Password to Modify
Password protection introduces a stronger barrier. When a workbook has a Password to Modify set, a dialogue appears on opening that invites the password or offers the option to open the file as read-only; without the password, the file cannot be modified directly. A pragmatic path when only a working copy is needed is to open the original in read-only mode, then use File > Save As with Browse, select Tools > General Options, clear the Password to Modify field and confirm with OK before saving under a new name. Opening the newly saved file allows edits because it no longer carries a modification password. Using a third-party utility to crack a password on someone else's file is inadvisable and potentially inappropriate, so the better route is to request an editable version from whoever sent the document.
Operating System-Level Restrictions on a Mac
Occasionally, the read-only state is imposed not by Excel but by the operating system, where the file has been locked so that only the owner can edit it. On a Mac, the fix is made outside Excel: locate the file in Finder, right-click it and choose Get Info, then clear the Locked checkbox before reopening the file in Excel. If the issue is one of permissions rather than a simple lock, the Get Info window also contains a Sharing and Permissions section at the bottom. This lists each user alongside a drop-down privilege set to either Read Only or Read and Write, and the file owner can adjust these entries to grant editing access to the relevant users.
Operating System-Level Restrictions on a PC
On a PC, the equivalent controls are found in File Explorer. Right-clicking the workbook and choosing Properties opens the General tab, where unchecking the Read-Only attribute and clicking OK is often sufficient to restore full access. If the restriction stems from security permissions rather than the file attribute, the Security tab lists the groups and usernames that have access along with their permission levels. Clicking Edit beneath that list allows the file owner to adjust access for individual entries, including granting the ability to modify the file where that is justified.
Splitting Text in Excel
LEFT, MID and RIGHT
Reshaping text is another everyday requirement in Excel, and the LEFT, MID and RIGHT functions provide predictable building blocks. LEFT extracts a specified number of characters from the start of a string, MID extracts from a given position in the middle, and RIGHT extracts from the end. For instance, =LEFT("test string",2) returns te, =MID("test string",6,3) returns str, and =RIGHT("test string",2) returns ng. When exact character counts are known in advance these functions can be applied directly, but real data often arrives with variable-length segments separated by spaces or other delimiters, so the position of the delimiter must first be discovered before extraction can take place.
Splitting at the First Delimiter
To split at the first occurrence of a delimiter such as a space, combining these extraction functions with FIND or SEARCH is effective. Both functions return the position of a substring within a string, with the key distinction that FIND is case-sensitive while SEARCH is not. Suppose cell A1 contains test string. To return everything to the left of the first space, use =LEFT(A1,FIND(" ",A1)-1). Here FIND returns 5 as the position of the space, subtracting 1 yields 4, and LEFT uses that figure to return test. To return the text to the right of the first space, the formula subtracts the space position from the total string length: =RIGHT(A1,LEN(A1)-FIND(" ",A1)). In this example, LEN(A1) is 11 and the FIND result is 5, so the expression evaluates to 6 and RIGHT returns string. The pattern generalises to other delimiters by replacing the space character with the required alternative.
Locating the Nth Delimiter
Locating the Nth occurrence of a delimiter takes an extra step because FIND and SEARCH identify only the first match after a given starting point. A common technique relies on SUBSTITUTE to mark the Nth occurrence with a unique character that does not appear elsewhere in the text, then uses FIND to locate it. Consider An example text string in A1 and a requirement to return everything up to the third space. Substituting the third space with a vertical bar creates a dependable marker: =SUBSTITUTE(A1," ","|",3) produces An example text|string. Finding the bar with =FIND("|",SUBSTITUTE(A1," ","|",3)) returns 16, the position of the marker. LEFT can then extract the part before that position by subtracting one: =LEFT(A1,FIND("|",SUBSTITUTE(A1," ","|",3))-1), which returns An example text. Combining the steps in this way makes the formula self-contained and avoids the need for helper cells.
These text approaches extend naturally to extracting the segment after the Nth delimiter by using MID or RIGHT, with similar position logic. Replacing LEFT with MID and adjusting the start index to the marker position plus one retrieves the portion that follows. The same idea works with second or fourth occurrences by changing the instance number inside SUBSTITUTE. When working with data sets that include inconsistent spacing or punctuation, it is worth verifying that the chosen marker character does not already appear in the source text, since the method depends on its uniqueness within each processed string.
Bringing These Techniques Together in Your Excel Workflows
These three strands combine to form a toolkit that handles a surprising range of everyday scenarios. WORKDAY and WORKDAY.INTL anchor date calculations to real-world calendars so that estimates and commitments respect weekends and public holidays, while the SEQUENCE-based visualisation grid can help colleagues understand how an end date is reached rather than simply accepting a single cell value. Managing read-only states allows teams to balance protection with flexibility, with the key being to identify which type of restriction applies before attempting to remove it. LEFT, MID and RIGHT, combined with FIND and SUBSTITUTE, turn messy text into consistent fields ready for further analysis.
Sending email reliably from Linux web servers and WordPress websites
Setting up a new VPS brought with it the need to get email services working at the operating system level, and that particular endeavour proved stubbornly resistant to resolution. What eventually broke the deadlock was stepping back from the OS entirely and turning to the Post SMTP plugin for WordPress, which handled the complexity of Gmail authentication cleanly and got things moving. Since then, things have moved on again: Proton Mail, with a subscription upgrade that adds a custom domain and an associated address, now handles outgoing mail seamlessly.
Sending email from a server involves block lists, authentication requirements and cloud provider restrictions that have a habit of turning a simple task into an extended troubleshooting session. That even applies with well-established approaches using Postfix or Sendmail, relaying through Gmail or specialist SMTP providers, continue to serve administrators reliably with minimal overhead. The list of things to do and manage is not a short one at the server level.
What follows draws together practical guidance from the Linode documentation on configuring Postfix with external SMTP servers, the Linode guide on relaying through Gmail specifically, the Cloudways walkthrough for Post SMTP on WordPress and the linuxconfig.org guide to Sendmail with Gmail, keeping to fundamentals that have changed little even as the surrounding tooling has moved on. In some ways, the sources are disparate yet complementary, something that is reflected in the rest of what you find below. The whole intent is that all this is in file for everyone.
Starting with the Environment
A sensible first step is to examine the environment in which the server runs. Some cloud platforms, including Akamai Cloud's Linode Compute Instances for certain new accounts, block outbound SMTP ports 25, 465 and 587 by default to combat abuse. This blocking prevents applications from sending any email until the restrictions are lifted. The remedy is procedural rather than technical: platform documentation explains how to request removal of these restrictions after acknowledging the provider's email policies. Tackling this early avoids fruitless troubleshooting later on.
Alongside the port restriction check, it is worth setting a proper fully qualified domain name (FQDN) on the host and applying all available system updates. A correctly configured hostname reduces delays during mailer start-up and helps ensure that headers and logs appear coherent to downstream systems. Basic checks, such as confirming that you can log in to the mail account you intend to use as a relay, will also spare time later.
Configuring Postfix on Debian and Ubuntu
On Debian or Ubuntu, Postfix offers a straightforward route to sending mail via a relay. Installing the required packages begins with apt-get update followed by apt-get install of libsasl2-modules and postfix. The installer will prompt for a general type of mail configuration, and choosing "Internet Site" is appropriate in this scenario. The System Mail Name should then be set to the domain through which you intend to send.
After installation, verify that the myhostname parameter in /etc/postfix/main.cf reflects the server's FQDN, for example:
myhostname = fqdn.example.comThis setting anchors Postfix's identity and helps downstream receivers interpret messages correctly. The myhostname value is also used in outgoing SMTP greetings, so accuracy matters.
Relaying through Gmail
Relaying through Gmail or Google Workspace adds a layer of security considerations that are worth understanding before proceeding. Google retired its "less secure apps" feature in 2024, which had previously allowed basic username-and-password authentication over SMTP. All third-party SMTP connections now require either OAuth or an app password, and traditional password-based authentication is no longer accepted. Google is also pushing towards passkeys as a replacement for passwords at the account sign-in level, though their practical applicability to server-level SMTP relay remains limited for now. App passwords, whilst still available, are presented by Google as a transitional measure rather than a long-term solution, so OAuth is the more future-proof path where it is supported.
Where two-step verification is enabled on a Google account, the recommended approach for Postfix relay is to generate an app password. Within the Google Account security settings, enabling two-step verification unlocks the ability to create app passwords under the "How you sign in to Google" section. Choosing a descriptive name such as "Postfix" keeps records intelligible, and the resulting 16-character password should be stored securely since it will not be displayed again. This app password is then used in place of your regular account password throughout the Postfix configuration.
Storing SMTP Credentials
With credentials in hand, Postfix needs to know how to authenticate to the relay. Depending on the guide you follow, credentials may be stored at /etc/postfix/sasl/sasl_passwd or at /etc/postfix/sasl_passwd. Either location works as long as the corresponding path is referenced correctly in main.cf. In the credentials file, the entry for Gmail using STARTTLS on port 587 takes this form:
[smtp.gmail.com]:587 username@gmail.com:app-passwordThe square brackets around the hostname instruct Postfix not to perform MX lookups for that host, ensuring it connects directly to the submission server. After saving the file, create the hash database with postmap, using whichever path you chose:
sudo postmap /etc/postfix/sasl/sasl_passwdThis produces a .db file that Postfix consults at run-time. Because both the plain-text file and the .db file contain credentials, you should tighten permissions so that only root can read or write them:
sudo chown root:root /etc/postfix/sasl/sasl_passwd /etc/postfix/sasl/sasl_passwd.db
sudo chmod 0600 /etc/postfix/sasl/sasl_passwd /etc/postfix/sasl/sasl_passwd.db
Configuring the Gmail Relay
The relay configuration in /etc/postfix/main.cf forms the core of the setup. Setting relayhost to [smtp.gmail.com]:587 instructs Postfix to deliver all mail via Google's submission server. At the end of the file, the following block enables SASL authentication and STARTTLS, points to the hash file created earlier, disallows anonymous mechanisms and specifies the CA bundle for TLS verification:
relayhost = [smtp.gmail.com]:587
smtp_sasl_auth_enable = yes
smtp_sasl_security_options = noanonymous
smtp_sasl_password_maps = hash:/etc/postfix/sasl/sasl_passwd
smtp_tls_security_level = encrypt
smtp_tls_CAfile = /etc/ssl/certs/ca-certificates.crt
Restarting Postfix applies the changes:
sudo systemctl restart postfixA simple test uses Postfix's built-in sendmail implementation. Invoking sendmail recipient@elsewhere.com, then entering From: and Subject: headers followed by a message body and a single dot on a line by itself, is sufficient to trigger a delivery attempt. Watching sudo tail -f /var/log/syslog (or /var/log/mail.log on some distributions) while testing helps confirm that authentication and delivery are succeeding, and the way back to the shell from sendmail is Ctrl+C.
Using Third-Party SMTP Providers
The same relay pattern works with third-party SMTP providers that specialise in transactional delivery. Service-specific details differ only in hostnames and credentials, while the underlying mechanism remains identical.
For Mandrill (Mailchimp's transactional email service), the credentials file would contain:
[smtp.mandrillapp.com]:587 USERNAME:API_KEYThe relayhost line in main.cf becomes [smtp.mandrillapp.com]:587. Note that the password field takes an API key, not your Mailchimp account password. Running postmap on the credentials file and restarting Postfix completes the switch.
For SendGrid, the entry for credentials is:
[smtp.sendgrid.net]:587 apikey:YOUR_API_KEYHere, the username is the literal string apikey (not your account name), and the password is the API key generated within your SendGrid account. The relayhost becomes [smtp.sendgrid.net]:587, followed by the same postmap and restart sequence.
One practical point worth noting: some guides place the credentials file directly under /etc/postfix/sasl_passwd, whilst the Linode Gmail relay guide uses the subdirectory path /etc/postfix/sasl/sasl_passwd. Either location is valid, but the path set in smtp_sasl_password_maps within main.cf must match whichever you choose. A mismatch produces unhelpful "file not found" errors at send time that can take some effort to diagnose.
Configuring Sendmail as an Alternative
Some administrators prefer Sendmail, particularly on distributions where it remains the default. Relaying through Gmail with Sendmail follows its own clear sequence. Installing the required packages varies by distribution: on Ubuntu, Debian and Linux Mint the command is apt install sendmail mailutils sendmail-bin, whilst on CentOS, Fedora, AlmaLinux and Red Hat systems, dnf install sendmail is used instead.
Authentication details live in an authinfo map under /etc/mail/authinfo. Creating that directory with restricted permissions and then adding a file such as gmail-auth allows the following entry to be stored:
AuthInfo: "U:root" "I:YOUR_GMAIL_EMAIL_ADDRESS" "P:YOUR_APP_PASSWORD"The quotes here are significant: the P: is a literal prefix for the password field, not part of the password itself. Building the database with makemap hash gmail-auth < gmail-auth produces gmail-auth.db in the same directory, which Sendmail will consult when connecting to the smart host.
Sendmail's configuration is macro-driven and centred on /etc/mail/sendmail.mc. Placing the relay and authentication directives just above the first MAILER definition ensures they are processed correctly when sendmail.cf is rebuilt. The key definitions set SMART_HOST to [smtp.gmail.com], force the submission port by defining RELAY_MAILER_ARGS and ESMTP_MAILER_ARGS as TCP $h 587, enable authentication with confAUTH_OPTIONS set to A p, and wire in the authinfo map with:
FEATURE('authinfo', 'hash -o /etc/mail/authinfo/gmail-auth.db')After saving those changes, running make -C /etc/mail regenerates sendmail.cf and systemctl restart sendmail brings the service up with the new configuration. Hosts without a resolvable FQDN may pause briefly at start-up, but the service typically continues after a short delay.
WordPress and the Post SMTP Plugin
Web applications introduce different constraints, particularly where user authentication is delegated to a third party. For WordPress sites, the Post SMTP plugin (originally forked from Postman SMTP) modernises the classic approach and integrates OAuth 2.0 so that Gmail and Google Workspace can be used without storing a mailbox password. With Google having retired basic password authentication for SMTP, an OAuth-based approach is now the standard requirement rather than an optional convenience.
The process begins with installation and activation of the plugin, after which its setup wizard auto-detects smtp.gmail.com and recommends SMTP-STARTTLS with OAuth 2.0 authentication on port 587. At this point, the wizard asks for a Client ID and Client Secret, which are obtained from the Google Cloud Console rather than the Gmail settings page. Creating a project in the console, enabling the Gmail API, and completing the OAuth consent screen with basic application information lays the necessary groundwork. Selecting "Web application" as the application type then allows you to enter the Authorised JavaScript origins and Authorised redirect URIs that the plugin displays during its setup step. Completing this creation reveals the Client ID and Client Secret, which are pasted back into the plugin wizard to proceed.
Before the plugin can authorise fully, the publishing status of the OAuth consent screen must usually be changed from "Testing" to "Production" (or "In production"). This step matters more than it might appear: whilst an app remains in "Testing" status, Google's authorisation tokens expire after just seven days, which means the connection will silently stop working and require reauthorisation on a weekly basis. Moving to "In production" removes this expiry, and refresh tokens then remain valid indefinitely unless revoked. The Google console provides a "Publish App" option on the OAuth consent screen page to make this change. Once published, returning to the WordPress dashboard and clicking "Grant permission with Google" allows you to select the desired account and accept the requested permissions. The plugin's status view then confirms that authorisation has succeeded. A test email through the plugin's own action validates that messages are leaving the site as expected.
This OAuth-based arrangement aligns with Google's current security model, avoids the need for app passwords, and reduces the risk of unauthorised access if a site is compromised. General security hardening of the WordPress installation itself remains essential regardless.
The Underlying Protocols
Underpinning all of these approaches are protocols that remain stable and well understood. SMTP still carries the mail, STARTTLS upgrades plaintext connections to encrypted channels either opportunistically or by policy, and DNS resolves relay hostnames to IP addresses. The role of DNS here is easy to overlook, but it is foundational: as The TCP/IP Guide sets out in its coverage of SMTP and related protocols, correct name resolution underpins every step of message delivery. If a relay hostname cannot be resolved, nothing else will proceed. If the certificate bundle pointed to by smtp_tls_CAfile is missing or outdated, STARTTLS negotiation will fail. Logs record these conditions at the time they occur, which is precisely why watching syslog during tests is more informative than simply checking whether a message arrives in an inbox.
A few operational considerations round out a dependable setup. Permission hygiene on credential files protects against accidental disclosure during audits or backups, and commands that manipulate maps (such as postmap and makemap) must be re-run after any edit to their corresponding source files. Consistency between the port specified in the credentials file and the one set in main.cf's relayhost parameter also matters: mismatches lead to confusing connection attempts. Postfix's postconf command lists all current configuration values, making it a convenient way to verify that paths and flags are set as expected.
On Reflection
Reliable email from servers involves the installation of supporting right component software, authentication in the way the provider expects, encrypting the submission channel, keeping credentials safe and testing with your eyes on the logs. This list makes it sound like the complex endeavour that it is. Thus, If your remit extends to a WordPress dashboard, it is better to use a plugin that speaks OAuth 2.0 and complete the corresponding setup in the Google Cloud Console so that everything flows cleanly.
Changing the Ansible Vault editor from Vi to Nano
Recently, I got to experiment with Ansible after reading about the orchestration tool in a copy of Admin magazine. It came in handy for updating a few web servers that I have, as well as updating my main Linux workstation. For the former, automated entry of SSH passwords sufficed, but the same did not apply for sudo usage on my local machine. This meant that I needed to use Ansible Vault to store the administrator password, and doing so opened up a file in the Vi editor. Since I am not familiar with Vi and wanted to get things sorted quickly, I fancied using something more user-friendly like Nano.
Doing this meant adding the following line to .bashrc:
export EDITOR=nano
Saving and closing the file followed by reloading the session set me up for what was needed.
Automated entry of SSH passwords
A useful feature for shell scripting is automatic password entry when logging into other servers. This often involves plain text files, which are not secure. Fortunately, I found an alternative. The first step is to use the keygen tool included with SSH. The command is shown below. The -t switch defines the key type, RSA in this example. You can add a passphrase, but I chose not to for convenience. You should evaluate your security requirements before implementing this approach.
ssh-keygen -t rsa
The next step is to use the ssh-copy-id command to generate the keys for a set of login credentials. For this, it is better to use a user account with restricted access to keep as much server security as you can. Otherwise, the process is as simple as executing a command like the following and entering the password at the prompt for doing so.
ssh-copy-id [user ID]@[server address]
Getting this set up has been useful for running a file upload script to keep a web server synchronised, and it is better to have the credentials encrypted rather than kept in a plain text file.
Halting constant disk activity on a WD My Cloud NAS
Recently, I noticed that the disk in my WD My Cloud NAS was active all the time, so it reminded me of another time when this happened. Then, I needed to activate the SSH service on the device and log in as root with the password welc0me. That default password was changed before doing anything else. Since the device runs on Debian Linux, that was a simple case of using the passwd command and following the prompts. One word of caution is in order since only root can be used for SSH connections to a WD My Cloud NAS and any other user that you set up will not have these privileges.
The cause of all the activity was two services: wdmcserverd and wdphotodbmergerd. One way to halt their actions is to stop the services using these commands:
/etc/init.d/wdmcserverd stop

/etc/init.d/wdphotodbmergerd stop
The above act only works until the next system restart, so these command should make for a more persistent disabling of the culprits:
update-rc.d -f wdmcserverd remove

update-rc.d -f wdphotodbmergerd remove
If all else fails, removing executable privileges from the normally executable files that the services need will work, and it is a solution that I have tried successfully between system updates:
cd /etc/init.d

chmod 644 wdmcserverd

reboot
Between all of these, it should be possible to have you WD My Cloud NAS go into power saving mode as it should, even if turning off additional services such as DLNA may be what some need to do. Having turned off these already, I only needed to disable the photo thumbnail services that were the cause of my machine's troubles.
Further securing MySQL in Fedora
Ubuntu users must be spoilt because any MySQL installation asks you for a root password, an excellent thing in my opinion. With Fedora, it just pops the thing on there with you needing to set up a service and setting the root password yourself; if I recall correctly, I think that openSUSE does the same thing. For the service management, I needed to grab system-config-services from the repositories because my Live CD installation left off a lot of stuff, OpenOffice and GIMP even. The following command line recipe addressed the service manager omission:
su - # Change to root, entering password when asked

yum -y install system-config-services # Installs the thing without a yes/no prompt

exit # Return to normal user shell
Thereafter, the Services item from the menus at System > Administration was pressed into service and the MySQL service enabled and started. The next step was to lock down the root user, so the following sequence was used:
mysql # Enter MySQL prompt; no need for user or password because it still is unsecured!

UPDATE mysql.user SET Password=PASSWORD('MyNewPass') WHERE User='root';

FLUSH PRIVILEGES;

quit # Exit the mysql prompt, leaving the bare mysql command unusable
For those occasions when password problems keep you out of the MySQL shell, you'll find password resetting advice on the MySQL website, though I didn't need to go the whole hog here. MySQL Administrator might be another option for this type of thing. That thought never struck me while I was using it to set up less privileged users and allowing them access to the system. For a while, I was well stymied in my attempts to access the MySQL using any of those extra accounts until I got the idea of associating them with a host, another thing that is not needed on Ubuntu if my experience is any guide. All in all, Fedora may make you work a little extra to get things like thing done, yet I am not complaining if it makes you understand a little more about what is going on in the background, something that is never a disadvantage.
Automating FTP I: UNIX and Linux
Having got tired of repeated typing in everything at the prompt of an interactive command line FTP session and doing similar things via the GUI route, I started to wonder if there was a scripting alternative and, lo and behold, I found it after a spot of googling. There are various opportunities for its extension such as prompting for username and password instead of the risky approach of including them in a script or cycling through a directory structure but here's the foundation stone for such tinkering anyway:
HOSTNAME='ftp.server.host'

USER='user'

PSSWD='password'

REP_SRC='source_directory'

REP__DEST='destination_directory'

FILENAME='*'
rm -rf log_file.tmp
cd "${REP_DEST}"
ftp -i -n -v <<EndFTP >>log_file.tmp 2>>log_file.tmp

open ${HOSTNAME}

user ${USER} ${PSSWD}

prompt

cd "${REP_SRC}"

mget "${FILENAME}"

EndFTP
cd ~
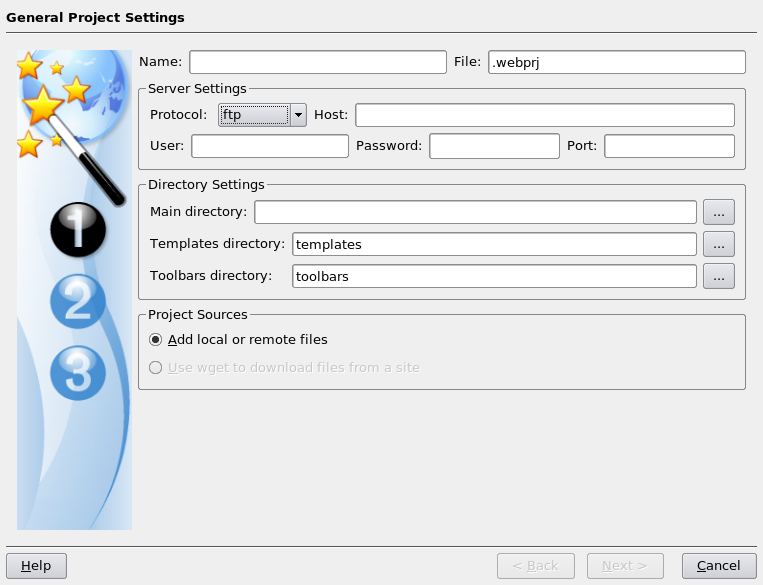
Setting up Quanta Plus to edit files on your web server
On Saturday, my hillwalking and photo gallery website suffered an outage thanks to Fasthosts, the site's hosting provider, having a security breach and deciding to change all my passwords. While I won't bore you with the details here, I had to change the password for my MySQL database from their unmemorable suggestion and hence the configuration file for the hillwalking blog. To accomplish this, I set up Quanta Plus to edit the requisite file on the server itself. That was achieved by creating a new project, setting the protocol as FTP and completing the details in the wizard, all relatively straightforward stuff. Since I have a habit of doing this from Dreamweaver, it's nice to see that an open source alternative provides the same sort of functionality.