TOPIC: CLIPBOARD
Building an email summariser for Apple Mail using both OpenAI and Shortcuts
One thing that I am finding useful in Outlook is the ability to summarise emails using Copilot, especially for those that I do not need to read in full. While Apple Mail does have something similar, I find it to be very terse in comparison. Thus, I started to wonder about just that by using the OpenAI API and the Apple Shortcuts app. All that follows applies to macOS Sequoia, though the Tahoe version is with us too.
Prerequisite
While you can have the required OpenAI API key declared within the Shortcut, that is a poor practice from a security point of view. Thus, you will need this to be stored in the macOS keychain, which can be accomplished within a Terminal session and issuing a command like the following:
security add-generic-password -a openai -s openai_api_key -w [API Key]
In the command above, you need to add the actual API key before executing it to ensure that it is available to the steps that follow. To check that all is in order, issue the following command to see the API key again:
security find-generic-password -a openai -s openai_api_key -w
This process also allows you to rotate credentials without editing the workflow, allowing for a change of API keys should that ever be needed.
Building the Shortcut
With the API safely stored, we can move onto the actual steps involved in setting up the Email Summarisation Shortcut that we need.
Step 1: Collect Selected Email Messages
First, open the Shortcuts app and create a new Shortcut. Then, add a Run AppleScript action and that contains the following code:
tell application "Mail"
    set selectedMessages to selection
    set collectedText to ""
    repeat with msg in selectedMessages
        set msgSubject to subject of msg
        set msgBody to content of msg
        set collectedText to collectedText & "Subject: " & msgSubject & return & msgBody & return & return
    end repeat
end tell
return collectedText
This script loops through the selected Mail messages and combines their subjects and bodies into a single text block.
Step 2: Retrieve the API Key
Next, add a Run Shell Script action and paste this command:
security find-generic-password -a openai -s openai_api_key -w | tr -d 'n'This reads the API key from the keychain and strips any trailing newline characters that could break the authentication header, the first of several gotchas that took me a while to sort.
Step 3: Send the Request to GPT-5
The, add a Get Contents of URL action and configure it as follows:
URL: https://api.openai.com/v1/chat/completions
Method: POST
Headers:
- Authorization:
Bearer [Shell Script result] - Content-Type:
application/json
Request Body (JSON):
{
  "model": "gpt-5",
  "temperature": 1,
  "messages": [
    {
      "role": "system",
      "content": "Summarise the following email(s) clearly and concisely."
    },
    {
      "role": "user",
      "content": "[AppleScript result]"
    }
  ]
}
When this step is executed, it replaces [Shell Script result] with the output from Step 2, and [AppleScript result] with the output from Step 1. Here, GPT-5 only accepts a temperature value of 1 (a lower value would limit the variability in the output if it could be used), unlike other OpenAI models and what you may see documented elsewhere.
Step 4: Extract the Summary from the Response
The API returns a JSON response that you need to parse, an operation that differs according to the API; Anthropic Claude has a different structure, for example. To accomplish this for OpenAI's gateway, add these actions in sequence to replicate what is achieved using in Python by loading completion.choices[0].message.content:
- Get Dictionary from Input (converts the response to a dictionary)
- Get Dictionary Value for key "choices"
- Get Item from List (select item 1)
- Get Dictionary Value for key "message"
- Get Dictionary Value for key "content"
One all is done (and it took me a while to get that to happen because of the dictionary → list → dictionary → dictionary flow; figuring out that not everything in the nesting was a dictionary took some time), click the information button on this final action and rename it to Summary Text. This makes it easier to reference in later steps.
Step 5: Display the Summary
Add a Show action and select the Summary Text variable. This shows the generated summary in a window with Close and Share buttons. The latter allows you to send to output to applications like Notes or OneNote, but not to Pages or Word. In macOS Sequoia, the list is rather locked down, which means that you cannot extend it beyond the available options. In use or during setup testing, beware of losing the open summary window behind others if you move to another app because it is tricky to get back to without using the CTRL + UP keyboard shortcut to display all open windows at once.
Step 6: Copy to Clipboard
Given the aforementioned restrictions, there is a lot to be said for adding a Copy to Clipboard action with the Summary Text variable as input. This allows you to paste the summary immediately into other apps beyond those available using the Share facility.
Step 7: Return Focus to Mail
After all these, add another Run AppleScript action with this single line:
tell application "Mail" to activateThis brings the Mail app back to the front, which is particularly useful when you trigger the Shortcut via a keyboard shortcut or if you move to another app window.
Step 8: Make the New Shortcut Available for Use
Lastly, click the information button at the top of your Shortcut screen. One useful option that can be activated is the Pin in Menu Bar one, which adds a menu to the top bar with an entry for the new Email Summary Shortcut in there. Ticking the box for the Use as Quick Action option allows you to set a keyboard shortcut. Until, the menu bar option appealed to me, that did have its uses. You just have to ensure that what you select does not override any combination that is in use already. Handily, I also found icons for my Shortcuts in Launchpad as well, which means that they also could be added to the Dock, something that I also briefly did.
Using the Shortcut
After expending the effort needed to set it up, using the new email summariser is straightforward. In Apple Mail, select one or more messages that you want to summarise; there is no need to select and copy the contained textual content because the Shortcut does that for you. Using the previously assigned keyboard combination, menu or Launchpad icon then triggers the summarisation processing. Thus, a window appears moments later displaying the generated summary while the same text is copied to your clipboard, ready to paste anywhere you need it to go. When you dismiss the pop-up window, the Mail app then automatically comes back into focus again.
Remote access between Mac and Linux, Part 2: x11vnc for sharing physical desktops
This is Part 2 of a three-part series on connecting a Mac to a Linux Mint desktop. Part 1 introduced the available options, whilst Part 3 covers SSH, RDP and TigerVNC.
Sharing the existing physical desktop is the point at which x11vnc enters the picture. Unlike a virtual VNC server, x11vnc mirrors the live X display, so what appears on the Linux monitor is precisely what is seen remotely. This is often preferred when a process or window must be observed without starting another session, making it particularly useful for monitoring ongoing work or guiding someone seated at the machine.
Basic Setup
Installing x11vnc and creating a password with x11vnc -storepasswd sets up the basics. The command x11vnc -usepw -display :0 -forever shares the current display on port 5900. The -display :0 flag is the important part, as :0 corresponds to the active physical display.
On the Mac side, RealVNC Viewer can connect by supplying either the IP address alone or the address with :5900 appended. If an "Invalid endpoint: port not correctly specified" error appears, it almost always stems from an incorrect address format. The correct forms are 192.168.1.50 or 192.168.1.50:5900, whereas entries such as 192.168.1.50::5900 or 192.168.1.50:0 will fail.
If there is any uncertainty about the port in use, running netstat -tlnp | grep x11vnc on the Linux machine should show a listener on 0.0.0.0:5900 when sharing display :0.
VNC display numbers map directly to TCP ports, so :0 means 5900, :1 means 5901 and so on. When connecting with RealVNC Viewer, supplying the address alone will use the default VNC port, which suits x11vnc on display :0. If a port must be stated, use a single colon with the actual TCP port, not the X display number.
Performance Tuning
Performance tuning is possible with a few additional options. x11vnc can enable a client-side pixel cache with -ncache 10, which asks the viewer to keep a set of off-screen image buffers for faster redraws, and -ncache_cr improves visible smoothness when windows are moved by encouraging copyrect updates.
When scrolling seems to stutter, -scrollcopyrect can help by detecting scroll operations and drawing them efficiently. -grabptr can improve pointer synchronisation between client and server.
On composited desktops, the X DAMAGE extension is used by default to hint at changed regions, but some compositing window managers interfere with this. In such cases, adding -noxdamage can avoid issues where updates are missed, at the cost of more conservative screen polling. x11vnc prints guidance about these behaviours on startup, which can be useful if any anomalies are encountered.
Input Handling and Mouse Button Issues
Input behaviour over VNC often differs from what is experienced when using the Linux machine directly. x11vnc does not carry the Mac's system preferences for the mouse or trackpad across the network; rather, it synthesises standard events that the X server interprets. As a result, wheel scrolling may feel different and the mapping of mouse buttons can be surprising.
When everything works perfectly whilst sitting at the Linux desktop but changes when connecting remotely, it is often because the events are being translated in a generic fashion over VNC. Trying a different viewer on the Mac sometimes improves matters because each has its own handling of input. The macOS Screen Sharing app, RealVNC Viewer and the TigerVNC viewer are all viable choices, and they do not feel identical in use.
Working with KVM Switches
It is also worth noting that hardware in the path can alter what the Linux system receives. If a mouse is connected through a KVM switch, the KVM may re-encode USB Human Interface Device signals, so the computer sees a very generic device. This can remap buttons in unexpected ways, and that mapping can differ between direct local use and a VNC session that injects events at another layer.
One way to correct misassigned buttons is to ask x11vnc to translate them with -buttonmap, which swaps the first three buttons so that the injected events match what the desktop expects. In simple cases where, for example, middle and right are reversed, -buttonmap 132 can restore the standard order of left, middle and right.
However, when a device presents right-click as a higher-numbered button such as 8, x11vnc's simple mapping is not enough because it only translates the primary trio. In that situation, the correction needs to happen before x11vnc sees the events by using the X input system.
The xinput list command identifies the device and xinput get-button-map shows how its buttons are currently enumerated. Applying xinput set-button-map with the desired sequence, for instance xinput set-button-map <ID> 1 2 3 4 5 6 7 8 9, forces the right codes at the operating system level and resolves the issue for both local and remote sessions.
These changes are not persistent across reboots unless added to a startup script or represented with an Xorg configuration snippet. Alternatively, some KVM models offer a HID pass-through or transparent mode that preserves the device's native signalling, which avoids the need for remapping. Bypassing the KVM for the mouse entirely is another way to ensure that the Linux machine sees the expected button layout, though this obviously changes how inputs are switched between computers.
Even after addressing button mapping, some scrolling oddities can remain. Combining the caching options with -scrollcopyrect and -grabptr, then reconnecting with a different viewer if needed, often gets closer to the feel of direct use.
Clipboard Support
Clipboard support is an area that can require attention depending on the tools in use. With x11vnc, clipboard synchronisation for plain text is supported, though the exact behaviour and configuration requirements can vary. Version 0.9.16 includes clipboard functionality, but in practice users often report difficulties with bidirectional clipboard operation and may need to use helper utilities such as autocutsel to achieve reliable two-way clipboard sharing.
When properly configured, copying text on one side and pasting on the other should work in both directions, with Command-C and Command-V on macOS and the usual Ctrl shortcuts on Linux. Rich text and images are not transferred, and file copy-paste is not supported by x11vnc at all.
Troubleshooting Clipboard Synchronisation
If clipboard synchronisation is not working as expected, x11vnc can be run with verbose logging to observe clipboard events in real time. This is particularly useful for diagnosing whether clipboard data are being detected and transferred between the client and server.
To enable detailed logging, first stop any running x11vnc service:
sudo systemctl stop x11vnc.serviceThen start x11vnc manually in a terminal with increased verbosity:
x11vnc -usepw -display :0 -forever -verbose -o ~/x11vnc_debug.logConnect from the Mac via RealVNC Viewer and attempt to copy and paste text in both directions. In another terminal, monitor the log file:
tail -f ~/x11vnc_debug.logLines mentioning clipboard activity, such as "Clipboard: received new client data" or "Clipboard: sending text selection to X server", indicate that x11vnc is detecting and transferring clipboard changes. If no clipboard-related messages appear, the VNC viewer may have clipboard synchronisation disabled in its settings.
In RealVNC Viewer, check Preferences → Inputs to ensure that clipboard synchronisation is enabled. On the macOS Screen Sharing app, clipboard support should work by default when connecting to x11vnc.
After testing, stop the manual run with Ctrl+C and restart the service:
sudo systemctl start x11vnc.serviceTo make verbose logging permanent, the -verbose flag and log output option can be added to the systemd service file's ExecStart line, allowing clipboard activity to be monitored in /var/log/x11vnc.log at any time.
Running x11vnc as a System Service
If x11vnc is to be used regularly and convenience matters, it can be launched at startup as a service so that a remote viewer can connect without a preparatory shell session on the Linux side. Setting up x11vnc as a systemd service ensures that the VNC server starts automatically whenever the Linux Mint machine boots, even before logging in.
To create the service, run:
sudo nano /etc/systemd/system/x11vnc.serviceThen paste the following configuration, adjusting the username as needed:
[Unit]
Description=Start x11vnc at startup for user
After=display-manager.service
Requires=display-manager.service

[Service]
Type=simple
ExecStart=/usr/bin/x11vnc -auth guess -forever -loop -noxdamage
  -display :0 -rfbauth /home/user/.vnc/passwd
  -buttonmap 138456729 -ncache 10 -ncache_cr
  -o /var/log/x11vnc.log
User=user
Group=user
Restart=on-failure

[Install]
WantedBy=multi-user.target
The -auth guess option allows x11vnc to attach to the X session automatically, whilst logging is directed to /var/log/x11vnc.log. The button mapping and caching options shown here incorporate the performance tuning and input corrections discussed earlier. Adjust /home/user and the username to match the account in use.
After creating the service file, reload systemd and enable the service:
sudo systemctl daemon-reload
sudo systemctl enable x11vnc.service
sudo systemctl start x11vnc.service
Check that the service is running:
systemctl status x11vnc.serviceThe output should show Active: active (running). Once this is in place, the Mac can connect to vnc://<linux-ip>:5900 at any time, even immediately after the Linux machine boots.
If x11vnc does not reconnect cleanly after logging out of Cinnamon, adding ExecStopPost=/bin/sleep 2 to the [Service] section will give systemd a brief pause before restarting the service.
Security Considerations
Security considerations in a home setting are straightforward. When both machines are on the same local network, there is no need to adjust router settings. If remote access from outside the home is required, port forwarding and additional protections would be needed.
VNC should not be left open to the internet without an encrypted wrapper. For purely local use, enabling the service at boot as described above often suffices, but for external access an SSH tunnel or VPN is essential.
Conclusion
x11vnc provides a reliable way to share the physical desktop of a Linux machine with a Mac on the same network. The setup is not onerous, and once the service is configured and the few necessary commands are learned, the connection can become an ordinary part of using the machines. The pitfalls that appear repeatedly, such as port format in viewer applications, clipboard configuration, or the way KVM switches can alter mouse behaviour, are easily overcome with a little attention to detail.
In Part 3, we examine the alternatives: SSH for terminal access, RDP with Xfce for responsive remote desktop sessions, and TigerVNC for virtual Cinnamon desktops.
Losing formatting with Windows copying and pasting
Copy and pasting between Windows programs can cause unwanted formatting to be carried over. Copying text from Internet Explorer into Outlook is one example of this that I see a lot, and Word to Word does it too. A trick that I picked up for avoiding this copying of formatting comes from a while back: copying into Notepad and pasting from there. Doing the copy/paste shuffle in that way strips off the formatting baggage and allows the default formatting for the particular destination to be applied. There may be other and slicker ways to do this, but what I have described works for me.
A pleasant surprise…
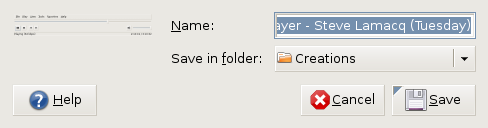
Yesterday, when taking the screen grab for my post on Quanta Plus, I did the Alt + Print Screen shuffle as usual. However, when I did so, I was greeted with a dialogue box asking me where I wanted to store the PNG file that was to be produced and what I wanted to call it. The operation was as swish as that. On Windows, the screenshot gets stuffed into the clipboard for you to extricate it with your graphics editor of choice, so this was an interesting surprise. It's the sort of thing that can make a good impression, and it is striking that Linux seems to be ahead of Windows on this one. Who said Linux was less than user-friendly?
Using alternative editors for SAS programming
When it comes to writing SAS programs, most use the tools that SAS gives us, be it Enterprise Guide, the Enhanced Editor or the Program Editor. While Enterprise Guide can work with UNIX SAS as the processing engine, it is very much a Windows tool and the Enhanced Editor functionality is provided through Windows-only programming (ActiveX, I seem to recall). However, that means that creature comforts are left behind you if you turn to writing SAS code using UNIX SAS; you have only got the good old-fashioned Program Editor supplied by SAS itself. However, there is a trick that you can use to make life more comfortable: SAS does allow you to submit the contents of your paste buffer (or clipboard) using the command SUBMIT BUFFER=DEFAULT and this can be assigned to a function key for ease of use (I use the same key to clear the log and output screens at the same time). In the Windows, you may need to explicitly copy the code to do this but, in UNIX, merely highlighting a section of code with an editor like NEdit will do the trick and, given that NEdit is reasonably pleasant tool for code cutting (the ability to define its macros with a spot of scripting is a definite plus point), this makes life more comfortable again.