TOPIC: BUTTON
Blocking thin scrollbar styles in Thunderbird on Linux Mint
When you get a long email, you need to see your reading progress as you work your way through it. Then, the last thing that you need is to have someone specifying narrow scrollbars in the message HTML like this:
<html style="scrollbar-width: thin;">
This is what I with an email newsletter on AI Governance sent to me via Substack. Thankfully, that behaviour can be disabled in Thunderbird. While my experience was on Linux Mint, the same fix may work elsewhere. The first step is to navigate the menus to where you can alter the settings: "Hamburger Menu" > Settings > Scroll to the bottom > Click on the Config Editor button.
In the screen that opens, enter layout.css.scrollbar-width-thin.disabled in the search and press the return key. Should you get an entry (and I did), click on the arrows button to the right to change the default value of False to True. Should your search be fruitless, right click anywhere to get a context menu where you can click on New and then Boolean to create an entry for layout.css.scrollbar-width-thin.disabled, which you then set to True. Whichever way you have accomplished the task, restarting Thunderbird ensures that the setting applies.
If the default scrollbar thickness in Thunderbird is not to your liking, returning to the Config Editor will address that. Here, you need to search for or create widget.non-native-theme.scrollbar.size.override. Since this takes a numeric value, pick the appropriate type if you are creating a new entry. Since that was not needed in my case, I pressed the edit button, chose a larger number and clicked on the tick mark button to confirm it. The effect was seen straight and all was how I wanted it.
In the off chance that the above does not work for you, there is one more thing that you can try, and this is specific to Linux. It sends you to the command line, where you issue this command:
gsettings get org.gnome.desktop.interface overlay-scrolling
Should that return a value of true, follow the with this command to change the setting to false:
gsettings set org.gnome.desktop.interface overlay-scrolling false
After that, you need to log off and back on again for the update to take effect. Since I had no recourse to that, it may be the same for you too.
The Evoluent VerticalMouse 4 and Linux: a worthwhile ergonomic investment
For anyone spending long hours at a computer, wrist pain is an occupational hazard that tends to arrive slowly and outstay its welcome. The Evoluent VerticalMouse 4 has built a strong following among people looking to address that discomfort, its design placing the hand upright in a natural handshake position rather than forcing the palm flat against a desk. For Linux users, however, the out-of-the-box experience leaves something to be desired, and a few terminal commands are needed before the mouse behaves as it should.
The Ergonomic Case
The fundamental problem with a conventional mouse is that it holds the hand palm-down, a position that twists the forearm bones and places sustained tension on the wrist and median nerve. Used daily over years, this is a well-established route to RSI and, in more serious cases, carpal tunnel syndrome. The Evoluent addresses this by rotating the mouse through 90 degrees, so the hand rests on its side, eliminating that forearm twist. Terence Eden, writing about his experience with several generations of the device, notes that since adopting the vertical mouse range his wrists have been free of pain, and references an evaluation by a team of physical therapists, ergonomists and medical doctors at the University of California, Berkeley health services clinic, who found that the mouse promoted a neutral wrist and forearm posture.
The VM4R (the right-handed wired version) is the same fundamental shape as the earlier generation 3, but with a wider base and a larger lip along the lower edge to prevent the little finger from dragging on the desk surface. The pointer speed button, which on the generation 3 was located on the underside of the mouse (an awkward place to reach during use), has been moved to the top on the VM4R, where it can be operated without lifting or repositioning the hand. Two thumb buttons are included, a feature that is particularly useful for anyone whose index finger is suffering the effects of years of left-clicking. The chrome finish looks striking, though it does attract fingerprints.
What Linux Gets Right Out of the Box
The basic mouse functions work without any configuration on Linux, confirmed on Ubuntu 9.10 and higher. The cursor moves, the scroll wheel scrolls, and the pointer speed button changes the tracking speed as expected. The one immediate gap is that the scroll wheel click does not perform a middle-click paste, as Linux users might expect, and the additional buttons do not behave intuitively until they are remapped. Since Evoluent provides no Linux driver or configuration utility (their software is Windows-only), all customisation goes through the terminal.
Running xinput list will show the mouse in the list of input devices, typically appearing as:
"Evoluent VerticalMouse 4" id=8 [XExtensionPointer]Despite the mouse reporting 14 buttons, only 6 are physical buttons. The physical layout, as documented by Eden, is as follows: button 1 is the index finger (left click), button 2 is the ring finger (middle click), button 3 is the little finger (right click), buttons 4 and 5 are scroll up and scroll down respectively, button 8 is the upper thumb button, button 9 is the scroll wheel click and button 10 is the lower thumb button.
Remapping the Buttons: the Quick Method
The xinput{target="_blank"} tool allows button remapping in a single command. The following mapping, used by Eden himself, disables the index and ring fingers as direct clickers, makes the lower thumb button act as the primary left click, restores middle-click paste to the scroll wheel click, and sets the little finger as a right click:
xinput set-button-map "Evoluent VerticalMouse 4" 0 3 0 4 5 6 7 0 2 1 2The position of each number in the string corresponds to a button number, and the value at each position is the action that button will perform. Experiment with different values until the layout suits your workflow. This change takes effect immediately, but it is session-only: a reboot will reset the buttons to their defaults.
As MrEricSir notes in his guide to the mouse on Linux, the numeric device ID shown by xinput list will vary from one machine to the next and should not be relied upon in scripts. Using the full device name in quotes, as shown above, is the more reliable approach.
Making the Remapping Permanent: the Xorg Method
To make the button mapping survive a reboot, an Xorg configuration file is the recommended route. The first step is to identify the USB ID of the mouse by running lsusb and looking for the Evoluent entry in the output:
Bus 004 Device 004: ID 1a7c:0191 Evoluent VerticalMouse 4The portion you need is 1a7c:0191, though as MrEricSir points out, this will likely differ on your own system. With that value in hand, create the configuration file:
sudo nano /usr/share/X11/xorg.conf.d/90-evoluent.confPaste in the following block, substituting your own USB ID and preferred button mapping string:
Section "InputClass"
        Identifier      "Evoluent"
        MatchUSBID      "1a7c:0191"
        Option "ButtonMapping" "0 3 0 4 5 6 7 0 2 1 2"
EndSection
Note that the button mapping string in this file does not begin with the device ID: that was only required for the xinput command. Save, close and reboot, and the mapping will be applied automatically on every subsequent login. The configuration file path above is confirmed to work on Ubuntu; on other distributions, the relevant directory may differ.
One known complication with the Xorg approach is that the USB ID can change if the mouse is plugged into a different USB port, as some systems enumerate devices differently by port. If the mapping stops working after a port change, running lsusb again will confirm whether the ID has changed, and the configuration file will need updating accordingly.
Making the Remapping Permanent: the Script Method
A commenter on Eden's post, Lukas, offers an alternative that sidesteps the USB ID problem entirely by extracting the device's current session ID dynamically at startup using grep:
xinput --set-button-map $(xinput list | grep -i "evoluent verticalmouse" | grep -o "id=[0-9]*" | grep -o '[0-9]*') 1 3 3 4 5 6 7 9 2 8 11 12 13 14This can be saved as a shell script, made executable with chmod +x, and added to the startup applications of your desktop environment. Because xinput needs the display server to be fully initialised before it can act, adding a sleep 5 line at the top of the script is advisable to prevent it from running too early on login.
A Note on the Scroll Wheel
One recurring theme in user reports is that the scroll wheel on the VM4R has a noticeably tactile, audible click with each scroll step. Eden remarks that he personally prefers a free-spinning wheel and found the VM4R's scroll noticeably stiffer than the generation 2 model. A separate user, James, describes a more persistent problem across three separate Evoluent mice: the scroll wheel intermittently loses stability, causing the page to jump unexpectedly rather than scrolling smoothly one step at a time. Eden's suggested remedy is to clean the wheel gently with isopropyl alcohol, as dust and debris can accumulate inside the mechanism over time.
Disabling the LED
The Evoluent logo on the mouse glows constantly during use. For those who find this distracting, particularly in a dark environment, there is a hardware method to disable it that does not require any software. Unplug the mouse, then hold down the negative (−) end of the pointer speed rocker button on the side of the mouse and plug it back in while keeping the button held. The logo light will remain off until the procedure is reversed by holding the positive (+) end of the same button during reconnection. This method is confirmed to work on later production units of the VM4R.
Using the Mouse on Wayland
The methods described above, xinput and Xorg configuration files, are specific to the X11 display server. Wayland is now the default on most major distributions, including Ubuntu and Fedora, and neither approach will work there. The situation under Wayland is, however, somewhat better than it first appears.
For basic use, several users have reported that the Evoluent VerticalMouse 4 works largely as expected under Wayland with no configuration at all, with button behaviour closer to what most users would want out of the box. If that is sufficient for your needs, nothing further is required.
For custom button remapping under Wayland, the modern approach documented by Olivier Mehani in a December 2024 guide uses the hwdb subsystem, which operates at the udev level below the display server entirely. This makes it display-server agnostic and avoids the need for any background daemons or services.
The first step is to identify the scan codes of the buttons you wish to remap. Install evtest and run it as root to observe raw input events from the mouse:
sudo evtestSelect the Evoluent device from the list and press each button you want to remap. The output will show a scan code value in the MSC_SCAN field for each button press. On the VM4R, the lower thumb button has scan code 90004 and the upper thumb button has scan code 90006.
Next, determine the key codes you wish to map those buttons to. The libinput tool can show key codes as you press them:
sudo libinput debug-events --device /dev/input/eventX --show-keycodesSubstitute the correct event device for your keyboard, which can be found by running libinput debug-events without a --device argument and looking for the keyboard in the list. With both the scan codes and the desired key codes identified, create a file in /etc/udev/hwdb.d/. The filename should end in .hwdb, for example 70-evoluent.hwdb. The following example remaps the two thumb buttons to the Shift key and the Super key respectively, as Mehani uses them:
evdev:name:Evoluent VerticalMouse 4:*
 ID_INPUT_KEY=1
 ID_INPUT_KEYBOARD=1
 KEYBOARD_KEY_90004=leftshift
 KEYBOARD_KEY_90006=leftmeta
The ID_INPUT_KEY and ID_INPUT_KEYBOARD lines mark the mouse as a device capable of generating key events, which is required for the remapping to take effect. Once the file is saved, rebuild and reload the hardware database:
sudo systemd-hwdb update
sudo udevadm trigger
Restart your Wayland session and the new mappings will be active. The key names used in the file are lowercase versions of the Linux input event constants with the KEY_ prefix removed, so KEY_LEFTSHIFT becomes leftshift and KEY_LEFTMETA becomes leftmeta. Adjust the scan codes and key names to suit your own preferred layout.
Worth the Effort
The Evoluent VerticalMouse 4 is a well-considered device for anyone whose wrists are beginning to protest at years of conventional mouse use. For Linux users, the absence of any official configuration software is a genuine gap, but the community has documented reliable workarounds thoroughly. On X11, the xinput command and Xorg configuration files give you a permanent, flexible setup with minimal effort. On Wayland, Mehani's December 2024 guide demonstrates that the hwdb approach provides an equally robust solution that works at the kernel input level, independent of any display server. As Eden observes in his review, the lack of a good mouse configuration interface on Linux is a genuine oversight, but it is one that a little patience can overcome.
Shrinking title bar search box in Microsoft Office 365 applications

It might be a new development, but I only recently spotted the presence of a search box in the titles of both Microsoft Word and Microsoft Excel that I have as part of an Office 365 subscription. Though handy for searching file contents and checking on spelling and grammar, I also realised that the boxes take up quite a bit of space and decided to see if hiding them was possible.
![]()
In the event, I found that they could be shrunk from a box to an icon that expanded to pop up a box when you clicked on them. Since I did not need the box to be on view all the time, that outcome was sufficient for my designs, though it may not satisfy others who want to hide this functionality completely.
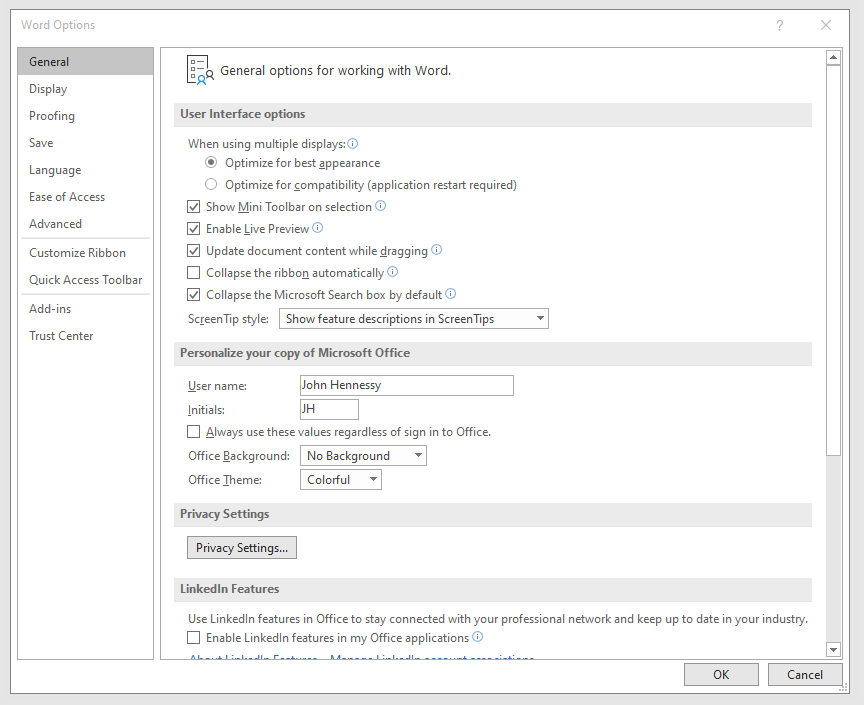
To get it, it was a matter of going to File > Options and putting a tick in the box next to the Collapse the Microsoft Search box by default entry in the General tab before clicking on the OK button. Doing that freed up some title bar space as desired, and searching is only a button press away.
Making a custom button to hide or display the Google Toolbar in Firefox
While adding more toolbars to Firefox is all very fine, they can take up space on the screen. Even with the big screens that many of us have these days, it's still nice to be able to see more of what we use web browsers to visit: web pages. For the Web Developer extension's toolbar, there is the Toggle Web Developer Toolbar plugin for showing and hiding the thing when so desired. As it happens, I keep it hidden until I need it and I fancied doing the same thing with the Google Toolbar but found none. Instead, I happened on a tutorial that used the Custom Buttons plugin to define a custom button. That gives you an entry named Add new button... to the context menu that appears when you right-click on the main menu bar near the top of the Firefox window. When you select the that extra entry in the menu, you get the dialogue box that you see below.

In there, that are some form fields that need filling. Button URL is an option without which you can do, but I entered "Toggle Google Toolbar" into the Name field while also sourcing an image to be used on the button instead of the default (a Google logo, naturally...). The last step is to add the code below underneath the /*CODE*/ comment line, leaving the latter in place.
const toolbar = document.getElementById("gtbToolbar");

toolbar.collapsed = !toolbar.collapsed;
With all that completed, clicking on the OK button is all that's needed to finish off the button definition. With that done, the next step is to add the button where you want it by right-clicking on the top menu bar again and selecting the Customise... entry. From the list of buttons that appears, just pick the new one and drag it to where you want it to go. Then, you're done with what might sound like a roundabout away of putting in place a space saver, but I can live with that.
Moving application title bar buttons on GNOME desktops

A recent look at how Ubuntu 10.04 development is getting on confronted me with an interface situation to which I am not accustomed: title bar buttons at the left. The usual combination of buttons for maximisation, minimisation and closure were there in their usual order but at the left of the window. While this is the where you find them on OS X, I prefer the Windows convention and placed them to the right again.
To achieve that end, I ran gconf-editor from the command line using my usual user account (not sudo; that doesn't seem to work) and made my way to apps -> metacity -> general. Once there, I sought out the button_layout property and moved the colon in the value from the left to the right. In other words, I started with this:
maximize,minimize,close:
and changed it to this (note the position of the colon in the actual string):
:maximize,minimize,close
If you ever find yourself wanting to change things from the Windows convention to the Apple one, just reverse what I did. As an aside, you also can swap the button order too if you like. After all, it's just a text field that you can edit, and the screen immediately refreshes when you hit the Return key after completing the edit.
As a more general observation, if Ubuntu 10.04 does come out using the OS X convention for title bar button placement, I could see others like wanting it changed back and that's why I am sharing it here. Surprising users in this way, especially after the 9.10 release's attracting some adverse comments, would not be all that advisable. The issue may be easy to address, but that's small comfort when you release how easily users are discouraged.
Nevertheless, 10.04 is an LTS release and what I have seen so far looks polished; there may be no splash screen at boot and shutdown time for what I am running (I am sticking with acquiring upgrades every so often instead of periodic re-installation from a new disk image) but that's a minor matter.
For the sake of not turning over the apple cart, I may have left off VirtualBox Additions, and things look steady enough so far. In fact, I am writing these words using Firefox 3.6 on there. Accompanying that is OpenOffice 3.2, but things do not look so different apart from these, a reassuring observation. While there may be an emphasis on purple in the colour scheme at the time of writing, that could change yet. 9.10's course had plenty of that, so I am willing to be patient. After all, there's more than a month to go yet, before the final cut is available for general use.
Navigation shortcuts
Though I may have been slow off the mark on this, I recently discovered keyboard equivalents to browser back and forward buttons. They are: Alt+[Let Arrow] for back and Alt+[Right Arrow] for forward. While I may have first discovered their existence in Firefox, they seem to be more widely available than that, with the same trickery working in Chrome and Internet Explorer having them too. The existence of these keyboard shortcuts might provide some pause for thought too for those web application developers who intend to disable the Back and Forward functionality in browsers, but being able to save mouse mileage with some keyboard action can't be bad.
Other uses for the middle mouse button
Here's another one of those things that I discovered while being clumsy: in Firefox, click on your middle mouse button/wheel while hovering over a tab, and it will close it; you don't even need to click on the close icon. Evince, the PDF viewer favoured by Ubuntu, also makes use of the middle mouse button: for panning your way through documents using the hand tool. In a moment of lateral thinking, I tried the same trick with Adobe Reader; in version 7.x, it works in the same way. On Windows at least, Adobe Reader 8.x is a different animal and features automatic scrolling, a very useful proposition for the reading of eBooks if the text doesn't pass by you too quickly, and even a moderately reliable read aloud feature.