Version control of large files on GitHub
27th August 2024When you try pushing large files to a GitHub repository, you may find that you breach its 100 MB limit. When you do, you either need to buy a data pack or exclude the file from being tracked. In my case, I decided that the monthly fee for 50 GB was not overly onerous, so I added that. Excluding such files using the .gitignore functionality makes a lot of sense, too.
If you decide to proceed as I did, you will need to install git-lfs. Since that may vary by operating system, I am leaving to you to look for those details on the website that I have linked to earlier. Activating it for your user account needs the following:
git lfs install
Following that, you need to flag the file or type of file using a command like the following:
git lfs track "[file path with name or search pattern]"
Executing the above adds the file path including the file name or the search pattern (normal operating system wildcards like * work here) to a file named .gitattributes in the root of the repository folder hierarchy. If that file no longer exists, it will get created the first time that this is done. It will also need to be added to the repository using git add like any other file. A general command like the following will also do it anyway, since it covers everything in the relevant folder:
git add .
After making a commit, the next step is to push the contents into GitHub. At this stage, the large file or files will be recognised and sent to large file storage with only a text link in the main area. Everything else will be handled as normal.
While on this subject, I need to add a few words of warning. Pushing a large file to GitHub without doing things up front will cause the operation to fail. That may make the transition over to large file storage all the more tricky, since things will be out of order. Moving everything to a temporary folder and again cloning the repository was how I got out of this impasse when it happened to me. Then, I could get the large file handling set up before getting going again. It is better to sort things like this out at the start of the process, rather than attempting to remedy things part way through the process.
Keeping a file or directory out of a Git or GitHub repository
26th August 2024Recently, I have begun to do more version control of files with Git and GitHub. However, GitHub is not a place to keep files with log in credentials. Thus, I wanted to keep these locally but avoid having them being tracked in either Git or GitHub.
Adding the names to a .gitignore file will avoid their inclusion prospectively, but what can you do if they get added in error before you do? The answer that I found is to execute a command like the following:
git rm -r --cached [path to file or directory with its name]
That takes it out of the staging area and allows the .gitignore functionality to do its job. The -r switch makes the command recursive, should you be working with the contents of a directory. Then, the --cached flag is what does the removal from the staging area.
While the aforementioned worked for me when I had an oversight, the following is also suggested:
git update-index --assume-unchanged [path to file or directory with its name]
That may be working without a .gitignore file, which was not how I was doing things. Nevertheless, it may have its uses for someone else, so that is why I include it above.
Remedying a warning about an ECDSA host key
25th August 2024During some website maintenance that I have been doing using my iMac, I encountered a message like the following at one point:
Warning: the ECDSA host key for '<server name>' differs from the key for the IP address '<server IP address>'
The cause was a rebuild of one of my web servers and changes to SSH keys that it caused. The solution in my case was to issue a command like the following:
ssh-keygen -R <server IP address>
That felt neater than editing ~/.ssh/known_hosts to remove the affected key. If the command does not remedy things for you, then editing the file should help. That, after all, is what the rest of the warning message suggested to me. My qualms about messing with files made me go with the command, and that got things sorted. There had been some use of ssh-copy-id too, which might be information that is worth having to hand.
Using third-party tools to make an Evoluent Mouse work as needed on macOS
24th August 2024Now having a new location from which I can work, I acquired an all-in-one desktop computer for use while there. While tempted by an HP option that runs Windows, I ended up choosing an iMac instead. That gained me extra disk space and more memory at a cost. Having UNIX-style command line capability was another attraction. After living with the Windows terminal for a while, its limitations were all too apparent to me.
While I started off desktop computing on a Macintosh Classic and having owned a MacBook Pro in the more recent past, there still was a learning curve. One of these related to the configuration of the mouse supplied with the system. Whatever about only having one button and needing to learn gestures, it was the speed at which the pointer goes that really got me reaching for my more usual Evoluent. Even so, the subsequent discovery of LinearMouse makes things much more bearable once all the requisite permissions were assigned.
Getting the Evoluent configured to my liking needed another third-party application: USB Overdrive. If Evoluent's own software fitted the bill, that would have done. However, they have done some finger pointing at Apple instead of updating it to work with the latest Mac technology. There may be truth in the accusations, but it is striking that another piece of software works when theirs does not. Nevertheless, the other option worked once it got the permissions to detect the hardware. Then, it was a matter of working out which button was which on the mouse, so I could have them assigned as I wished.
After that, I could settle into the new system and get used to its idiosyncrasies. Adding Parallels got me a Windows 11 virtual machine for business compatibility, while I got going with setting up some automation using the macOS terminal. All is becoming more settled than working out of a laptop.
Needing third-party software does have a catch, though: underlying changes to macOS could scupper things. It was the sort of thing that made me move away from GNOME Shell as my Linux desktop. The extensions on which I was depending kept getting obsoleted by every new release. It is something to watch, even if macOS evolves less dramatic than GNOME 3 in its various forms.
Avoid seeing "before you leave" messages in Firefox
20th August 2024After updating a page in a Textpattern instance that I have, I got a pop-up message asking me to confirm my intention to leave the editor page. While recalling that there was a way to avoid these extra dialogue boxes, I could not remember what it was. In any case, it was hardly as if I needed to add extra mouse clicks to my day, even if there may have been good intentions on the CMS developer's side.
The solution going into about:config. If doing this for the first time, you will be presented with a confirmation screen with an override tick box for later incursions. Once past the screen in question (assuming that you have not overridden it at a previous encounter), the next step is to search for dom.disable_beforeunload and set its value to true, since the default value is false.
While that did what I needed, I also noted another option called dom.require_user_interaction_beforeunload with a value of true. One has to wonder if setting that to false instead of changing dom.disable_beforeunload would have a similar effect. When I tried this, dom.require_user_interaction_beforeunload did not work as fully as dom.disable_beforeunload. Thus, I suggest sticking with the latter for now.
Turn off display of popular highlights in Kindle apps for Windows and Android
19th August 2024When I read books on a PC, I often make use of the Amazon Kindle web app. However, I do use its Android and iOS apps on mobile devices, and the Windows app remains available. On these, I never have taken to using annotations, though the facility does have its uses for many. Another feature that I rarely relish is the display of popular highlights, since I find this a little intrusive. Usually, I go about turning it off for that very reason.
On the Windows app, this is straightforward enough. Go to Tools > Options through the menu bar. On the dialogue box that produces, pick the Annotations screen and remove the tick mark in the Popular Highlights section. Then, click on the Save button to close the settings box and return to the main application screen.
Doing the same on Android is much less obvious. First, you need to open a book. Then, tap on the text size icon (Aa) followed by doing the same on the More menu item in the pane that appears. Scroll downward until you find Popular Highlights and toggle the setting to its off position. Lastly, swipe down the pane to close it. Though you have done this with one book open, it applies to all.
While some have commented that touchscreen devices can feel more intuitive to use, that has not been born out by what Amazon has done. It fits into the same category as how they responded when Google changed the rules for in-app purchases. Then, Amazon decided to remove this from their app. While that was a financial and business decision, their approach to user experience on their Android app does need another look.
Opening up Kindle for PC in a maximised window on Windows 11
18th August 2024One irritation with the Windows app for Amazon Kindle is that it does not open in a maximised window, and it scarcely remembers your size settings from session to session. Finding a solution to this sizing issue is no easy task, so I happened on one of my own that I previously used with File Explorer folder shortcuts.
The first step is to find the actual location of the Start Menu shortcut. Trying C:\Users\[User Name]\AppData\Roaming\Microsoft\Windows\Start Menu\Programs\Amazon\Amazon Kindle should do that.
Next, right-click on the Kindle icon and choose Properties from the context menu that appears. In the dialogue box that causes to appear on the screen, look for the "Run:" setting. By default, this appears as "Normal Window" but you can change this to "Maximised", which is what I did before clicking on Apply before doing the same for the OK button to dismiss the dialogue box.
If you have pinned the shortcut to the taskbar or elsewhere, you may need to unpin it and pin it again to carry over the change. After that, I found that the Kindle app opened up in a maximised window as I wanted.
Excluding Google trend suggestions from an address bar search in Firefox
15th August 2024When it comes to learning what is happening in the world, I am more LOMO than FOMO. Thus, I do not appreciate anything that adds content that I did not request. Given the state of the world right now, there is a need to moderate one's intake. When I found trending topics being added to Google search results from the Firefox address bar, I then sought a way of turning that off.

That involved navigating to about:preferences#search in the address bar (you can go to Settings > Search just as well). Once there, it was a matter of looking in the Search Suggestions section and clearing the checkbox for the Show trending search suggestions item. Naturally, this only applies if you choose Google as your default search engine; otherwise it should not apply. For me, the setting change did what was needed.
Executing PowerShell scripts in Windows 11
14th August 2024Recently, I have added the capability to update a Hugo-driven website from a laptop running Windows 11. Compared to what you get with Linux, I do feel a little like a fish out of water when it comes to using Windows for tasks that I accomplish more often on the former. That includes running PowerShell scripts instead of their BASH counterparts. While Linux Subsystem for Windows could be an option, my machine runs Windows 11 Home, where it is unavailable. Learning the ways of the Windows Terminal cannot do any harm in any case.
The default action of not executing PowerShell scripts is not a bad approach when it comes to keeping machines secure for less technical users. For the rest, you need to learn how to use the Set-ExecutionPolicy commandlet. Doing this in a safe means doing it in a restrictive manner. Thus, I chose the following command and executed it in a terminal running with admin privileges:
Set-ExecutionPolicy -ExecutionPolicy Unrestricted -Scope CurrentUser
The scope here is for the currently logged-in user, instead of allowing every user the same capability. Some undoubtedly might suggest an execution policy of AllSigned and that adds effort that I was unwilling to expend, hence the choice that I made. This is not that critical a machine, so that is why I made the choice that I did. There was nothing too complicated about the script logic anyway.

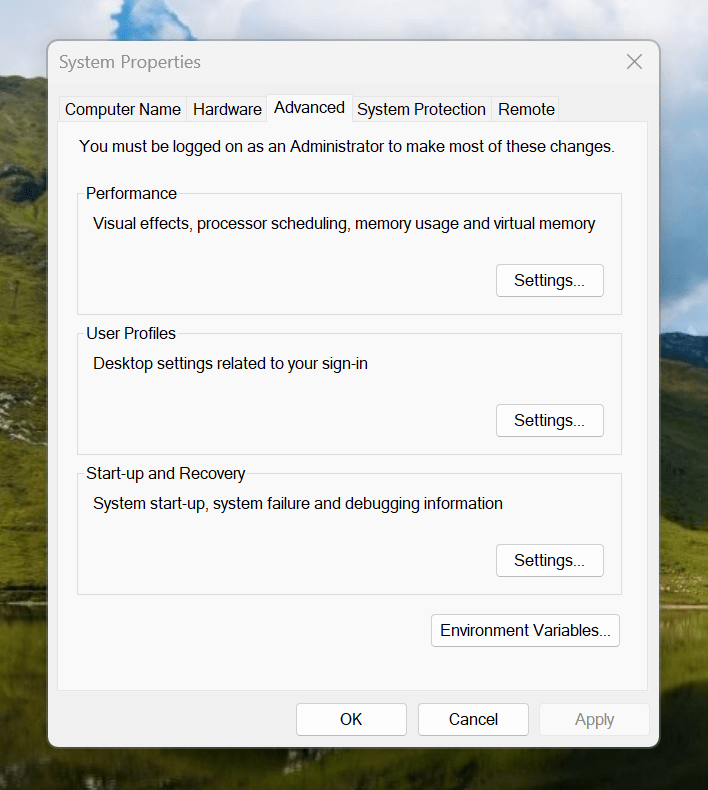
Making the script available without needing to specify the path to it was my next step. In my case, I added a new location to the Path environment variable. To accomplish that, you need to find the Control Panel, open it and go to System and Security. Then, move to System (Control Panel\System and Security\System) and click on Advanced System Settings. In the new dialogue box that appears, click on the Environment Variables... button. Next, select the Path entry and click on the Edit button. That spawns another dialogue box where I added the new path. Clicking the OK button in each dialogue box closes them all, one at a time, to get back to the Control Panel window again. That too can be closed, and any open terminals shut down and a new one opened. The process is clunky, yet it works once you know what to do.
At the end of all this, I had a scripted process for updating a Hugo-driven website. It was not as sleek as what I have on my Linux system, yet it works well enough to allow more flexibility. In time, I may refine things further.
Get web links from Outlook emails and Teams chats to open in your web browser of choice
12th August 2024By default, web links from either Outlook (here, I am referring to the Classic version and not the newer web appliance version that Microsoft would like us all to use, though many think it to be feature-incomplete) or Teams open in Edge, which may not be everyone's choice of web browser. Many choose Google Chrome, while I mainly use Mozilla Firefox, with Brave being another option that I have.

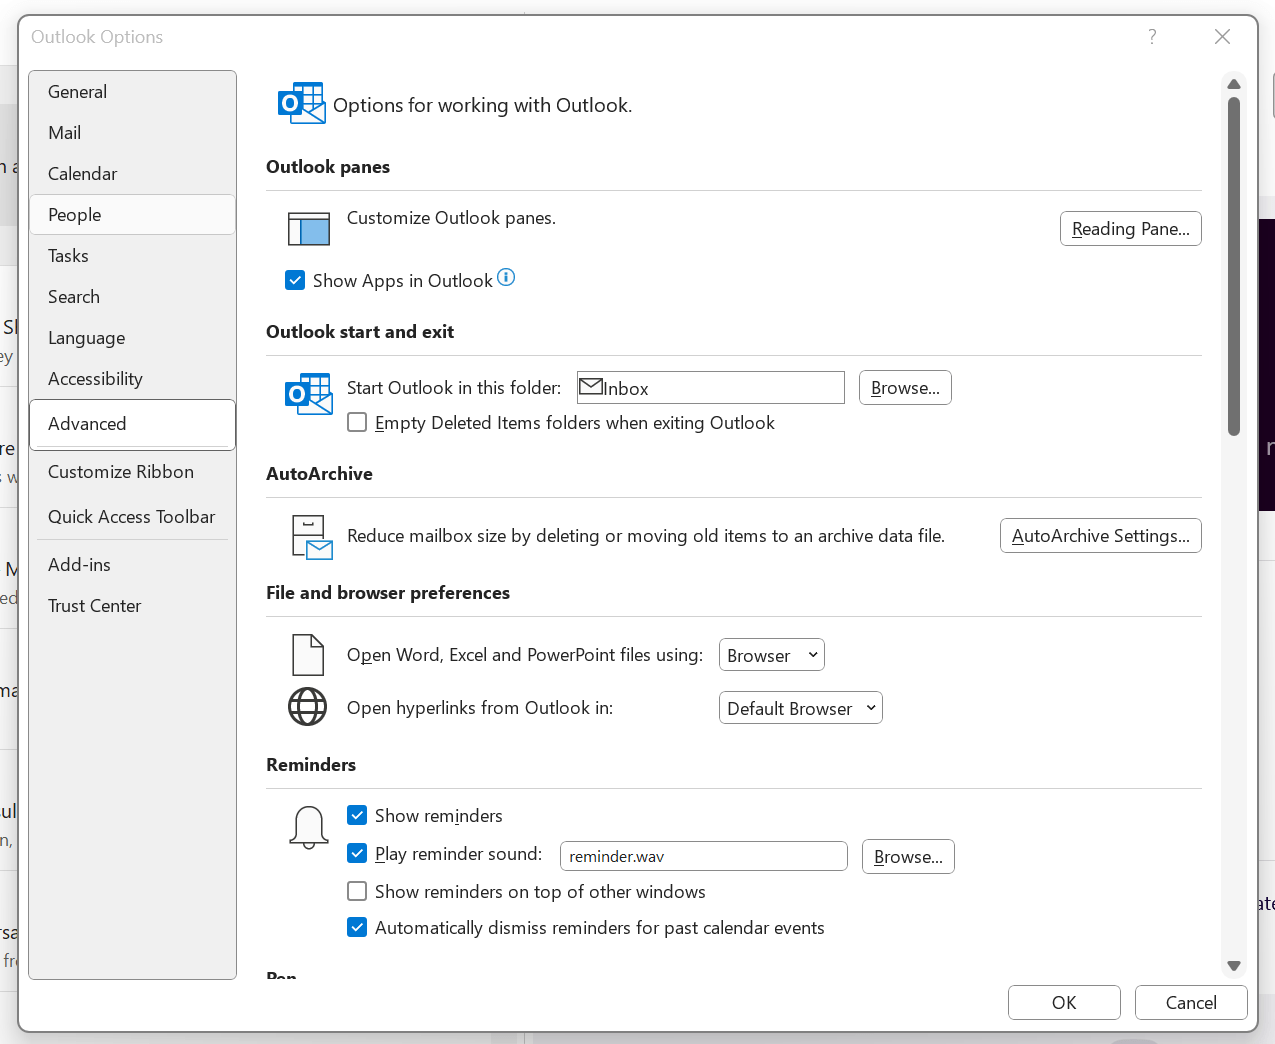
To get both Outlook and Teams to use your default system web browser, go to Outlook and navigate to File > Options > Advanced > File and browser preferences. Once there, look for the line with Open hyperlinks from Outlook in. The dropdown box will show Microsoft Edge by default, but there is another option: Default Browser. Choosing that will change things away from Edge to your chosen browser, assuming that you have set it by default using the Settings application.

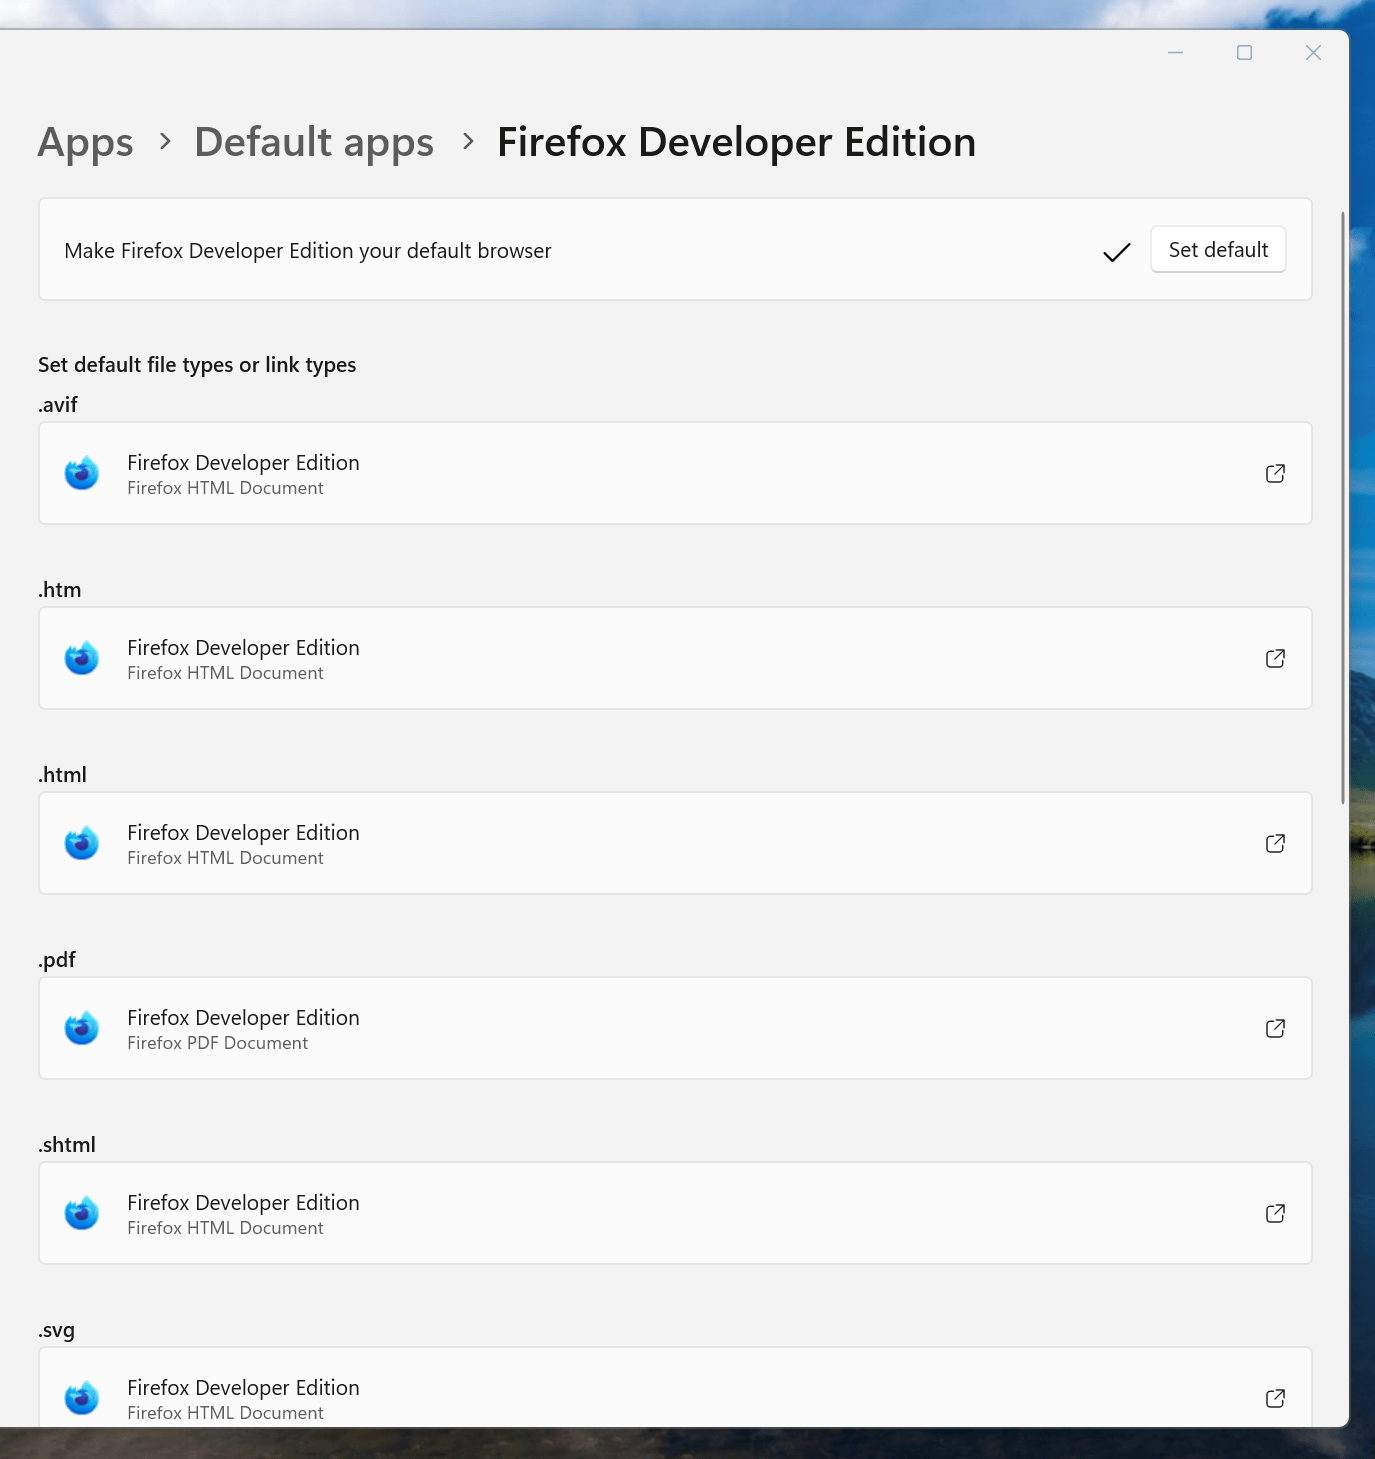
If you have not gone there, navigate to Apps > Default apps. Once there, find the entry for the browser that you want to use and click on the Set default button. You also will see a list of file types, where you may need to change the setting for those as well. Once the system default is sorted, that will be honoured by Outlook and Teams as well.