One way to fix slow CyberGhost VPN connections on Windows 10
31st January 2020Due to a need to access websites with country blocking, I have decided to give CyberGhost a go and it also will come in handy when connecting devices to other Wi-Fi connections. What I have got is the three year subscription package and all went went well on the first day of use. However, things became unusable on the second and a reboot did not sort it.
The problem seemed to affect a phone running Android too and I even got to suspecting my router an broadband provider. Even terminating the subscription came to mind but it did not come to that. Instead, I did a bit more research and tried changing the maximum transition unit (MTU) for the connection to 1300 as suggested in a CyberGhost help article. Using the Control Panel meant that it was resetting to 1500 on my Windows 10 machine so I then turned to a command line based solution.
To do that, I started PowerShell in administrator mode from the context menu produced by right clicking on the Start Menu icon on the taskbar. Then, I entered the following command to see what connections I had and what the MTU settings were:
netsh interface ipv4 show subinterfaces
From looking through the Settings and Control Panel applications, I already had worked out what network interface belonged to the CyberGhost connection. Seeing that the MTU setting was 1500, I then issued a command like the following to change that to 1300.
netsh interface ipv4 set subinterface "<name of ethernet interface>" mtu=1300 store=persistent
Here, <name of ethernet interface> gets replace by the name of your connection and the string is quoted to avoid spaces in the name causing problems with executing the command. Once that second command had been run, the first one was issued again and the output checked to ensure that the MTU setting was as expected.
This was done when the VPN connection was inactive but it may work also with an active connection. After making the change, I again reconnected to the VPN and all has been as expected since then and I found a better connection for my Android phone too.
More thinking on travelling without a laptop
10th December 2016When it comes to the technology that I carry with me on trips away, I have begun to start weighing devices on my kitchen scales. The results are a little revealing. The HP Pavilion dm5 that has gone with me to Ireland and other places weighs between 2.5 and 3 kg while my Apple iPad Mini 2 comes in at 764 grams. My 12.9″ iPad Pro with its Logitech keyboard weighs between these at 110 to 1200 grams. The idea of consolidating computing devices for travel has been discussed on here before now and the main thing stopping my just going with the iPad Pro was the viewing of photos without filling up its 32 GB of storage space.
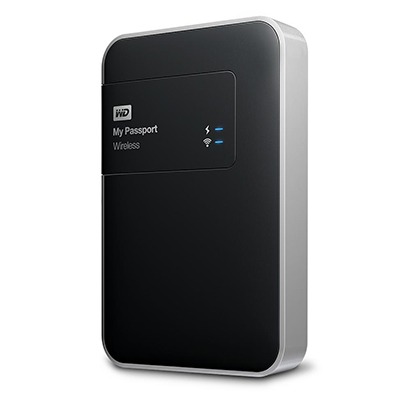
Since then, I just may have found a workaround and it is another gadget, this time weighing only a few hundred grams: a 1 TB WD My Passport Wireless portable hard drive. Aside from having a SD card slot that allows the automatic backup of photos, it also can connect with tablets and phones using WiFi broadband.
It is the WD My Cloud app that makes the connections to mobile devices useful and it works smoothly on iOS and Android devices too. Nevertheless, there is more functionality on the latter ones such as DNG file support and an added slide show feature that works with JPEG files. Both of these are invaluable for viewing photos and I feel a little short-changed that they are not available on iOS. Hopefully, that will get resolved sooner rather than later.
Thankfully, my Pentax K5 II DSLR camera can be persuaded to save DNG and JPEG files simultaneously so that they can be viewed full screen on both types of devices without having to transfer them onto the tablet first as you would with Apple’s SD card reader. Usefully, that gets around my oversight in buying iPads with only 32 GB of storage each. That now looks like a false economy given what I am trying now.
Such is the weight difference, just taking along my Apple iPad Pro and the WD device will save around 1 kg and there is less fuss at airport security screening too. While my HTC phone would suffice for seeing photos as slide shows, I am wondering if my battered Google Nexus 9 could come too. The only dilemma then would be how to pack things since I am not sure how a large iPad screen would seem to cabin crew or other passengers during take off and landing. That makes using the Nexus 9 onboard more of a proposition and the iPad might go into the hold luggage to make life a little easier. Still, that choice is a minor concern now that I can try travelling overseas without a laptop to see how I get along.
Piggybacking an Android Wi-Fi device off your Windows PC’s internet connection
16th March 2013One of the disadvantages of my Google/Asus Nexus 7 is that it needs a Wi-Fi connection to use. Most of the time this is not a problem since I also have a Huawei mobile WiFi hub from T-Mobile and this seems to work just about anywhere in the U.K. Away from the U.K. though, it won’t work because roaming is not switched on for it and that may be no bad thing with the fees that could introduce. My HTC Desire S could deputise but I need to watch costs with that too.
There’s also the factor of download caps and those apply both to the Huawei and to the HTC. Recently, I added Anquet‘s Outdoor Map Navigator (OMN) to my Nexus 7 through the Google Play store for a fee of £7 and that allows access to any walking maps that I have bought from Anquet. However, those are large downloads so the caps start to come into play. Frugality would help but I began to look at other possibilities that make use of a laptop’s Wi-Fi functionality.
Looking on the web, I found two options for this that work on Windows 7 (8 should be OK too): Connectify Hotspot and Virtual Router Manager. The first of these is commercial software but there is a Lite edition for those wanting to try it out; that it is not a time limited demo is not something that I can confirm though that did not seem to be the case since it looked as if only features were missing from it that you’d get if you paid for the Pro variant. The second option is an open source one and is free of charge apart from an invitation to donate to the project.
Though online tutorials show the usage of either of these to be straightforward, my experiences were not all that positive at the outset. In fact, there was something that I needed to do and that is why this post has come to exist at all. That happened even after the restart that Conectify Hotspot needed as part of its installation; it runs as a system service so that’s why the restart was needed. In fact, it was Virtual Router Manager that told me what the issue was and it needed no reboot. Neither did it cause network disconnection of a laptop like the Connectify offering did on me and that was the cause of its ejection from that system; limitations in favour of its paid addition aside, it may have the snazzier interface but I’ll take effective simplicity any day.
Using Virtual Router Manager turns out to be simple enough. It needs a network name (also known as an SSID), a password to restrict who accesses the network and the internet connection to be shared. In my case, the was Local Area Connection on the drop down list. With all the required information entered, I was ready to start the router using the Start Network Router button. The text on this changes to Stop Network Router when the hub is operational or at least it should have done for me on the first time that I ran it. What I got instead was the following message:
The group or resource is not in the correct state to perform the requested operation.
The above may not say all that much but it becomes more than ample information if you enter it into the likes of Google. Behind the scenes, Virtual Router Manager is using native Windows functionality is create a WiFi hub from a PC and it appears to be the Microsoft Virtual Wi-Fi Miniport Adapter from what I have seen. When I tried setting up an adhoc Wi-Fi network from a laptop to the Nexus 7 using Windows’ own network set up capability via its Control Panel, it didn’t do what I needed so there might be something that third party software can do. So, the interesting thing about the solution to my Virtual Router Manager problem was that it needed me to delve into the innards of Windows a little.
Firstly, there’s running Command Prompt (All Programs > Accessories) from the Start Menu with Administrator privileges. It helps here if the account with which you log into Windows is in the Administrators group since all you have to do then is right click on the Start Menu entry and choose Run as administrator entry in the pop-up context menu. With a command line window now open, you then need to issue the following command:
netsh wlan set hostednetwork mode=allow ssid=[network name] key=[password] keyUsage=persistent
When that had done its thing, Virtual Router Manager worked without a hitch though it did turn itself after a while and that may be no bad thing from the security standpoint. On the Android side, it was a matter of going in Settings > Wi-Fi and choose the new network that have been creating on the laptop. This sort of thing may apply to other types of tablet (Dare I mention iPads?) so you could connect anything to the hub without needing to do any more on the Windows side.
For those wanting to know what’s going on behind the scenes on Windows, there’s a useful tutorial on Instructables that shows what third party software is saving you from having to do. Even if I never go down the more DIY route, I probably have saved myself having to buy a mobile Wi-Fi hub for any trips to Éire. For now, the Irish 3G dongle that I already have should be enough.