AttributeError: module ‘PIL’ has no attribute ‘Image’
11th March 2024One of my websites has an online photo gallery. This has been a long-term activity that has taken several forms over the years. Once HTML and JavaScript based, it then was powered by Perl before PHP and MySQL came along to take things from there.
While that remains how it works, the publishing side of things has used its own selection of mechanisms over the same time span. Perl and XML were the backbone until Python and Markdown took over. There was a time when ImageMagick and GraphicsMagick handled image processing, but Python now does that as well.
That was when the error message gracing the title of this post came to my notice. Everything was working well when executed in Spyder, but the message appears when I tried running things using Python on the command line. PIL is the abbreviated name for the Python 3 pillow package; there was one called PIL in the Python 2 days.
For me, pillow loads, resizes and creates new images, which is handy for adding borders and copyright/source information to each image as well as creating thumbnails. All this happens in memory and that makes everything go quickly, much faster than disk-based tools like ImageMagick and GraphicsMagick.
Of course, nothing is going to happen if the package cannot be loaded, and that is what the error message is about. Linux is what I mainly use, so that is the context for this scenario. What I was doing was something like the following in the Python script:
import PIL
Then, I referred to PIL.Image when I needed it, and this could not be found when the script was run from the command line (BASH). The solution was to add something like the following:
from PIL import Image
That sorted it, and I must have run into trouble with PIL.ImageFilter too, since I now load it in the same manner. In both cases, I could just refer to Image or ImageFilter as I required and without the dot syntax. However, you need to make sure that there is no clash with anything in another loaded Python package when doing this.
A little bit of abstraction
21st August 2021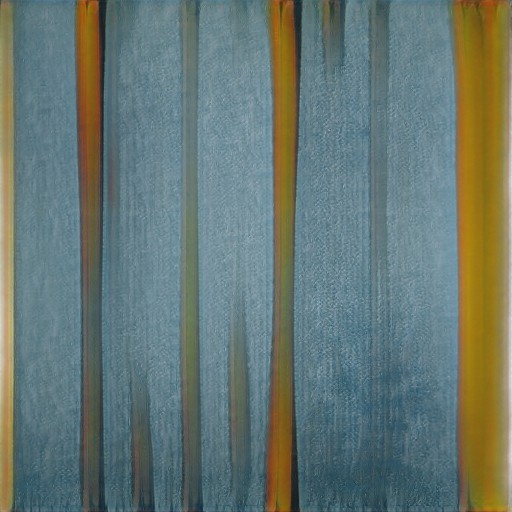
Data science has remained in my awareness since 2017 though my work is more on its fringes in clinical research. In fact, I have been involved more in the standardisation and automation of more traditional data reporting than in the needs of data modelling such as data engineering or other similar disciplines. Much of this effort has meant the use of SAS, with which I have programmed since 2000 and for which I have a licence (an expensive commodity, it has to be said), but other technologies are being explored with R, Python and Julia being among them.
The change in technological scope does bring an element of excitement and new interest but there is also some sadness when tried and trusted technologies meet with newer competition and valued skills are no longer as career securing as they once were. Still, there is plenty of online training out there and I already have collected some of my thoughts on this. The learning continues and the need for repositioning is also clear.
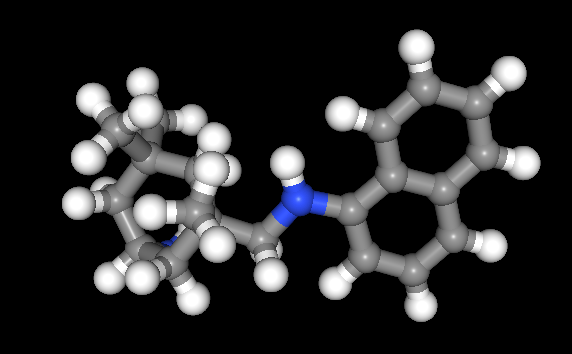
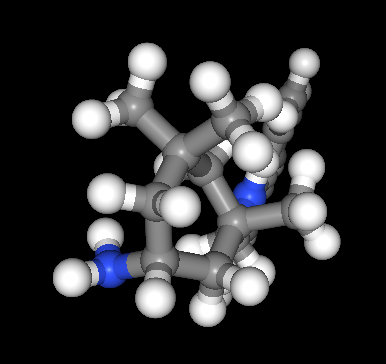
The journey also has brought some curios to my notice. One of these is This Person Does Not Exist, a website building photos of non-existent faces using machine learning. Recently, I learned of others like it such as This Artwork Does Not Exist, This Cat Does Not Exist, This Horse Does Not Exist, and This Chemical Does Not Exist. The last of these probably should be entitled “This Molecule Does Not Exist (Yet)” since it is a fictitious molecular structure that has been created and what you get is an actual moving image that spins it around in three-dimensional space. The one with dynamically generated abstract art is the main inspiration for this piece and is of more interest to me while the other two are more explanatory though the horse website is not so successful in its execution and one can ask why we need more cat pictures.
To some, the idea of creating fake pictures may feel a little foreboding and that especially applies to photos of people and the livelihoods of any content creators. Nevertheless, these sources of imagery have their legitimate uses such as decorating websites or brochures and that is where my interest is piqued. After all, there are some subjects where pictures can be scarce so any form of decoration that enlivens an article has to have some use. Technology websites like this one can feature images too with screenshots and device photos being commonplace but they can all look like each other, hence the need for a little more variety and having pictures often increases the choice of website themes as well since so many need images to make them work or stand out. As ever, being sparing with any new innovations remains in order so that is how I approach this matter as well.
Using .htaccess to control hotlinking
10th October 2020There are times when blogs cease to exist and the only place to find the content is on the Wayback Machine. Even then, it is in danger of being lost completely. One such example is the subject of this post.
Though this website makes use of the facilities of Cloudflare for various functions that include the blocking of image hotlinking, the same outcome can be achieved using .htaccess files on Apache web servers. It may work on Nginx to a point too but there are other configuration files that ought to be updated instead of using a .htaccess when some frown upon the approach. In any case, the lines that need adding to .htaccess are listed below though the web address needs to include your own domain in place of the dummy example provided:
RewriteEngine on
 RewriteCond %{HTTP_REFERER} !^$
 RewriteCond %{HTTP_REFERER} !^http://(www\.)?yourdomain.com(/)?.*$ [NC]
 RewriteRule .*\.(gif|jpe?g|png|bmp)$ [F,NC]
The first line turns on the mod_rewrite engine and you may have that done anyway. Of course, the module needs enabling in your Apache configuration for this to work and you have to be allowed to perform the required action as well. This means changing the Apache configuration files. The next pair of lines look at the HTTP referer strings and the third one only allows images to be served from your own web domain and not others. To add more, you need to copy the third line and change the web address accordingly. Any new lines need to precede the last line that defines the file extensions that are to be blocked to other web addresses.
 RewriteEngine on
 RewriteCond %{HTTP_REFERER} !^$
 RewriteCond %{HTTP_REFERER} !^http://(www\.)?yourdomain.com(/)?.*$ [NC]
 RewriteRule \.(gif|jpe?g|png|bmp)$ /images/image.gif [L,NC]
Another variant of the previous code involves changing the last line to display a default image showing others what is happening. That may not reduce the bandwidth usage as much as complete blocking but it may be useful for telling others what is happening.
Installing Perl modules using CPAN on Linux Mint 19.2
28th September 2019My online travel photo gallery is a self-coded set of PHP scripts that read data from tables in a MySQL database. These tables are built from input XML files using a Perl script that itself creates and executes an SQL script. The Perl script also does some image processing using GraphicsMagick commands to resize images and to add copyright information and image framing. Because this processed one image at a time sequentially, it was taking several minutes to complete and only partly used the capacity of the PC that I used.
This led me to look at adding parallel processing and that is what brought me to looking at the Parallel::ForkManager Perl module. An alternative approach might have been to add new images in such a way as not to need the full run involving hundreds of image files, but that will take more work and I fancied having a look at parallelising things anyway.
If it was not there already, the first act would have been to install build-essential to get access to the cpan command. The following command accomplishes this:
sudo apt-get install build-essential
Once that is there, the cpan command needs to be run and some questions answered to get things going. The first question to answer is whether you want setup to be as automated as possible and the default answer of yes worked for me. The next question to answer regards the approach that cpan takes when installing modules and I chose sudo here (local::lib is the default value and manual is another option). After this, cpan drops into its own command shell. Here, I issued two more commands to continue the basic setup by updating CPAN.pm to the latest version and adding Bundle::CPAN to optimise the module further:
make install
 install Bundle::CPAN
Continuing the last of these may need extra intervention to confirmation the suggested default of exit at one point in its operation and that takes a little time to complete. It is after this that Parallel::ForkManager can be installed using the following command:
install Parallel::ForkManager
That completed quickly and the cpan shell was exited using its exit command. Then, the new module was available in scripting after that. The actual use of this module is something that hope to describe in another post so I am ending this one here and the same process is just as applicable to setting up cpan and adding any other Perl CPAN module.
Lightening of desktop background images on Linux Mint Debian Edition running in Virtualbox
22nd October 2018After a recent upgrade to Linux Mint Debian Edition 3 in a VirtualBox virtual machine that I had running its predecessor, I began to notice that background images were being loaded with more washed out of faded colours. This happened at startup so selecting another background image worked as intended until the same thing happened to that after a system restart.
This problem is not new and has affected the Cinnamon desktop in the main Linux Mint variant (the one that is based on Ubuntu) and issuing the following command in a terminal session is a suggested solution:
gsettings set org.cinnamon.muffin background-transition fade-in
In my case, that solved the problem and desktop background image display is as it should be since I executed the above. All it took was a change to a system setting.
Rethinking photo editing
17th April 2018Photo editing has been something that I have been doing since my first-ever photo scan in 1998 (I believe it was in June of that year but cannot be completely sure nearly twenty years later). Since then, I have been using a variety of tools for the job and wondered how other photos can look better than my own. What cannot be excluded is my preference for being active in the middle of the day when light is at its bluest as well as a penchant for using a higher ISO of 400. In other words, what I do when making photos affects how they look afterwards as much as the weather that I had encountered.
My reason for mentioning the above aspects of photographic craft is that they affect what you can do in photo editing afterwards, even with the benefits of technological advancement. My tastes have changed over time, so the appeal of re-editing old photos fades when you realise that you only are going around in circles and there always are new ones to share, so that may be a better way to improve.
When I started, I was a user of Paint Shop Pro but have gone over to Adobe since then. First, it was Photoshop Elements, but an offer in 2011 lured me into having Lightroom and the full version of Photoshop. Nowadays, I am a Creative Cloud photography plan subscriber so I get to see new developments much sooner than once was the case.
Even though I have had Lightroom for all that time, I never really made full use of it and preferred a Photoshop-based workflow. Lightroom was used to select photos for Photoshop editing, mainly using adjustments for such things as tones, exposure, levels, hue and saturation. Removal of dust spots, resizing and sharpening were other parts of a still minimalist approach.
What changed all this was a day spent pottering about the 2018 Photography Show at the Birmingham NEC during a cold snap in March. That was followed by my checking out the Adobe YouTube Channel afterwards where there were videos of the talks featured every day of the four-day event. Here are some shortcuts if you want to do some catching up yourself: Day 1, Day 2, Day 3, and Day 4. Be warned though that these videos are long in that they feature the whole day and there are enough gaps that you may wish to fast-forward through them. Even so, there is quite a bit of variety of things to see.
Of particular interest were the talks given by the landscape photographer David Noton who sensibly has a philosophy of doing as little to his images as possible. It helps that his starting points are so good that adjusting black and white points with a little tonal adjustment does most of what he needs. Vibrancy, clarity and sharpening adjustments are kept to a minimum while some work with graduated filters evens out exposure differences between skies and landscapes. It helps that all this can be done in Lightroom, so that set me thinking about trying it out for size and the trick of using the backslash (\) key to switch between raw and processed views is a bonus granted by non-destructive editing. Others may have demonstrated the creation of composite imagery, but simplicity is more like my way of working.
Confusingly, we now have the cloud-based Lightroom CC while the previous desktop counterpart is known as Lightroom Classic CC. Though the former may allow for easy dust spot removal among other things, it is the latter that I prefer because the idea of wholesale image library upload does not appeal to me for now and I already have other places for off-site image backup like Google Drive and Dropbox. The mobile app does look interesting since it allows capturing images on a such a device in Adobe’s raw image format DNG. Still, my workflow is set to be more Lightroom-based than it once was and I quite fancy what new technology offers, especially since Adobe is progressing its Sensai artificial intelligence engine. The fact that it has access to many images on its systems due to Lightroom CC and its own stock library (Adobe Stock, formerly Fotolia) must mean that it has plenty of data for training this AI engine.
Upgrading a 2012 Google Nexus 7 to Android 5.0
19th November 2014Today, I was lured into upgrading my 2012 Google (ASUS) Nexus 7 to the final version of Android 5.0 (also known as Lollipop) by an icon in the device’s top panel. Initially, it felt as it was working OK but a certain sluggish could not be overlooked and there have been complaints about this with some questioning the sense of what Google have done. However, there would have been comments about grandfathering the device if they had not left us have the latest release of Android so there was no victory either way. We humans are fickle creatures and there is an example of exactly that in a well observed double-ended short story by the Irish writer Maura Laverty.
My impressions of how the upgrade had lumbered the tablet had me wondering about replacing the thing with either an Apple iPad Mini 2 or a Google (HTC) Nexus 9 but a much less expensive option came to mind: doing a full factory reset of the device using its recovery mode. That may sound drastic but much of what I had on there was in the cloud anyway so there was nothing to lose. So these are the instructions from Google themselves and I will leave you to use them at your own risk:
- If your tablet is on, turn it off.
- Press and hold the Volume Down button, then press and hold the Power button at the same time until the tablet turns on. You’ll see the word “Start” with an arrow around it.
- Press the Volume Down button twice to highlight “Recovery mode”.
- Press the Power button to start Recovery mode. You’ll see an image of an Android robot with a red exclamation mark and the words “No command.”
- While holding down the Power button, press the Volume Up button.
- Use the volume buttons to scroll to “wipe data/factory reset,” then press the Power button to select it.
- Scroll down to “Yes -- erase all user data,” then press the Power button to select it.
Note: If your tablet becomes unresponsive at any point during these steps, you can restart it by holding down the Power button for several seconds.
Once that was completed and the tablet restarted, the set-up routine began and took around an hour to reinstate the various apps that had been lost by the rest. Much of that was down to the time taken for re-installation rather than that taken by the actual downloads themselves over a wired broadband connection. The wait was worth it because the Nexus 7 feels more responsive again. While there times when little lags are noticeable, they are nothing next to the slowdown that I had witnessed before the rest. It might have been a better option than attempting to return to Android 4.4.4 using a factory image, which was another option that I was considering. So long as there is no deterioration in speed, the effort expended to do a reset will have been worthwhile.
Copying only updated new or updated files by command line in Linux or Windows
2nd August 2014With a growing collection of photographic images, I often find myself making backups of files using copy commands and the data volumes are such that I don’t want to keep copying the same files over and over again so incremental file transfers are what I need. So commands like the following often get issued from a Linux command line:
cp -pruv [source] [destination]
Because this is in Linux, it the bash shell that I use so the switches may not apply to others like ssh, fish or ksh. For my case, p preserves file properties such as its time and date and the cp command does not do this always so it needs adding. The r switch is useful because the copy then in recursive so only a directory needs to specified as the source and the destination needs to be one level up from a folder with the same name there so as to avoid file duplication. It is the u switch that makes the file copy incremental and the v one issues messages to the shell that show how the copying is going. Seeing a file name issued by the latter does tell you how much more needs to be copied and that the files are going where they should.
What inspired this post though is my need to do the same in a Windows session and issuing xcopy commands will achieve the same end. Here are two that will do the needful:
xcopy [source] [destination] /d /s
xcopy [source] [destination] /d /e
In both cases, it is the d switch that ensures that the copy is incremental and you can add a date too, with a colon between it and the /d, if you see fit. The s switch copies only directories that contain files while the e one copies even empty directories. Using the d switch without either of those did not trigger any copying action when I tried so I reckon that you cannot do without either of them. By default, both of these commands issue output to the command line so you can keep an eye on what is happening and this especially is useful when ensuring that files are going to the right destination because the behaviour differs from that of the bash shell in Linux.
Removing advertisements from uTorrent
12th July 2014BitTorrent may have got some bad press due to its use for downloading copyrighted material such as music and movies but it does have its legitimate uses too. In my case, many a Linux distro has been downloaded in this way and it does take the weight off servers by distributing the load across users instead.
Speaking of Linux, my general choice of client has been Transmission and there are others. In the Windows world, there is a selection that includes BitTorrent, Inc. themselves. However, many favour uTorrent (or μTorrent) so that’s the one that I tried and there free and subscription-based options. To me, the latter feels like overkill when an eternal licence could be made available as an easy way to dispatch the advertisements on display in the free version.
As much as I appreciate the need for ads to provide revenue to a provider of otherwise free software, they do need to be tasteful and those in uTorrent often were for dating websites that had no scruples about exposing folk to images that were unsuitable for a work setting. Those for gaming websites were more tolerable in comparison. With the non-availability of an eternal licence option, I was left pondering alternatives like qBittorrent instead. That is Free Software too so it does have that added advantage.
However, I uncovered an article on LifeHacker that sorted my problem with uTorrent. The trick is to go into Options > Preferences via the menus and then go to the Advanced section in the dialogue box that appears. In there, go looking for each of the following options and set each one to false in turn:
- offers.left_rail_offer_enabled/left_rail_offer
- gui.show_plus_upsell
- offers.sponsored_torrent_offer_enabled/sponsored_torrent_offer_enabled
- bt.enable_pulse
- gui.show_notorrents_node
- offers.content_offer_autoexec
In practice, I found some of the above already set to false and another missing but set those that remained from true to false cleaned up the interface so I hope never to glimpse those unsuitable ads again. The maker of uTorrent need to look at the issue or revenue could get lost and prospective users could see the operation as being cheapened by what is displayed. As for me, I am happy to have gained something in the way of control.
Fixing Background Image Display in GNOME Shell 3.10
2nd May 2014On upgrading from Ubuntu GNOME 13.10 to Ubuntu GNOME 14.04, a few rough edges were to be noticed. One was the display of my chosen background image: it was garbled. Later, I discovered that there is a maximum width of 2560 px for background images in GNOME Shell these days and that things get messy beyond that.
In my case, the image width was around 6000 px and I was used to its getting resized in GNOME Shell 3.8 and its predecessors. It seems that the functionality got removed after that though so the workaround of manual image resizing in the GIMP needed to be employed. Though having big images open in memory creates an additional overhead, not handling them very well at all looks like a bug caused by setting 2560 px as a maximum screen width for the GNOME Shell panel and the complete removal of Nautilus from desktop rendering duties. Let’s hope that sense is seen with ever larger screen sizes and resolutions coming our way.
It’s the sort of thing that did get me looking at adding on Cinnamon 2.2 for a while before setting background image scaling using the indispensable GNOME Tweak Tool was discovered. LinuxG.net has a useful tutorial on this for anyone with such an adventurous streak in them. For now though, I am OK with my set up but the GNOME project’s focus on minimalism could affect us in other ways so I can see why Clem Lefebvre started the Cinnamon one primarily for Linux Mint and the desktop environment is appearing elsewhere too. After all, Gedit lost its menu bar in GNOME 3.12 so it’s just as well that we have alternative choices.
Update 2014-05-06: It seems that the desktop image bug that afflicts GNOME Shell 3.10 got sorted for GNOME Shell 3.12. At least, that is the impression that an Antergos instance in a VirtualBox virtual machine gives me.