When a hard drive is unrecognised by the Linux hddtemp command
15th August 2021One should not do a new PC build in the middle of a heatwave if you do not want to be concerned about how fast fans are spinning and how hot things are getting. Yet, that is what I did last month after delaying the act for numerous months.
My efforts mean that I have a system built around an AMD Ryzen 9 5950X CPU and a Gigabyte X570 Aorus Pro with 64 GB of memory and things are settling down after the initial upheaval. That also meant some adjustments to the CPU fan profile in the BIOS for quieter running while the the use of Be Quiet! Dark Rock 4 cooler also helps as does a Be Quiet! Silent Wings 3 case fan. All are components from trusted brands though I wonder how much abuse they got during their installation and subsequent running in.
Fan noise is a non-quantitative indicator of heat levels as much as touch so more quantitative means are in order. Aside from using a thermocouple device, there are in-built sensors too. My using Linux Mint means that I have the sensors command from the lm-sensors package for checking on CPU and other temperatures though hddtemp is what you need for checking on the same for hard drives. The latter can be used as follows:
sudo hddtemp /dev/sda /dev/sdb
This has to happen using administrator access and a list of drives needs to be provided because it cannot find them by itself. In my case, I have no mechanical hard drives installed in non-NAS systems and I even got to replacing a 6 TB Western Digital Green disk with an 8 TB SSD but I got the following when I tried checking on things with hddtemp:
WARNING: Drive /dev/sda doesn't seem to have a temperature sensor.
 WARNING: This doesn't mean it hasn't got one.
 WARNING: If you are sure it has one, please contact me ([email protected]).
 WARNING: See --help, --debug and --drivebase options.
 /dev/sda: Samsung SSD 870 QVO 8TB: no sensor
The cause of the message for me was that there is no entry for Samsung SSD 870 QVO 8TB in /etc/hddtemp.db so that needed to be added there. Before that could be rectified, I needed to get some additional information using smartmontools and these needed to be installed using the following command:
sudo apt-get install smartmontools
What I needed to do was check the drive’s SMART data output for extra information and that was achieved using the following command:
sudo smartctl /dev/sda -a | grep -i Temp
What this does is to look for the temperature information from smartctl output using the grep command with output from the first being passed to the second through a pipe. This yielded the following:
190 Airflow_Temperature_Cel 0x0032 072 050 000 Old_age Always - 28
The first number in the above (190) is the thermal sensor’s attribute identifier and that was needed in what got added to /etc/hddtemp.db. The following command added the necessary data to the aforementioned file:
echo \"Samsung SSD 870 QVO 8TB\" 190 C \"Samsung SSD 870 QVO 8TB\" | sudo tee -a /etc/hddtemp.db
Here, the output of the echo command was passed to the tee command for adding to the end of the file. In the echo command output, the first part is the name of the drive, the second is the heat sensor identifier, the third is the temperature scale (C for Celsius or F for Fahrenheit) and the last part is the label (it can be anything that you like but I kept it the same as the name). On re-running the hddtemp command, I got output like the following so all was as I needed it to be.
/dev/sda: Samsung SSD 870 QVO 8TB: 28°C
Since then, temperatures may have cooled and the weather become more like what we usually get but I am still keeping an eye on things, especially when the system is put under load using Perl, R, Python or SAS. There may be further modifications such as changing the case or even adding water cooling, not least to have a cooler power supply unit, but nothing is being rushed as I monitor things to my satisfaction.
EVF or OVF?
22nd December 2019In photography, some developments are passing fads while others bring longer lasting changes. In their own way, special effects filters and high dynamic range techniques cause their share of excitement before that passed and their usage became more sensible. In fact, the same might be said for most forms of image processing because tastefulness eventually gets things in order. Equally, there are others that mark bigger shifts.
The biggest example of the latter is the move away from film photography to digital image capture. There still are film photographers but they largely depend on older cameras since very few are made any more. My own transition came later than others but I hardly use film any more and a lack of replacement parts for cameras that are more than fifteen years old only helps to keep things that way. Another truth is that digital photography makes me look at my images more critically and that helps for some continued improvement.
Also, mobile phone cameras have become so capable that the compact camera market has shrunk dramatically. In fact, I gave away my Canon PowerShot G11 earlier this year because there was little justification in hanging onto it. After all, it dated back to 2010 and a phone would do now what it once did though the G11 did more for me than I might have expected. Until 2017, my only photos of Swedish locations were made with that camera. If I ever was emotional at its departure and I doubt that I was, that is not felt now.
If you read photography magazines, you get the sense that mirrorless cameras have captured a lot of the limelight and that especially is the case with the introduction of full frame models. Some writers even are writing off the chances of SLR’s remaining in production though available model ranges remain extensive in spite of the new interlopers. Whatever about the departure of film, the possible loss of SLR’s with their bright optical viewfinders (OVF’s) does make me a little emotional since they were the cameras that so many like me aspired to owning during my younger years and the type has served me well over the decades.

Even so, I too have used mirrorless cameras and an Olympus PEN E-PL5 came into my possession in 2013. However, I found that using the screen on the back of a camera was not to my liking and the quality of mobile phone cameras is such that I no longer need any added portability. However, it needs to be remembered that using a Tamron 14 to 150 mm zoom lens with the body cannot have helped either. Wishing to sample a counterpart with an electronic view finder, I replaced it with an Olympus OM-D E-M10 Mark III earlier this year and have been getting on fine with that.
The body certainly is a compact one but the handling is very like an SLR and I have turned off the automatic switching between viewfinder and screen since I found it distracting; manually switching between the two is my preference. As it happens, using the EVF took a little acclimatisation but being able to add a spirit level overlay proved to as useful as it was instructive. The resulting images may be strong in the green and blue ends of the visible spectrum but that suits a user that is partial to both colours anyway. It also helps that the 16.1 megapixel sensor creates compact images that are quick to upload to a backup service. There have been no issues working with my Tamron lens and keeping that was a deciding factor in my remaining with Olympus in spite of a shutter failure with the older camera. That was fixed efficiently and at a reasonable cost too.
As good as the new Olympus has been, it has not displaced my existing Canon EOS 5D Mark II and Pentax K5 II SLR’s. The frame size is much smaller anyway and January saw me acquire a new Sigma 24 to 105 mm zoom lens for the former after an older lens developed an irreparable fault. The new lens is working as expected and the sharpness of any resulting images is impressive. However, the full frame combination is weighty even if I do use it handheld so that means that the Pentax remains my choice for overseas trips. There also is an added brightness in the viewfinders of both cameras that I appreciate so the OM-D complements the others rather than replacing them.
While I can get on with EVF’s if SLR’s ever get totally superseded, I am planning to stick mainly with SLR’s for now. Interestingly, Canon has launched a new enthusiast model so there must be some continuing interest in them. Also, it seems that Canon foresees a hybrid approach where live viewing using the screen on the back of the camera may add faster autofocus or other kinds of functionality while the OVF allows more traditional working. That of itself makes me wonder if we might see cameras that can switch between EVF and OVF modes within the same viewfinder. The thought may be as far fetched as it is intriguing yet there may be other possibilities that have not been foreseen. One thing is clear though: we are in an age of accelerating change.
Performing parallel processing in Perl scripting with the Parallel::ForkManager module
30th September 2019In a previous post, I described how to add Perl modules in Linux Mint while mentioning that I hoped to add another that discusses the use of the Parallel::ForkManager module. This is that second post and I am going to keep things as simple and generic as they can be. There are other articles like one on the Perl Maven website that go into more detail.
The first thing to do is ensure that the Parallel::ForkManager module is called by your script and having the following line near the top will do just that. Without this step, the script will not be able to find the required module by itself and errors will be generated.
use Parallel::ForkManager;
Then, the maximum number of threads needs to be specified. While that can be achieved using a simple variable declaration, the following line reads this from the command used to invoke the script. It even tells a forgetful user what they need to do in its own terse manner. Here $0 is the name of the script and N is the number of threads. Not all these threads will get used and processing capacity will limit how many actually are in use so there is less chance of overwhelming a CPU.
my $forks = shift or die "Usage: $0 N\n";
Once the maximum number of available threads is known, the next step is to instantiate the Parallel::ForkManager object as follows to use these child processes:
my $pm = Parallel::ForkManager->new($forks);
With the Parallel::ForkManager object available, it is now possible to use it as part of a loop. A foreach loop works well though only a single array can be used with hashes being needed when other collections need interrogation. Two extra statements are needed with one to start a child process and another to end it.
foreach $t (@array) {
 my $pid = $pm->start and next;
 << Other code to be processed >>
 $pm->finish;
 }
Since there often is other processing performed by script and it is possible to have multiple threaded loops in one, there needs to be a way of getting the parent process to wait until all the child processes have completed before moving from one step to another in the main script and that is what the following statement does. In short, it adds more control.
$pm->wait_all_children;
To close, there needs to be a comment on the advantages of parallel processing. Modern multi-core processors often get used in single threaded operations and that leaves most of the capacity unused. Utilising this extra power then shortens processing times markedly. To give you an idea of what can be achieved, I had a single script taking around 2.5 minutes to complete in single threaded mode while setting the maximum number of threads to 24 reduced this to just over half a minute while taking up 80% of the processing capacity. This was with an AMD Ryzen 7 2700X CPU with eight cores and a maximum of 16 processor threads. Surprisingly, using 16 as the maximum thread number only used half the processor capacity so it seems to be a matter of performing one’s own measurements when making these decisions.
Changing monitor brightness using the Linux command line
11th August 2018Recently, I felt the need to reduce the brightness of my monitor but did not persuade the hardware buttons to do the job so I started wondering about other means and found that the xrandr command did the trick. The first step was to find out what my display was being called so I executed the following command to retrieve the information using the -q query switch:
xrandr -q | grep " connected"
The output from this looked like this:
DVI-D-0 connected primary 1920x1080+0+0 (normal left inverted right x axis y axis) 521mm x 293mm
My device name appeared as the first block of characters in the above so I plugged that into the second command below to achieve the desired adjustment.
xrandr --output DVI-D-0 --brightness 0.9
Any value between 0.0 and 1.0 is acceptable but I went with 0.9 for 90% brightness. The required dimming and brightening then is only a command away.
Halting constant disk activity on a WD My Cloud NAS
6th June 2018Recently, I noticed that the disk in my WD My Cloud NAS was active all the time so it reminded me of another time when this happened. Then, I needed to activate the SSH service on the device and log in as root with the password welc0me. That default password was changed before doing anything else. Since the device runs on Debian Linux, that was a simple case of using the passwd command and following the prompts. One word of caution is in order since only root can be used for SSH connections to a WD My Cloud NAS and any other user that you set up will not have these privileges.
The cause of all the activity was two services: wdmcserverd and wdphotodbmergerd. One way to halt their actions is to stop the services using these commands:
/etc/init.d/wdmcserverd stop
 /etc/init.d/wdphotodbmergerd stop
The above act only works until the next system restart so these command should make for a more persistent disabling of the culprits:
update-rc.d -f wdmcserverd remove
 update-rc.d -f wdphotodbmergerd remove
If all else fails, removing executable privileges from the normally executable files that the services need will work and it is a solution that I have tried with success between system updates:
cd /etc/init.d
 chmod 644 wdmcserverd
 reboot
Between all of these, it should be possible to have you WD My Cloud NAS go into power saving mode as it should though turning off additional services such as DLNA may be what some need to do. Having turned off these already, I only needed to disable the photo thumbnail services that were the cause of my machine’s troubles.
Rethinking photo editing
17th April 2018Photo editing has been something that I have been doing since my first-ever photo scan in 1998 (I believe it was in June of that year but cannot be completely sure nearly twenty years later). Since then, I have been using a variety of tools for the job and wondered how other photos can look better than my own. What cannot be excluded is my preference for being active in the middle of the day when light is at its bluest as well as a penchant for using a higher ISO of 400. In other words, what I do when making photos affects how they look afterwards as much as the weather that I had encountered.
My reason for mentioning the above aspects of photographic craft is that they affect what you can do in photo editing afterwards, even with the benefits of technological advancement. My tastes have changed over time, so the appeal of re-editing old photos fades when you realise that you only are going around in circles and there always are new ones to share, so that may be a better way to improve.
When I started, I was a user of Paint Shop Pro but have gone over to Adobe since then. First, it was Photoshop Elements, but an offer in 2011 lured me into having Lightroom and the full version of Photoshop. Nowadays, I am a Creative Cloud photography plan subscriber so I get to see new developments much sooner than once was the case.
Even though I have had Lightroom for all that time, I never really made full use of it and preferred a Photoshop-based workflow. Lightroom was used to select photos for Photoshop editing, mainly using adjustments for such things as tones, exposure, levels, hue and saturation. Removal of dust spots, resizing and sharpening were other parts of a still minimalist approach.
What changed all this was a day spent pottering about the 2018 Photography Show at the Birmingham NEC during a cold snap in March. That was followed by my checking out the Adobe YouTube Channel afterwards where there were videos of the talks featured every day of the four-day event. Here are some shortcuts if you want to do some catching up yourself: Day 1, Day 2, Day 3, and Day 4. Be warned though that these videos are long in that they feature the whole day and there are enough gaps that you may wish to fast-forward through them. Even so, there is quite a bit of variety of things to see.
Of particular interest were the talks given by the landscape photographer David Noton who sensibly has a philosophy of doing as little to his images as possible. It helps that his starting points are so good that adjusting black and white points with a little tonal adjustment does most of what he needs. Vibrancy, clarity and sharpening adjustments are kept to a minimum while some work with graduated filters evens out exposure differences between skies and landscapes. It helps that all this can be done in Lightroom, so that set me thinking about trying it out for size and the trick of using the backslash (\) key to switch between raw and processed views is a bonus granted by non-destructive editing. Others may have demonstrated the creation of composite imagery, but simplicity is more like my way of working.
Confusingly, we now have the cloud-based Lightroom CC while the previous desktop counterpart is known as Lightroom Classic CC. Though the former may allow for easy dust spot removal among other things, it is the latter that I prefer because the idea of wholesale image library upload does not appeal to me for now and I already have other places for off-site image backup like Google Drive and Dropbox. The mobile app does look interesting since it allows capturing images on a such a device in Adobe’s raw image format DNG. Still, my workflow is set to be more Lightroom-based than it once was and I quite fancy what new technology offers, especially since Adobe is progressing its Sensai artificial intelligence engine. The fact that it has access to many images on its systems due to Lightroom CC and its own stock library (Adobe Stock, formerly Fotolia) must mean that it has plenty of data for training this AI engine.
Carrying out a hard reset of a home KVM switch
20th March 2017During a recent upgrade from Linux Mint 18 to Linux Mint 18.1 on a secondary machine, I ran into bother with my Startech KVM (keyboard, video, mouse and audio sharing) switch. The PC failed to recognise the attachment of my keyboard and mouse so an internet search began.
Nothing promising came from it apart from resetting the KVM switch. In other words, the solution was to turn it off and back on again. That was something that I did try without success. What I had overlooked was that there USB connections to PC’s that fed the device with a certain amount of power and that was enough to keep it on.
Unplugging those USB cables as well as the power cable was needed to completely switch off the device. That provided the reset that I needed and all was well again. Otherwise, I would have been baffled enough to resort to buying a replacement KVM switch so the extra information avoided a purchase that could have cost in the region of £100. In other words, a little research had saved me money.
A look at Google’s Pixel C
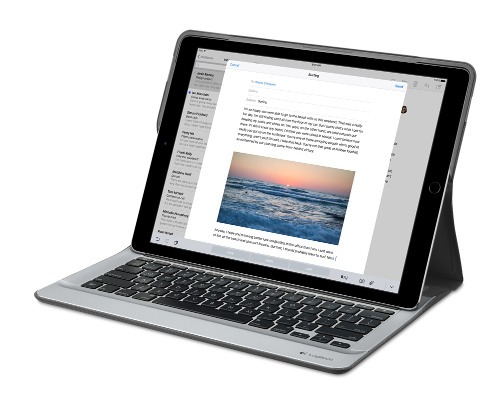
26th December 2016Since my last thoughts on trips away without a laptop, I have come by Google’s Pixel C. It is a 10″ tablet so it may not raise hackles on an aircraft like the 12.9″ screen of the large Apple iPad Pro might. The one that I have tried comes with 64 GB of storage space and its companion keyboard cover (there is a folio version). Together, they can be bought for £448, a saving of £150 on the full price.
![]()
The Pixel C keyboard cover uses strong magnets to hold the tablet onto it and that does mean some extra effort when changing between the various modes. These include covering the tablet screen as well as piggy backing onto it with the screen side showing or attached in such a way that allows typing. The latter usefully allows you to vary the screen angle as you see fit instead of having to stick with whatever is selected for you by a manufacturer. Unlike the physical connection offered by an iPad Pro, Bluetooth is the means offered by the Pixel C and it works just as well from my experiences so far. Because of the smaller size, it feels a little cramped in comparison with a full size keyboard or even that with a 12.9″ iPad Pro. They also are of the scrabble variety though they work well otherwise.
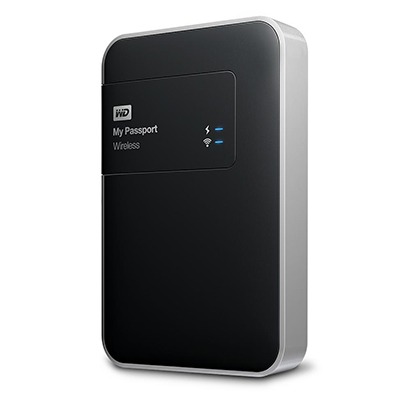
The tablet itself is impressively fast compared to a HTC One A9 phone or even a Google Nexus 9 and that became very clear when it came to installing or updating apps. The speed is just as well since an upgrade to Android 7 (Nougat) was needed on the one that I tried. You can turn on adaptive brightness too, which is a bonus. Audio quality is nowhere near as good as a 12.9″ iPad Pro but that of the screen easily is good enough for assessing photos stored on a WD My Passport Wireless portable hard drive using the WD My Cloud app.
All in all, it may offer that bit more flexibility for overseas trips compared to the bigger iPad Pro so I am tempted to bring one with me instead. The possibility of seeing newly captured photos in slideshow mode is a big selling point since it does functions well for tasks like writing emails or blog posts, like this one since it started life on there. Otherwise, this is a well made device.
More thinking on travelling without a laptop
10th December 2016When it comes to the technology that I carry with me on trips away, I have begun to start weighing devices on my kitchen scales. The results are a little revealing. The HP Pavilion dm5 that has gone with me to Ireland and other places weighs between 2.5 and 3 kg while my Apple iPad Mini 2 comes in at 764 grams. My 12.9″ iPad Pro with its Logitech keyboard weighs between these at 110 to 1200 grams. The idea of consolidating computing devices for travel has been discussed on here before now and the main thing stopping my just going with the iPad Pro was the viewing of photos without filling up its 32 GB of storage space.
Since then, I just may have found a workaround and it is another gadget, this time weighing only a few hundred grams: a 1 TB WD My Passport Wireless portable hard drive. Aside from having a SD card slot that allows the automatic backup of photos, it also can connect with tablets and phones using WiFi broadband.
It is the WD My Cloud app that makes the connections to mobile devices useful and it works smoothly on iOS and Android devices too. Nevertheless, there is more functionality on the latter ones such as DNG file support and an added slide show feature that works with JPEG files. Both of these are invaluable for viewing photos and I feel a little short-changed that they are not available on iOS. Hopefully, that will get resolved sooner rather than later.
Thankfully, my Pentax K5 II DSLR camera can be persuaded to save DNG and JPEG files simultaneously so that they can be viewed full screen on both types of devices without having to transfer them onto the tablet first as you would with Apple’s SD card reader. Usefully, that gets around my oversight in buying iPads with only 32 GB of storage each. That now looks like a false economy given what I am trying now.
Such is the weight difference, just taking along my Apple iPad Pro and the WD device will save around 1 kg and there is less fuss at airport security screening too. While my HTC phone would suffice for seeing photos as slide shows, I am wondering if my battered Google Nexus 9 could come too. The only dilemma then would be how to pack things since I am not sure how a large iPad screen would seem to cabin crew or other passengers during take off and landing. That makes using the Nexus 9 onboard more of a proposition and the iPad might go into the hold luggage to make life a little easier. Still, that choice is a minor concern now that I can try travelling overseas without a laptop to see how I get along.
Pondering travel device consolidation using an Apple iPad Pro 12.9″
18th September 2016It was a change of job in 2010 that got me interested in using devices with internet connectivity on the go. Until then, the attraction of smartphones had not been strong, but I got myself a Blackberry on a pay as you go contract, but the entry device was painfully slow, and the connectivity was 2G. It was a very sluggish start.
It was supplemented by an Asus Eee PC that I connected to the internet using broadband dongles and a Wi-Fi hub. This cumbersome arrangement did not work well on short journeys and the variability of mobile network reception even meant that longer journeys were not all that successful either. Usage in hotels and guest houses though went better and that has meant that the miniature laptop came with me on many a journey.
In time, I moved away from broadband dongles to using smartphones as Wi-Fi hubs and that largely is how I work with laptops and tablets away from home unless there is hotel Wi-Fi available. Even trips overseas have seen me operate in much the same manner.
One feature is that we seem to carry quite a number of different gadgets with us at a time and that can cause inconvenience when going through airport security since they want to screen each device separately. When you are carrying a laptop, a tablet, a phone and a camera, it does take time to organise yourself and you can meet impatient staff, as I found recently when returning from Oslo. Checking in whatever you can as hold luggage helps to get around at least some of the nuisance and it might be time for the use of better machinery to cut down on having to screen everything separately.
When you come away after an embarrassing episode as I once did, the attractions of consolidating devices start to become plain. In fact, most probably could get with having just their phone. It is when you take activities like photography more seriously that the gadget count increases. After all, the main reason a laptop comes on trips beyond Britain and Ireland at all is to back up photos from my camera in case an SD card fails.
Parking that thought for a while, let’s go back to March this year when temptation overcame what should have been a period of personal restraint. The result was that a 32 GB 12.9″ Apple iPad Pro came into my possession along with an Apple Pencil and a Logitech CREATE Backlit Keyboard Case. It should have done so, but the size of the screen did not strike me until I got it home from the Apple Store. That was one of the main attractions because maps can be shown with a greater field of view in a variety of apps, a big selling point for a hiker with a liking for maps, who wants more than what is on offer from Apple, Google or even Bing. The precision of the Pencil is another boon that makes surfing the website so much easier and the solid connection between the case and the iPad means that keyboard usage is less fiddly than it would if it used Bluetooth. Having tried them with the BBC iPlayer app, I can confirm that the sound from the speakers is better than any other mobile device that I have used.
Already, it has come with me on trips around England and Scotland. These weekend trips saw me leave the Asus Eee PC stay at home when it normally might have come with me and taking just a single device along with a camera or two had its uses too. The screen is large for reading on a train but I find that it works just as well so long as you have enough space. Otherwise, combining use of a suite of apps with recourse to the web does much of the information seeking needed while on a trip away and I was not found wanting. Battery life is good too, which helps.
Those trips allowed for a little light hotel room blog post editing too and the iPad Pro did what was needed, though the ergonomics of reaching for the screen with the Pencil meant that my arm was held aloft more than was ideal. Another thing that raised questions in my mind is the appearance of word suggestions at the bottom of the screen as if this were a mobile phone since I wondered if these were more of a hindrance than a help given that I just fancied typing and not pointing at the screen to complete words. Copying and pasting works too but I have found the screen-based version a little clunky so I must see if the keyboard one works just as well, though the keyboard set up is typical of a Mac so that affects word selection. You need to use the OPTION key in the keyboard shortcut that you use for this and not COMMAND or CONTROL as you might do on a PC.
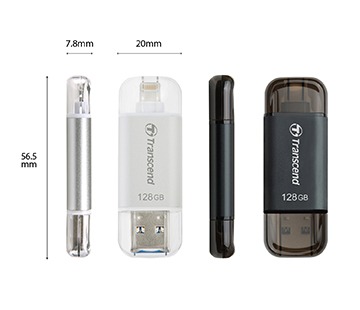
Even with these eccentricities, I was left wondering if it had any utility when it came to backing up photos from digital cameras and there is an SD card adapter that makes this possible. A failure of foresight on my part meant that the 32 GB capacity now is an obvious limitation but I think I might have hit on a possible solution that does not need to upload to an iCloud account. It involves clearing off the photos onto a 128 GB Transcend JetDrive Go 300 so they do not clog up the iPad Pro’s storage. That the device has both Lightning and USB connectivity means that you can plug it into a laptop or desktop PC afterwards too. If that were to work as I would hope, then the laptop/tablet combination that I have been using for all overseas trips could be replaced to allow a weight reduction as well as cutting the hassle at airport security.
Trips to Ireland still may see my sticking with a tried and tested combination though because I often have needed to do some printing while over there. While I have been able to print a test document from an iPad Mini on my home network-connected printer, not every model supports this and that for NFC or Air Print is not universal either. If this were not an obstacle, apps like Pages, Numbers and Keynote could have their uses for business-related work and there are web-based offerings from Google, Microsoft and others too.
In conclusion, I have found that my iPad Pro does so much of what I need on a trip away that retiring the laptop/tablet combination for most of these is not as outrageous as it once would have seemed. In some ways, iOS has a way to go yet before it could take over from macOS but it remains in development so it will be interesting to see what happens next. All the while, hybrid devices running Windows 10 are becoming more pervasive and that might provide Apple with the encouragement that it needs.