Minimum viable product?
31st October 2022While I have done my styling for websites that I have, this one has used third-party themes since its inception. This approach does have its advantages because you can benefit from the efforts of others; it can be a way to get added functionality and gain an appearance that is more contemporary in feel.
Naturally, there also are drawbacks. Getting the desired appearance can be challenging without paying for it, and your tastes may not match current fashions. Then, there are restrictions on customisation. Where user interfaces are available, these cannot be limitless. A fallback is to tweak code but ever-increasing complexity hampers that and an automated update can erase a modification, even if child themes are a possibility on at least one content management system.
For me, the drawbacks now outweigh the advantages so I have created my own design and that is what you now see. Behind the scenes, there is a back-to-basics approach and everything should look brighter. As the title of this post suggests, this is a start with further tweaks coming in time. For now, I hope that what you find will be sufficient to please.
Rethinking photo editing
17th April 2018Photo editing has been something that I have been doing since my first-ever photo scan in 1998 (I believe it was in June of that year but cannot be completely sure nearly twenty years later). Since then, I have been using a variety of tools for the job and wondered how other photos can look better than my own. What cannot be excluded is my preference for being active in the middle of the day when light is at its bluest as well as a penchant for using a higher ISO of 400. In other words, what I do when making photos affects how they look afterwards as much as the weather that I had encountered.
My reason for mentioning the above aspects of photographic craft is that they affect what you can do in photo editing afterwards, even with the benefits of technological advancement. My tastes have changed over time, so the appeal of re-editing old photos fades when you realise that you only are going around in circles and there always are new ones to share, so that may be a better way to improve.
When I started, I was a user of Paint Shop Pro but have gone over to Adobe since then. First, it was Photoshop Elements, but an offer in 2011 lured me into having Lightroom and the full version of Photoshop. Nowadays, I am a Creative Cloud photography plan subscriber so I get to see new developments much sooner than once was the case.
Even though I have had Lightroom for all that time, I never really made full use of it and preferred a Photoshop-based workflow. Lightroom was used to select photos for Photoshop editing, mainly using adjustments for such things as tones, exposure, levels, hue and saturation. Removal of dust spots, resizing and sharpening were other parts of a still minimalist approach.
What changed all this was a day spent pottering about the 2018 Photography Show at the Birmingham NEC during a cold snap in March. That was followed by my checking out the Adobe YouTube Channel afterwards where there were videos of the talks featured every day of the four-day event. Here are some shortcuts if you want to do some catching up yourself: Day 1, Day 2, Day 3, and Day 4. Be warned though that these videos are long in that they feature the whole day and there are enough gaps that you may wish to fast-forward through them. Even so, there is quite a bit of variety of things to see.
Of particular interest were the talks given by the landscape photographer David Noton who sensibly has a philosophy of doing as little to his images as possible. It helps that his starting points are so good that adjusting black and white points with a little tonal adjustment does most of what he needs. Vibrancy, clarity and sharpening adjustments are kept to a minimum while some work with graduated filters evens out exposure differences between skies and landscapes. It helps that all this can be done in Lightroom, so that set me thinking about trying it out for size and the trick of using the backslash (\) key to switch between raw and processed views is a bonus granted by non-destructive editing. Others may have demonstrated the creation of composite imagery, but simplicity is more like my way of working.
Confusingly, we now have the cloud-based Lightroom CC while the previous desktop counterpart is known as Lightroom Classic CC. Though the former may allow for easy dust spot removal among other things, it is the latter that I prefer because the idea of wholesale image library upload does not appeal to me for now and I already have other places for off-site image backup like Google Drive and Dropbox. The mobile app does look interesting since it allows capturing images on a such a device in Adobe’s raw image format DNG. Still, my workflow is set to be more Lightroom-based than it once was and I quite fancy what new technology offers, especially since Adobe is progressing its Sensai artificial intelligence engine. The fact that it has access to many images on its systems due to Lightroom CC and its own stock library (Adobe Stock, formerly Fotolia) must mean that it has plenty of data for training this AI engine.
More thinking on travelling without a laptop
10th December 2016When it comes to the technology that I carry with me on trips away, I have begun to start weighing devices on my kitchen scales. The results are a little revealing. The HP Pavilion dm5 that has gone with me to Ireland and other places weighs between 2.5 and 3 kg while my Apple iPad Mini 2 comes in at 764 grams. My 12.9″ iPad Pro with its Logitech keyboard weighs between these at 110 to 1200 grams. The idea of consolidating computing devices for travel has been discussed on here before now and the main thing stopping my just going with the iPad Pro was the viewing of photos without filling up its 32 GB of storage space.
Since then, I just may have found a workaround and it is another gadget, this time weighing only a few hundred grams: a 1 TB WD My Passport Wireless portable hard drive. Aside from having a SD card slot that allows the automatic backup of photos, it also can connect with tablets and phones using WiFi broadband.
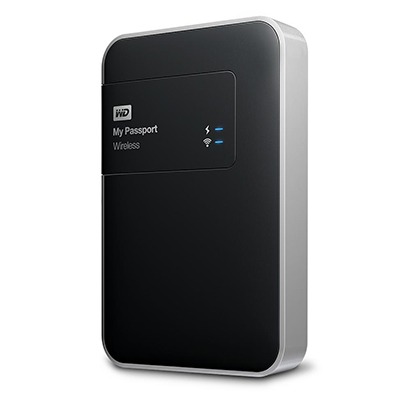
It is the WD My Cloud app that makes the connections to mobile devices useful and it works smoothly on iOS and Android devices too. Nevertheless, there is more functionality on the latter ones such as DNG file support and an added slide show feature that works with JPEG files. Both of these are invaluable for viewing photos and I feel a little short-changed that they are not available on iOS. Hopefully, that will get resolved sooner rather than later.
Thankfully, my Pentax K5 II DSLR camera can be persuaded to save DNG and JPEG files simultaneously so that they can be viewed full screen on both types of devices without having to transfer them onto the tablet first as you would with Apple’s SD card reader. Usefully, that gets around my oversight in buying iPads with only 32 GB of storage each. That now looks like a false economy given what I am trying now.
Such is the weight difference, just taking along my Apple iPad Pro and the WD device will save around 1 kg and there is less fuss at airport security screening too. While my HTC phone would suffice for seeing photos as slide shows, I am wondering if my battered Google Nexus 9 could come too. The only dilemma then would be how to pack things since I am not sure how a large iPad screen would seem to cabin crew or other passengers during take off and landing. That makes using the Nexus 9 onboard more of a proposition and the iPad might go into the hold luggage to make life a little easier. Still, that choice is a minor concern now that I can try travelling overseas without a laptop to see how I get along.
Upgrading a 2012 Google Nexus 7 to Android 5.0
19th November 2014Today, I was lured into upgrading my 2012 Google (ASUS) Nexus 7 to the final version of Android 5.0 (also known as Lollipop) by an icon in the device’s top panel. Initially, it felt as it was working OK but a certain sluggish could not be overlooked and there have been complaints about this with some questioning the sense of what Google have done. However, there would have been comments about grandfathering the device if they had not left us have the latest release of Android so there was no victory either way. We humans are fickle creatures and there is an example of exactly that in a well observed double-ended short story by the Irish writer Maura Laverty.
My impressions of how the upgrade had lumbered the tablet had me wondering about replacing the thing with either an Apple iPad Mini 2 or a Google (HTC) Nexus 9 but a much less expensive option came to mind: doing a full factory reset of the device using its recovery mode. That may sound drastic but much of what I had on there was in the cloud anyway so there was nothing to lose. So these are the instructions from Google themselves and I will leave you to use them at your own risk:
- If your tablet is on, turn it off.
- Press and hold the Volume Down button, then press and hold the Power button at the same time until the tablet turns on. You’ll see the word “Start” with an arrow around it.
- Press the Volume Down button twice to highlight “Recovery mode”.
- Press the Power button to start Recovery mode. You’ll see an image of an Android robot with a red exclamation mark and the words “No command.”
- While holding down the Power button, press the Volume Up button.
- Use the volume buttons to scroll to “wipe data/factory reset,” then press the Power button to select it.
- Scroll down to “Yes -- erase all user data,” then press the Power button to select it.
Note: If your tablet becomes unresponsive at any point during these steps, you can restart it by holding down the Power button for several seconds.
Once that was completed and the tablet restarted, the set-up routine began and took around an hour to reinstate the various apps that had been lost by the rest. Much of that was down to the time taken for re-installation rather than that taken by the actual downloads themselves over a wired broadband connection. The wait was worth it because the Nexus 7 feels more responsive again. While there times when little lags are noticeable, they are nothing next to the slowdown that I had witnessed before the rest. It might have been a better option than attempting to return to Android 4.4.4 using a factory image, which was another option that I was considering. So long as there is no deterioration in speed, the effort expended to do a reset will have been worthwhile.
Piggybacking an Android Wi-Fi device off your Windows PC’s internet connection
16th March 2013One of the disadvantages of my Google/Asus Nexus 7 is that it needs a Wi-Fi connection to use. Most of the time this is not a problem since I also have a Huawei mobile WiFi hub from T-Mobile and this seems to work just about anywhere in the U.K. Away from the U.K. though, it won’t work because roaming is not switched on for it and that may be no bad thing with the fees that could introduce. My HTC Desire S could deputise but I need to watch costs with that too.
There’s also the factor of download caps and those apply both to the Huawei and to the HTC. Recently, I added Anquet‘s Outdoor Map Navigator (OMN) to my Nexus 7 through the Google Play store for a fee of £7 and that allows access to any walking maps that I have bought from Anquet. However, those are large downloads so the caps start to come into play. Frugality would help but I began to look at other possibilities that make use of a laptop’s Wi-Fi functionality.
Looking on the web, I found two options for this that work on Windows 7 (8 should be OK too): Connectify Hotspot and Virtual Router Manager. The first of these is commercial software but there is a Lite edition for those wanting to try it out; that it is not a time limited demo is not something that I can confirm though that did not seem to be the case since it looked as if only features were missing from it that you’d get if you paid for the Pro variant. The second option is an open source one and is free of charge apart from an invitation to donate to the project.
Though online tutorials show the usage of either of these to be straightforward, my experiences were not all that positive at the outset. In fact, there was something that I needed to do and that is why this post has come to exist at all. That happened even after the restart that Conectify Hotspot needed as part of its installation; it runs as a system service so that’s why the restart was needed. In fact, it was Virtual Router Manager that told me what the issue was and it needed no reboot. Neither did it cause network disconnection of a laptop like the Connectify offering did on me and that was the cause of its ejection from that system; limitations in favour of its paid addition aside, it may have the snazzier interface but I’ll take effective simplicity any day.
Using Virtual Router Manager turns out to be simple enough. It needs a network name (also known as an SSID), a password to restrict who accesses the network and the internet connection to be shared. In my case, the was Local Area Connection on the drop down list. With all the required information entered, I was ready to start the router using the Start Network Router button. The text on this changes to Stop Network Router when the hub is operational or at least it should have done for me on the first time that I ran it. What I got instead was the following message:
The group or resource is not in the correct state to perform the requested operation.
The above may not say all that much but it becomes more than ample information if you enter it into the likes of Google. Behind the scenes, Virtual Router Manager is using native Windows functionality is create a WiFi hub from a PC and it appears to be the Microsoft Virtual Wi-Fi Miniport Adapter from what I have seen. When I tried setting up an adhoc Wi-Fi network from a laptop to the Nexus 7 using Windows’ own network set up capability via its Control Panel, it didn’t do what I needed so there might be something that third party software can do. So, the interesting thing about the solution to my Virtual Router Manager problem was that it needed me to delve into the innards of Windows a little.
Firstly, there’s running Command Prompt (All Programs > Accessories) from the Start Menu with Administrator privileges. It helps here if the account with which you log into Windows is in the Administrators group since all you have to do then is right click on the Start Menu entry and choose Run as administrator entry in the pop-up context menu. With a command line window now open, you then need to issue the following command:
netsh wlan set hostednetwork mode=allow ssid=[network name] key=[password] keyUsage=persistent
When that had done its thing, Virtual Router Manager worked without a hitch though it did turn itself after a while and that may be no bad thing from the security standpoint. On the Android side, it was a matter of going in Settings > Wi-Fi and choose the new network that have been creating on the laptop. This sort of thing may apply to other types of tablet (Dare I mention iPads?) so you could connect anything to the hub without needing to do any more on the Windows side.
For those wanting to know what’s going on behind the scenes on Windows, there’s a useful tutorial on Instructables that shows what third party software is saving you from having to do. Even if I never go down the more DIY route, I probably have saved myself having to buy a mobile Wi-Fi hub for any trips to Éire. For now, the Irish 3G dongle that I already have should be enough.
Do we need dongles anymore?
12th March 2012Recent exposure to both the HTC Wildfire S and the HTC Desire S has me wondering if we need mobile broadband dongles anymore. The reason for my asking this is that both Android devices can act as mobile wi-fi hubs and they work very well as these too. Even the dedicated T-Mobile mobile wi-fi hub that I picked up in the closing months of 2011 now looks a little obsolete though it retains a cost advantage in its favour.
In the case of both HTC phones, it thankfully is possible to use high security encryption and a pass key too. However, it is best to change the default key before any activation of wi-fi signal, if only to ensure that you don’t end up with a very nasty bill. The Wi-Fi Hotspot App has all the settings that you need and up to five connections can be supported at a time, just like that T-Mobile hub that I mentioned earlier.
That replaced a defunct dongle from the same company; the USB connection appeared to have failed and was ailing for a while. Now, it might be that the more transparent use of an actual mobile phone might be usurping that as well, especially when I have been wondering why it has been doing so well with internet connectivity while using it on the move. This voyage into the world of what smartphones and similar devices can do is throwing up its share of surprises as I go along.
A new phone
4th February 2012After a few years with a straightforward Nokia 1661 and a PAYG Blackberry 8520, I decided to go and upgrade from the former to an HTC Wildfire S. So far, the new phone has been good to me with only a few drawbacks. Other than working out how to insert a SIM card, the phone has been easy to use with just a few nuances to learn, such as finger pinch zooming and dealing with an onscreen keyboard as opposed to a real one.
The touchscreen interface and the 3G capability are the big changes from my Blackberry and both make web browsing so much faster too, especially with the larger screen. For instance, checking RSS feeds with Google Reader and emails is so much faster on the move with the screen being very responsive most of the time that I am using it; it does get dirty like others so either a screen cover or frequent cleaning with a camera lens cloth would be no bad thing. The onscreen keyboard remains something to which I need to grow accustomed and probably is the one area where the Blackberry continues to hold sway though turning the phone sideways and tapping it on the side to change orientation helps a lot. That makes the keys larger and, while my finger are not the thickest, there are fewer cases of hitting the wrong key. Even then, you need to get used to switching between alphabet and numeric keyboards and that applies also when you need punctuation marks like commas and so on.

Otherwise, the user interface is bright and pleasing to the eye with the typical presentation of both a clock and current weather on there. Handily, the screen is locked easily too with a press of the button at the top right of the phone. That will put a stop to inadvertent phone calls, emailing, web browsing and other things so it is to be commended. To unlock the screen, all that’s needed is to swipe the lock bar to the bottom. Any alerts are viewed in a similar way with holding down your finger on the top bar presenting an extension that can be pulled all of the way down to see what’s there.
With an icon for the Android Marketplace on the main screen, I got to adding a few apps and you can set these to update automatically too but you need to watch your phone contract’s data allowance. The one for WordPress works better than it does on my Blackberry but it seems that retweeting with UberSocial is much less good on the Android platform. For one thing, feeds for all accounts are presented on the one screen and swiping left to right is needed for replying, retweeting and other operations and that’s not working out so smoothly for me yet. Maybe I’ll try an alternative. There are others that I have downloaded too and these include one from CrossCountry Trains and that seems to be a nice offering even if it failed to find trains between Macclesfield and Edale of a Sunday morning. For those omissions, I have an alternative in place and I also have the LinkedIn app too. That seems to work well too. Usefully, it is possible to move these to the phones microSD card to avoid filling up the limited space that’s on offer. However, that isn’t to say that I will be going mad on these things.
Of course, any phone should be good at making and taking phones and the Wildfire seems to be doing well on this score too. Firstly, contacts were read from the SIM but they can be transferred from an old phone using Bluetooth connections too. Sound is good and loud though you need to be on a call to adjust the speaker volume with the rocker button on the side of the phone. Otherwise, that just changes the volume of the ring tone. Without any adjustments, the phone seems to vibrate and ring at the same time though that may be something that I get to changing in time. The pings emitted when new text messages, emails or tweets fall into the same category.
If there’s any downside to this phone, it has to be battery life. Unlike others that I have had, this is a phone that needs charging every night at the very least. Maybe that’s the price of having a nice bright responsive screen but it would be no harm if it lasted longer. Others have found the same thing and reported as much on the web though some have having worse experiences than others. There are some hints regarding how to conserve battery life but they include such things as switching off 3G or data capabilities and neither appeal to me; after all, I might as well use my old Nokia if this is all that can be offered. Instead, I am wondering if acquiring a spare battery might be no bad idea because that’s what I do for my Pentax DSLR (note in passing: I haven’t got to using the phone’s own camera but recent wintry weather had me tempted by the idea, especially with the likes of Twitpic and YFrog out there.). Taking things further, others have mentioned getting a larger capacity replacement but that sounds more risky.
All in all, first impressions of the HTC Wildfire are good ones. Over time, I should find out more about the ins and outs of the gadget. After all, it is a mini-computer with its own operating system and other software. Since I continue to learn more and more about PC’s everyday, the same should be the case here too.
Trying out Irish Mobile Broadband
2nd January 2012Over the course of a year, I end up visiting Ireland a few times so I decided to invest in a Meteor PAYG broadband stick to see how I’d get on with it. For €20, your can get a 30-day pass with 7.5 GB downloading capacity, a more generous offer than you’d get with some UK mobile networks (T-Mobile really come to mind here). Signal strength was strong wherever I tried it too with 3G being available so long as you are in the right place with EDGE being the lowest that I got otherwise. Download speeds are good too so it turned out to be a good investment of €30 to get the Huawei E173 USB dongle (I had a T-Mobile one of these before and it no longer works so I am keeping an eye on reliability with this one; the design seems a little different and I am getting OK so far) and €20 of credit that comes with it. After all, anything’s better than the punitive roaming rates that UK providers charge.
A useful little device
1st October 2011Last weekend, I ran into quite a lot of bother with my wired broadband service. Eventually, after a few phone calls to my provider, it was traced to my local telephone exchange and took another few days before it finally got sorted. Before that, a new ADSL filter (from a nearby branch of Maplin as it happened) was needed because the old one didn’t work with my phone. Without that, it wouldn’t have been possible to debug what was happening with the broadband clashing with my phone with the way that I set up things. Resetting the router was next and then there was a password change before the exchange was blamed. After all that, connectivity is back again and I even upgraded in the middle of it all. Downloads are faster and television viewing is a lot, lot smoother too. Having seen fairly decent customer service throughout all this, I am planning to stick with my provider for a while longer too.
Of course, this outage could have left me disconnected from the Internet but for the rise of mobile broadband. Working off dongles is all very fine until coverage lets you down and that seems to be my experience with Vodafone at the moment. Another fly in the ointment was my having a locked down work laptop that didn’t entertain such the software installation that is needed for running these things, a not unexpected state of affairs though it is possible to connect over wired and wireless networks using VPN. With my needing to work from home on Monday, I really had to get that computer online. Saturday evening saw me getting my Toshiba laptop online using mobile broadband and then setting up an ad hoc network using Windows 7 to hook up the work laptop. To my relief, that did the trick but the next day saw me come across another option in Argos (the range of computing kit in there still continues to surprise me) that made life even easier.
While seeing if it was possible to connect a wired or wireless router to mobile broadband, I came across devices that both connected via the 3G network and acted as wireless routers too. Vodafone have an interesting option into which you can plug a standard mobile broadband dongle for the required functionality. For a while now, 3 has had its Mifi with the ability to connect to the mobile network and relay Wi-Fi signals too. Though it pioneered this as far as I know, others are following their lead with T-Mobile offering something similar: its Wireless Pointer. Unsurprisingly, Vodafone has its own too though I didn’t find and mention of mobile Wi-Fi on the O2 website.
That trip into Argos resulted in a return home to find out more about the latter device before making a purchase. Having had a broadly positive experience of T-Mobile’s network coverage, I was willing to go with it as long as it didn’t need a dongle. The T-Mobile one that I have seems not to be working properly so I needed to make sure that wasn’t going to be a problem before I spent any money. When I brought home the Wireless Pointer, I swapped the SIM card from the dongle to get going without too much to do. Thankfully, the Wi-Fi is secured using WPA2 and the documentation tells you where to get the entry key. Having things secured like this means that someone cannot fritter away your monthly allowance too and that’s as important for PAYG customers (like me) as much as those with a contract. Of course, eavesdropping is another possibility that is made more difficult too. So far, I have stuck with using it while plugged in to an electrical socket (USB computer connections are possible as well) but I need to check on the battery life too. Up to five devices can be connected by Wi-Fi and I can vouch that working with two connected devices is more than a possibility. My main PC has acquired a Belkin Wi-Fi dongle in order to use the Wireless Pointer too and that has worked very well too. In fact, I found that connectivity was independent of what operating system I used: Linux Mint, Ubuntu, Windows XP and Windows 7 all connected without any bother. The gadget fits in the palm of my hand too so it hardly can be called large but it does what it sets out to do and I have been glad to have it so far.
Changing the earpiece volume on a Nokia 1661
15th November 2010The Nokia 1661 is an entry-level phone so you’d have thought that they’d have made it obvious how to change the earpiece volume on the thing. However, it turns out to be something for which you do need to consult its manual and it’s not as user-friendly as it could be either. Seemingly, the earpiece volume only can be adjusted while you’re already on a phone call and you need to use the scroll key (push in left and right sides as needed) that could be right up against your face at the time! My way around this is to phone the speaking clock (123 in the U.K.) and adjust the earpiece while that call is in progress. Then, you’re set for future conversations with real people. Well, anything’s better than not being able to hear the other person due to background and my Nokia 1661 came with its volume set rather too low for me if I recall correctly. While I can appreciate the need to look after your hearing, you do need to have coherent phone conversations too.